
Viva Learning free is rolling out. For end user guidance please see my other blog post https://teamsqueen.com/2021/11/01/first-steps-using-viva-learning/
Setting up Viva Learning for your organisation
Microsoft 365 Admin Center
The process for setting up the free version of Viva Learning for your organisation starts in the Microsoft 365 Admin Center https://admin.microsoft.com/
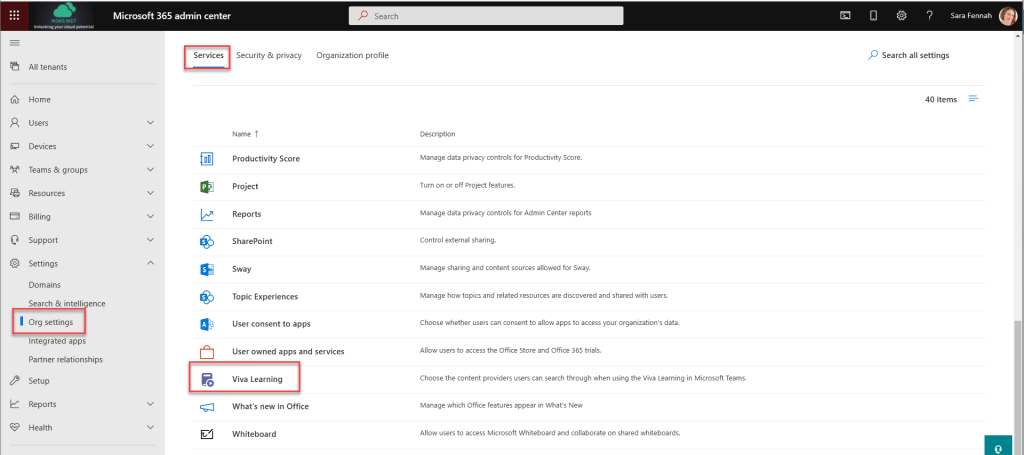
Navigate to Settings then choose Org Settings and Services where you will find Viva Learning
In the Viva Learning blade, check the items you want to make available to your users, including inputting the address of the SharePoint site which will host the Learning App Content. (more on this in a little bit), then click Save.
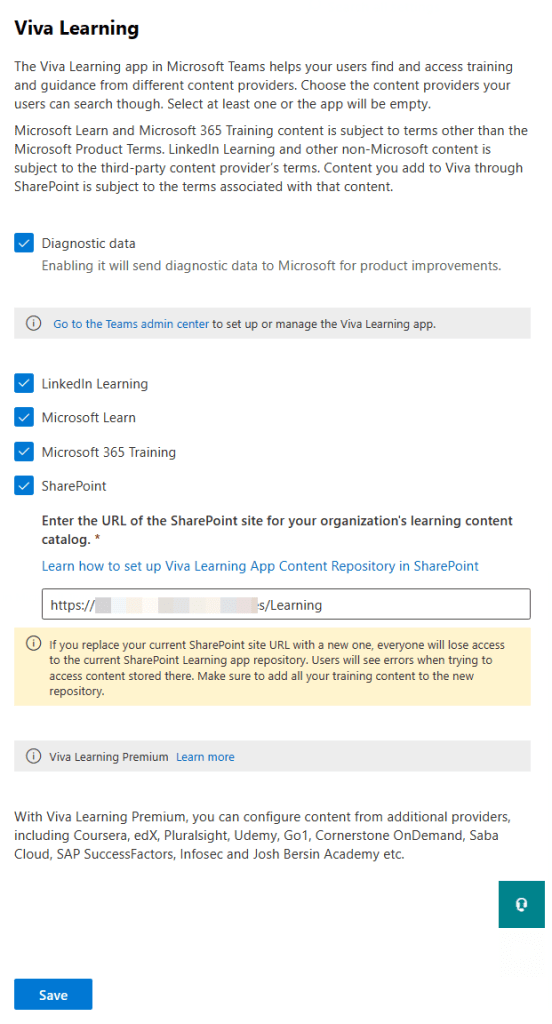
If you add any number of Viva Learning paid licenses to your tenant, you will see additional options within the settings screen, but they do require their own subscriptions, as does LinkedIn Learning premium.

SharePoint
The link on the dialog to get more information about setting up SharePoint site for use with Viva Learning points to https://docs.microsoft.com/en-us/microsoft-365/learning/configure-sharepoint-content-source?view=o365-worldwide&WT.mc_id=M365-MVP-5004583.
Whilst this is a new system and we all need to build up expertise, it appears best at this time to create a new site for this. This should simplify permissions and support for Multi-Geo organisations. You can only have one nominated site per organisation and all Viva Learning users will need read access to the list, though you can modify item permissions if needed to limit visibility. If users do not have access to the linked resources they will still see the folder & what files (learning resources) are in it, but not access those files.
The site used can be changed but you will need to recreate the list if you do change sites. Please do read the guidance before picking & setting your site.
In this walk through I created a new site and gave everyone in the organisation read only access to the site.
Once declared as the site for Viva Learning the Learning App Content Repository list is added to the site which will hold the list of other folders/libraries in SharePoint that contain learning materials.
Content is added to Viva Learning by creating an entry in the list to the folder containing the learning content. Remember that everyone who has access to the site will see the folders you add, including file details but only be able to access content they have permissions to. Newly added folders take up to 24hrs to appear in Viva Learning.
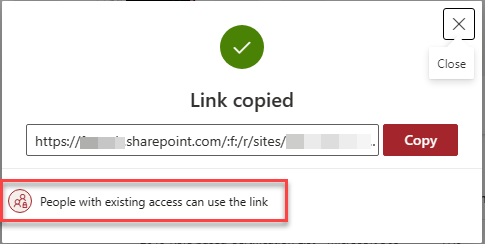
To add a filer or folder to the list of resources, locate the file/folder and choose copy link from the …
Be sure the link is for people with existing access
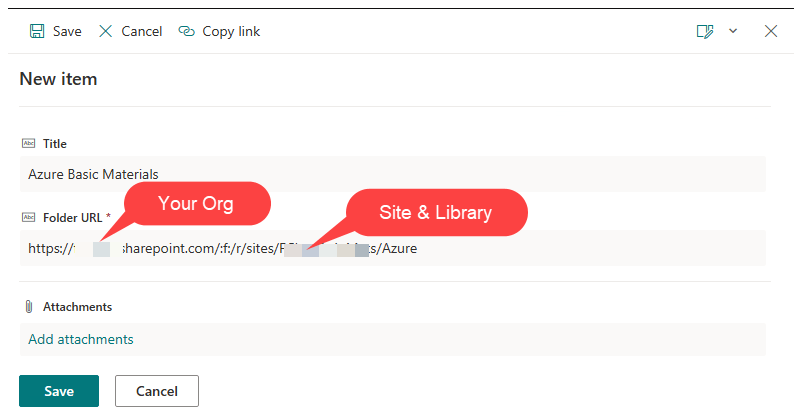
And copy the link then paste into a new entry in the Learning App Content Repository list
Teams Admin Center
To make the app available in Teams for your users you need to set up the Viva Learning App in Teams Admin Center https://admin.teams.microsoft.com/
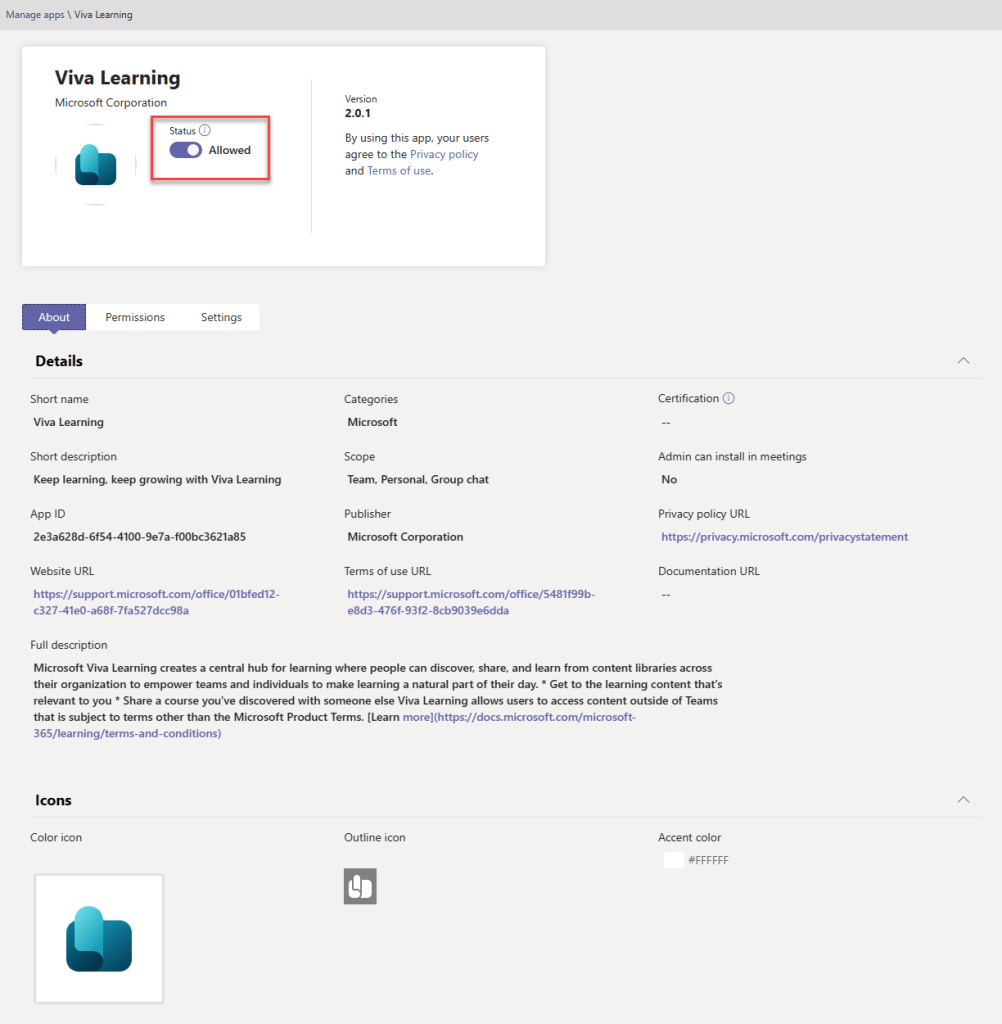
First under Manage Apps in Teams apps section, locate the Viva Learning app
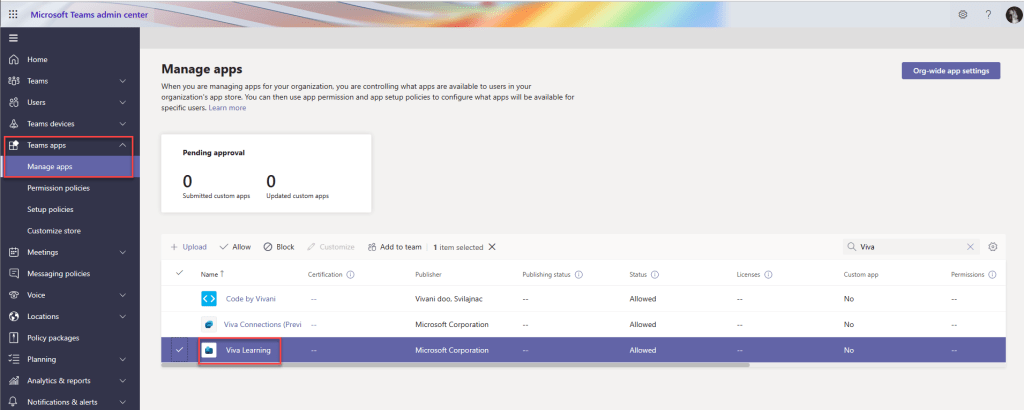
Ensure the app is set as Allowed
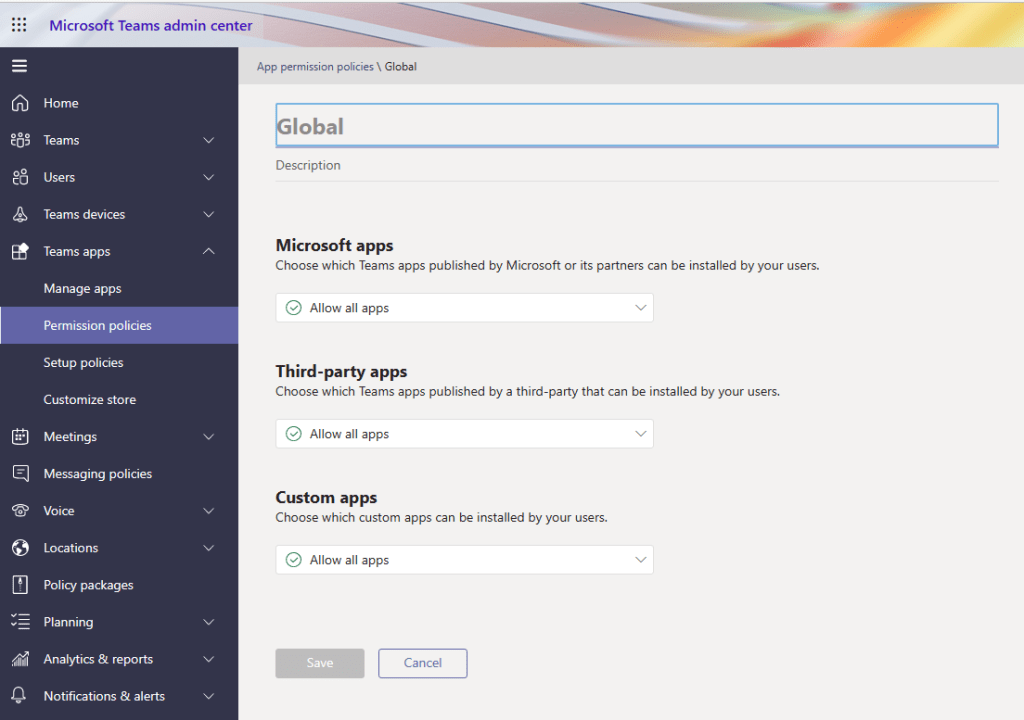
Next ensure the users are allowed to use the app in the App permission policies. Depending on your Apps permission policy settings you may need to enable Viva Learning in each policy. Viva Learning is a Microsoft app, so will automatically be available for your user if you allow all apps in that section.
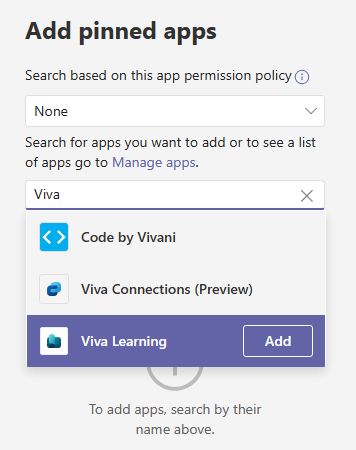
To add to the side rail for all users automatically you need to install the app using one or more app set up policies. To add the app, click Add apps under the Pinned apps section
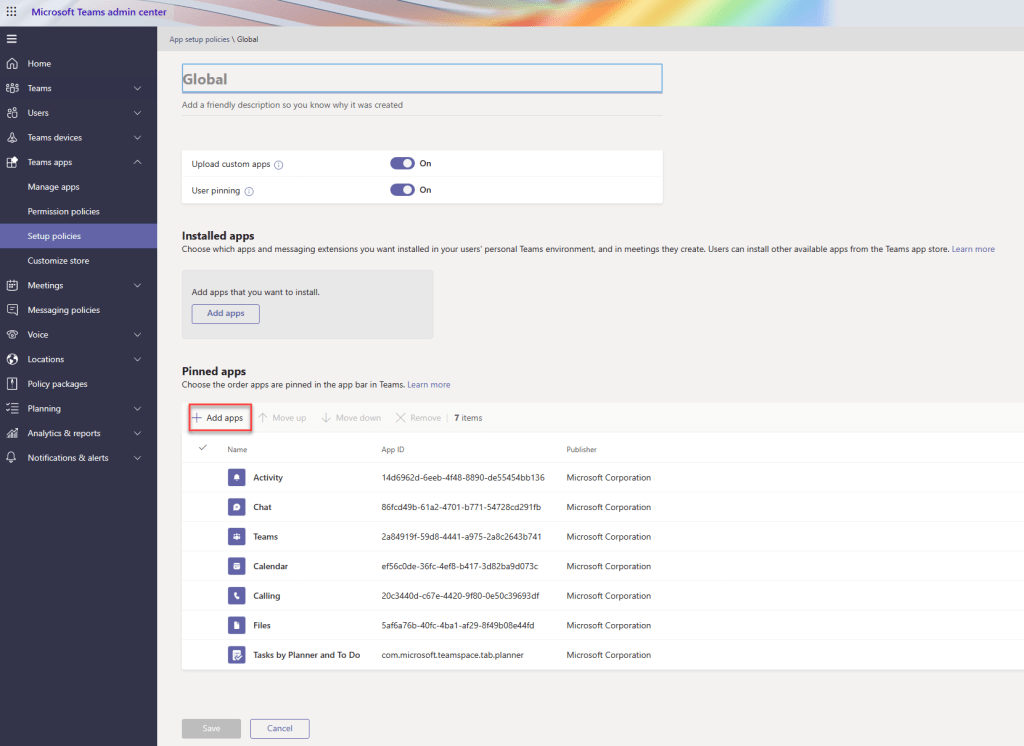
Search for Viva Learning and click Add
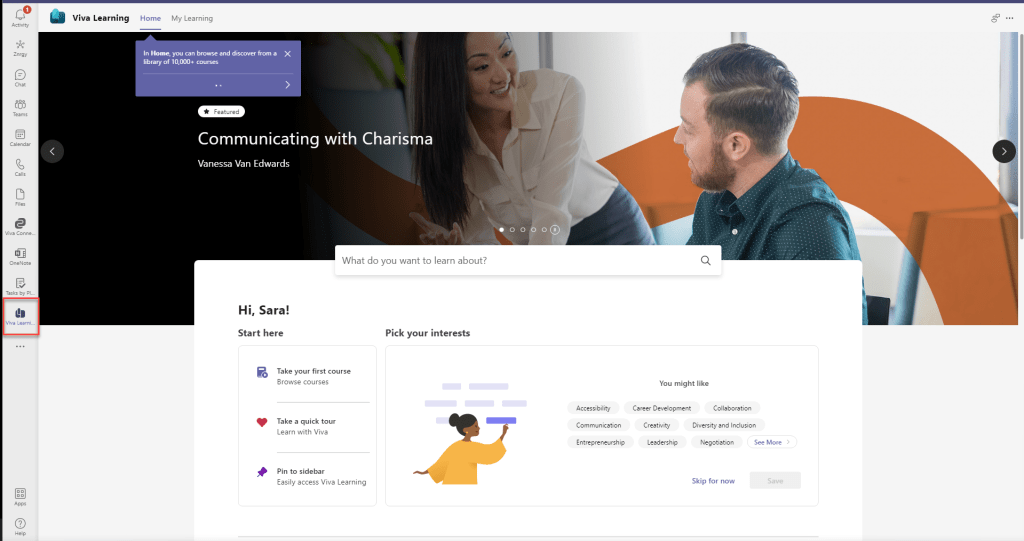
Save the policy and navigate to Teams to check if it is available. This may take a little time and you will need to restart Teams desktop app or log in fresh to Teams web app to check availability.

Hi I have done all the steps according to all the descriptions I have added myself as admin that is knowledge admin but I still do not get up the admin part in the Viva learning app… and the SharePoint part are not working… what am I doing wrong?
LikeLike
The Admin tab is only available to licensed users with knowledge admin or global admin roles.
LikeLike