Previously I ‘ve written two articles on busy lights for Microsoft Teams. I started with a manual approach in Using Flic and Hue to build a Do Not Disturb light and moved on to using purpose built devices from Plenom with A Busylight with Microsoft Teams. Now we are taking it a step further using the Teams Panel devices.
Teams Panels are designed as meeting room companion devices to show when meeting rooms are booked, what meeting they are booked for and to allow for ad-hoc bookings. After the family complained that my existing busy light solutions didn’t let them know what I was working on to decide if they could interrupt, I decided to see if the panel might work.
My Conclusion
It’s a neat solution to display your schedule outside the room BUT it doesn’t respond to status changes, so not the whole answer.
A Bit More Detail
Let’s look at how you can set up a Teams Panel as a personal device and then consider the pros and cons.
I purchased and am using the Yealink RoomPanel (details here)
Step 1: Admin Preparation
Before you even have a device you can configure the device configuration profile in the Teams Admin Center. This is not essential. If you do not configure a profile the default settings will be used or the settings can be configured on the device itself. No additional licenses are needed to use the device as a personal device.


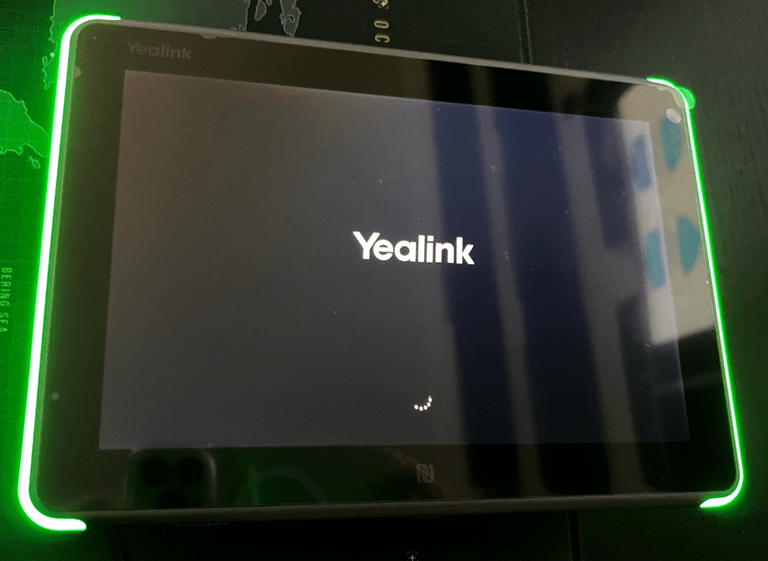
Step 2: Unpack and Power Up
Using the supplied power adapter, plug in the device and power on. It’s best at this point to also connect an wired internet connection. If your ethernet cable is PoE (Power Over Ethernet) you can dispense with the power supply. I wanted my panel to use WiFi after set up, so I started with both power and ethernet.
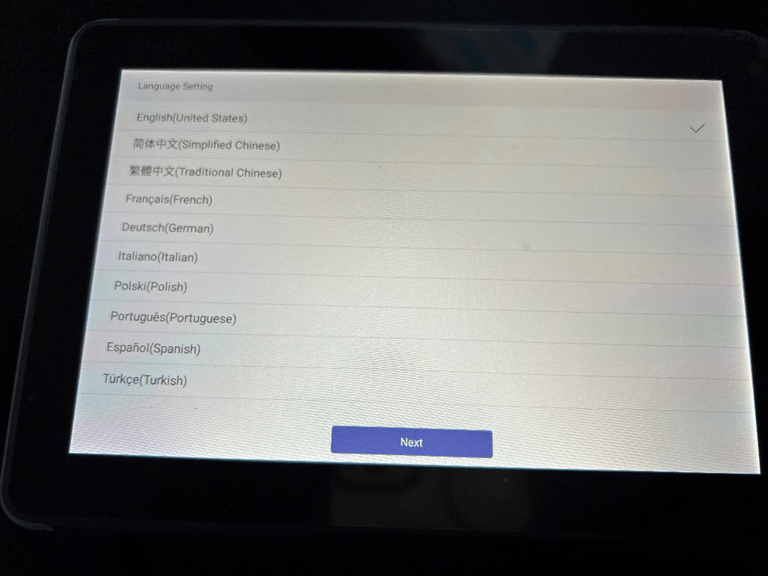
Step 3: Device Set Up and Login
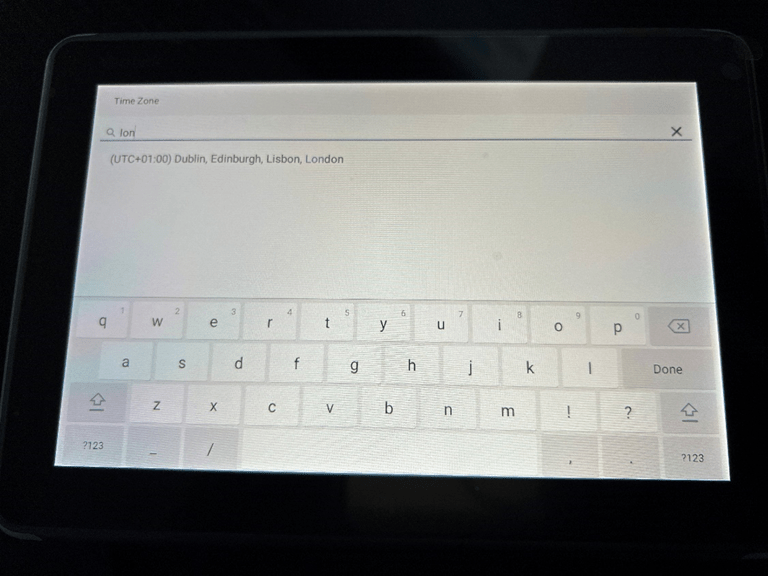
The device has a series of screens to set up. Choose the language and then time zone.
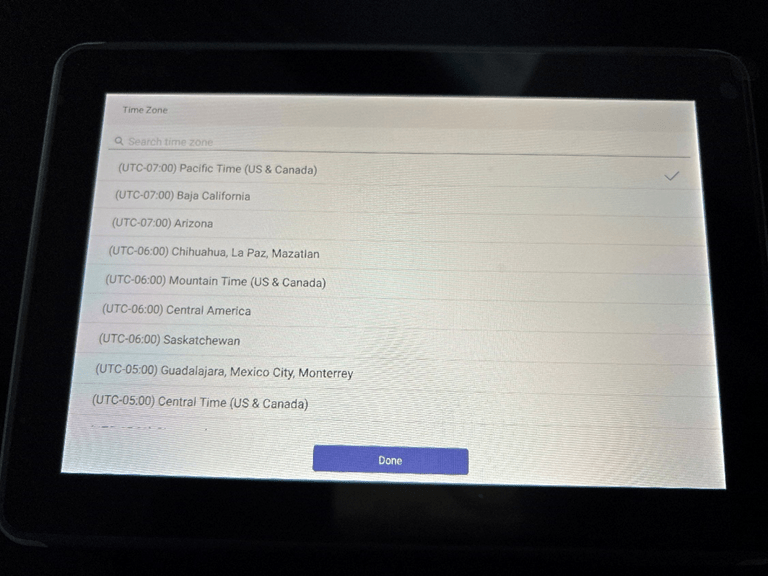
I really like the way you can search for the time zone.
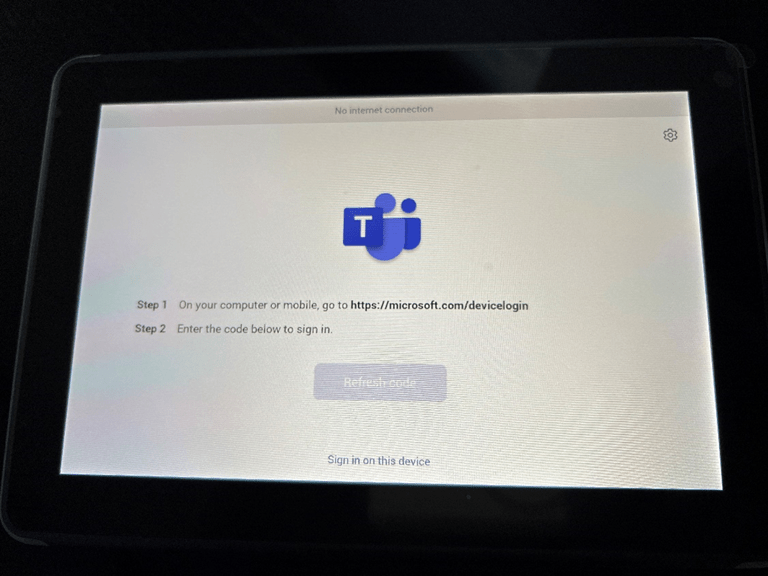
Then you need to sign in. You can sign in on the device or wait for the code to come up on screen and use the device log in on a different device via the website https://microsoft.com/devicelogin
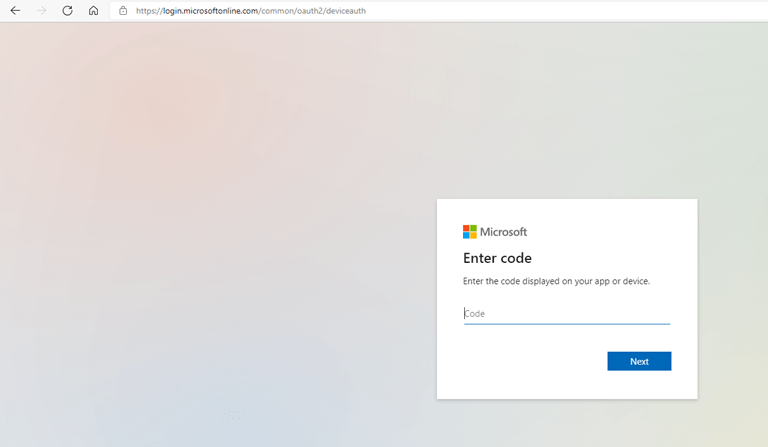
Here you can sign in with a personal account, the same as you use with Microsoft Teams on any other device. No additional licenses are needed to use the device with your account. Once signed in wait for the login process to complete and your calendar will load.
Step 4: Custom Configuration
As an administrator you can sign in to the Team Admin Center, and assign a configuration profile to the device as soon as it shows in the Panels section of Devices.
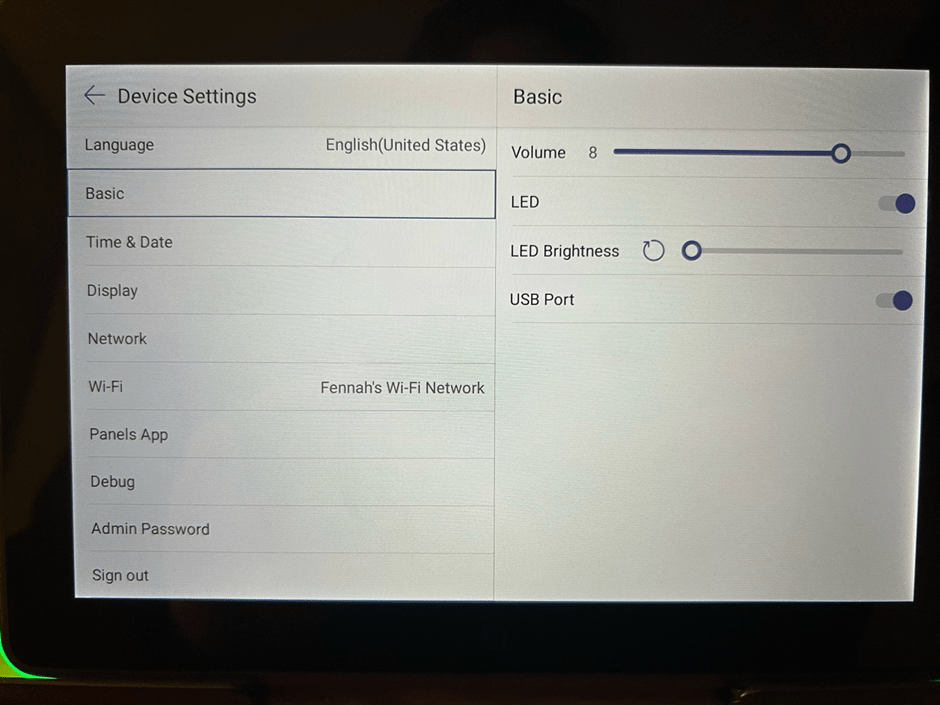
If you are not assigning device configuration you can configure settings on the device. There are some settings such as LED Brightness for the status light which can only be configured on device and not in the configuration profile.
To assign a configuration in the Teams Admin Center:
- Navigate to Devices and Panels
- Select the panel to apply the configuration to
- Select the Assign configuration button
- Search for the require configuration and Apply

To edit the settings on the device:
- Tap settings cog
- Navigate the menu to find the chosen settings
- For example under Basic you will find the LED brightness settings or you can choose the link WiFi options to switch to WiFi. For both you will need the device admin password, which is one setting you can set with the configuration profile.

- You can also connect a device via the panel app settings. This may solve my issue with the light not changing with status in Teams app, but I do have issues with this for some reason with my account and haven’t yet managed to get the panel to find my computer.
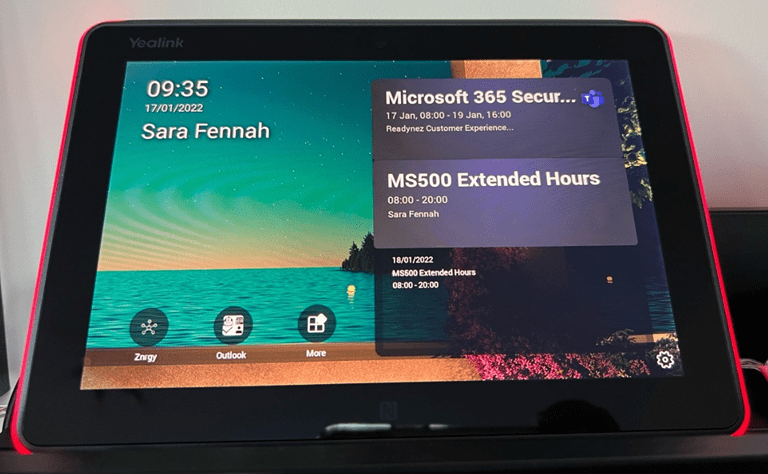
Using the Device Day to Day
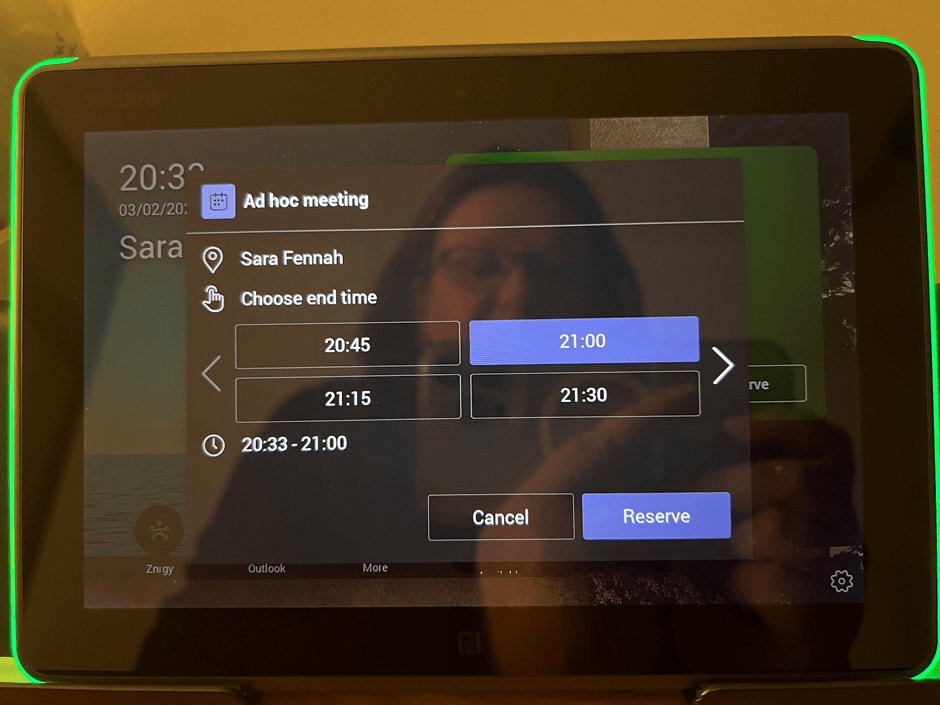
Sitting outside my home office the device now shows my calendar and even allows people to reserve the current slot in my diary, by tapping Reserve

Choosing the required end time, then tap Reserve again
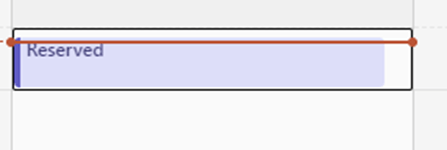
Which then pops into my calendar and turns the LED on the panel to red.
Wish List
Two things would makes this the ultimate home office or executive office busy light
- If the LED responded to my Teams status
- If the panel could be used to book times in advance with ability to edit the name of the meeting. Though I guess we could use the Teams app on a mobile device to create a meeting invite whilst stood outside the office.

Been trying to find a similar solution (to the Kuando) that is wireless (and avoid having to run a long USB cable from one side of the home office all the way to the outside of my office door. Surprised I haven’t been able to find something that is wireless & integrates w/ Teams… I would think with the low cost of displays nowadays someone would have made something to even show the name of the meeting in a small display.
LikeLike