Shared Channels are a channel within a Microsoft Teams Team. There are two stand out features which make this type of channel so eagerly anticipated
- People (and Teams) can be given access to just the channel, without needing to join the team
- Even channels hosted by another organisation are found in the list of Teams without any need to switch organisation. For anyone used to organisation switching they will know this is a big bonus.
Setting up shared channels is not the simplest process. In this walk through we will see the process to set up a shared channel from the hosting organisation and from a joining organisation.
NOTE: All Shared Channel features are OFF by default.
Organisation 1 – The Host
Shared Channels are set up by one organisation which we will call the host. The channel and all the information in it are stored in their tenant and subject to their security & governance controls.
To act as a host organisation you need to:
- All channel owner(s) to create Shared Channels and invite external users to the channel using a Teams Policy
- Allow member and owner users to enable Teams Public Preview (This is only required whilst the feature is in preview)
- Enable inbound B2B direct connect. This can be open (not recommended) or per external organisation (recommended)
Organisation 2 – The Collaborator
In order to allow your users to join a shared channel in another organisation you need to:
- Allow users to join external shared channels using a Teams Policy
- Allow users to enable Teams Public Preview (This is only required whilst the feature is in preview)
- Enable outbound B2B direct connect. This can be open (not recommended) or per external hosting organisation (recommended)
Setting Up Collaboration – A Walk Through
In this walk through we are setting up a Shared Channel called Viva Explorers in the organisation SaraFennahMVP (the host organisation). In this channel we are intending to invite users from Contoso (the collaborator organisation) to join. Administrators from the two organisations will work together to set up the collaboration. Starting with the hosts.
Setting up to Host a Shared Channel
Step 1 – Configure Cross Tenant Sharing for a Specific Domain
In our scenario the Global Administrator for SaraFennahMVP needs to configure external collaboration to allow users in Contoso to join the channel.
To do this they:
- Navigate to the Azure AD Portal ( https://portal.azure.com/#blade/Microsoft_AAD_IAM/ActiveDirectoryMenuBlade/Overview)
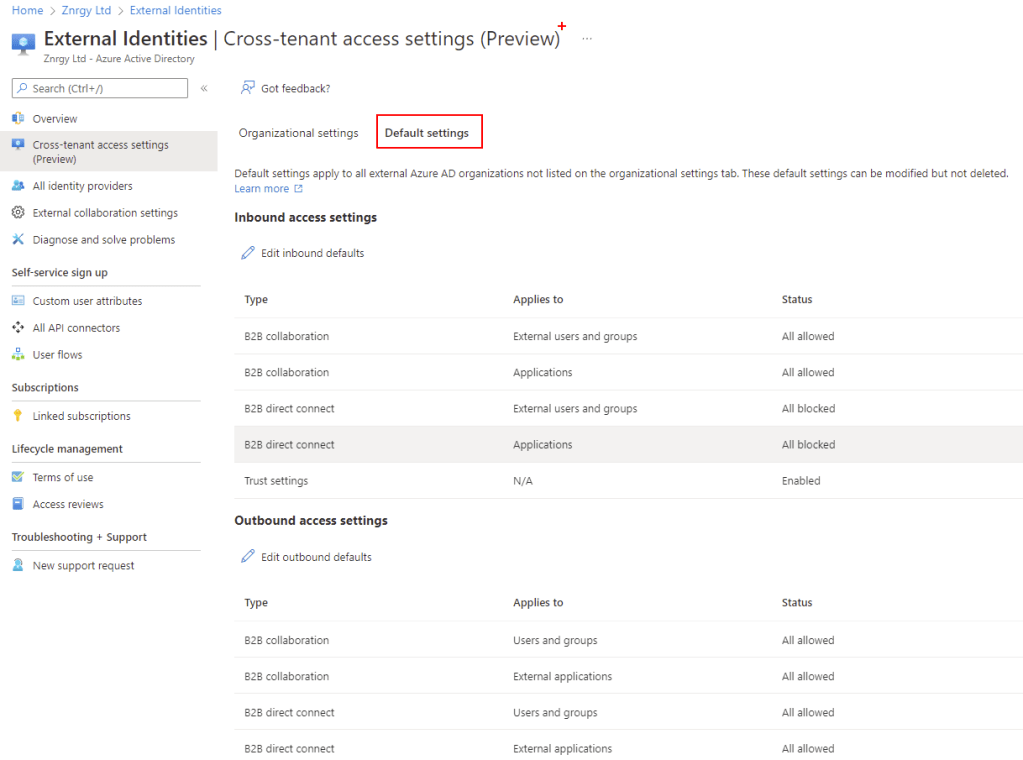
- Select External Identities > Cross-tenant access settings (Preview)
- Choose Organizational settings
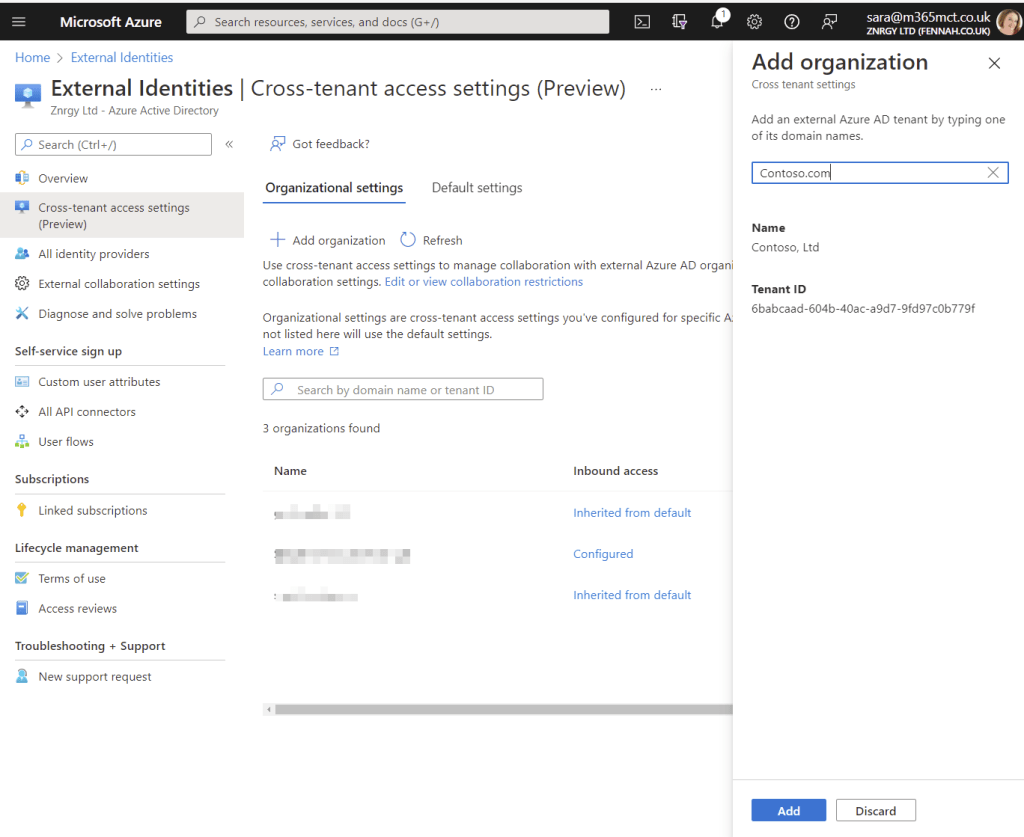
- Select + Add organization
- Search for the organization using domain name, this is case Contoso.com. Please remember that many organisations have multiple domain names registered. To avoid confusion, it is best to check with a Microsoft 365 administrator at the partner organisation for the domain. This will also allow you to verify tenant ID before opening up collaboration to ensure you are opening your doors to the correct organization!
- Select Add

- The new tenant will be added with both inbound and outbound settings inherited from default settings.

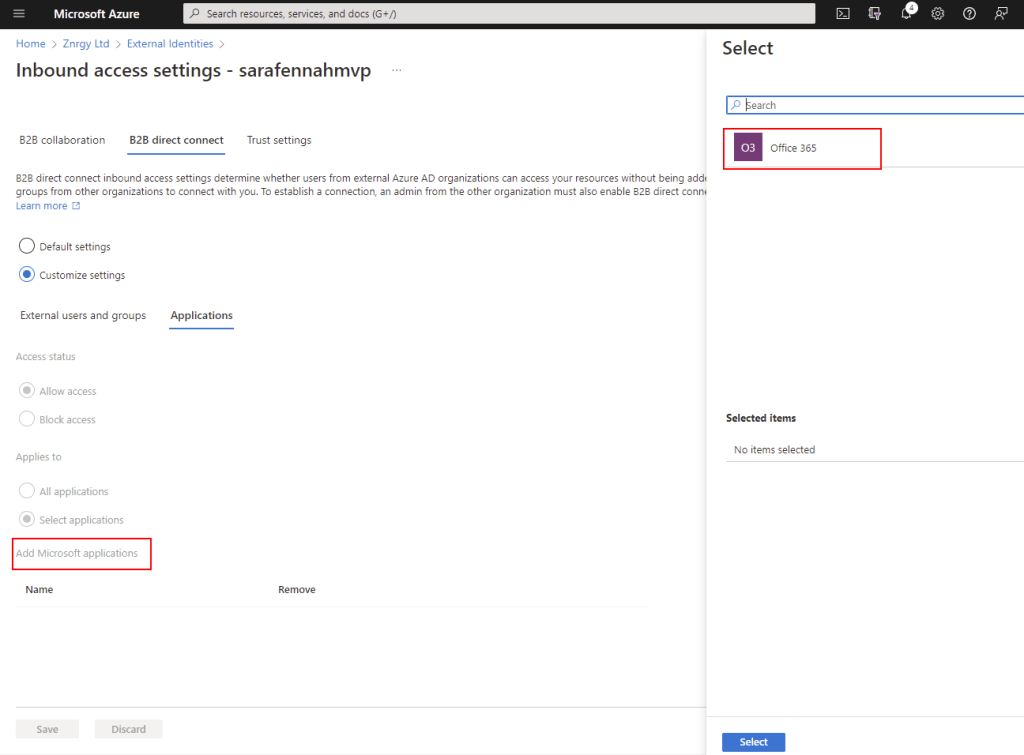
- To be able to host shared channels to which Contoso users can be invited customise the inbound settings by clicking Inherited from default link
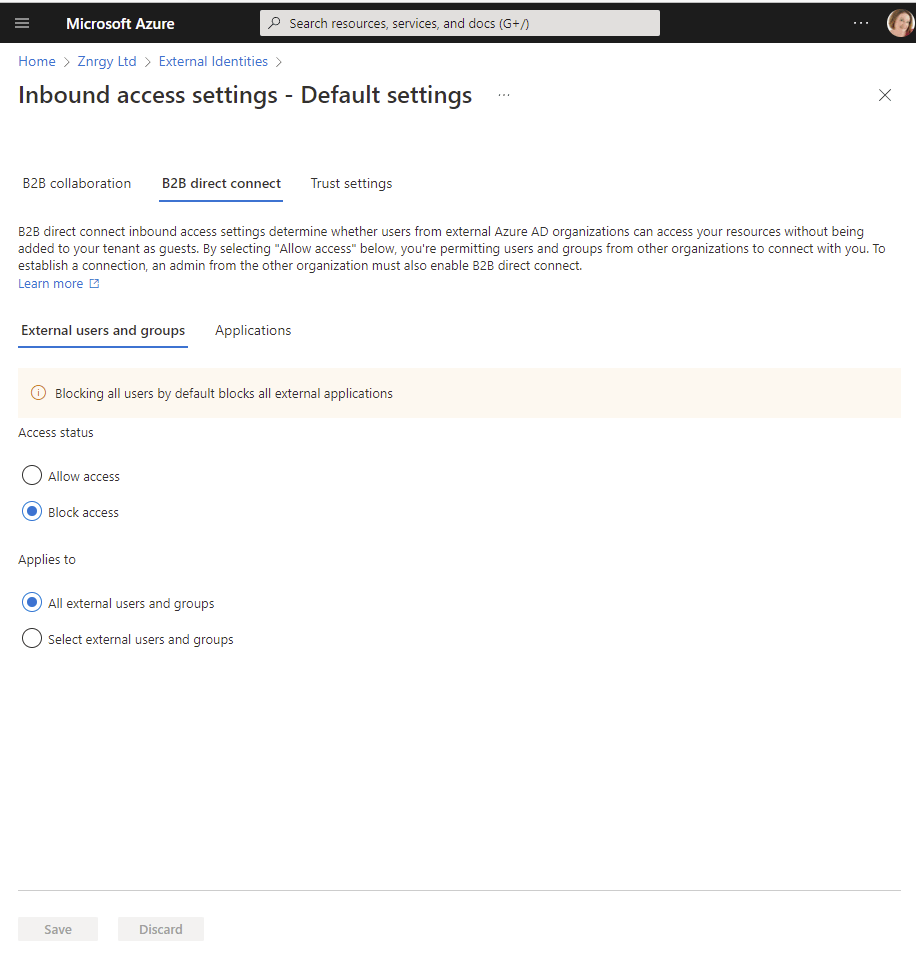
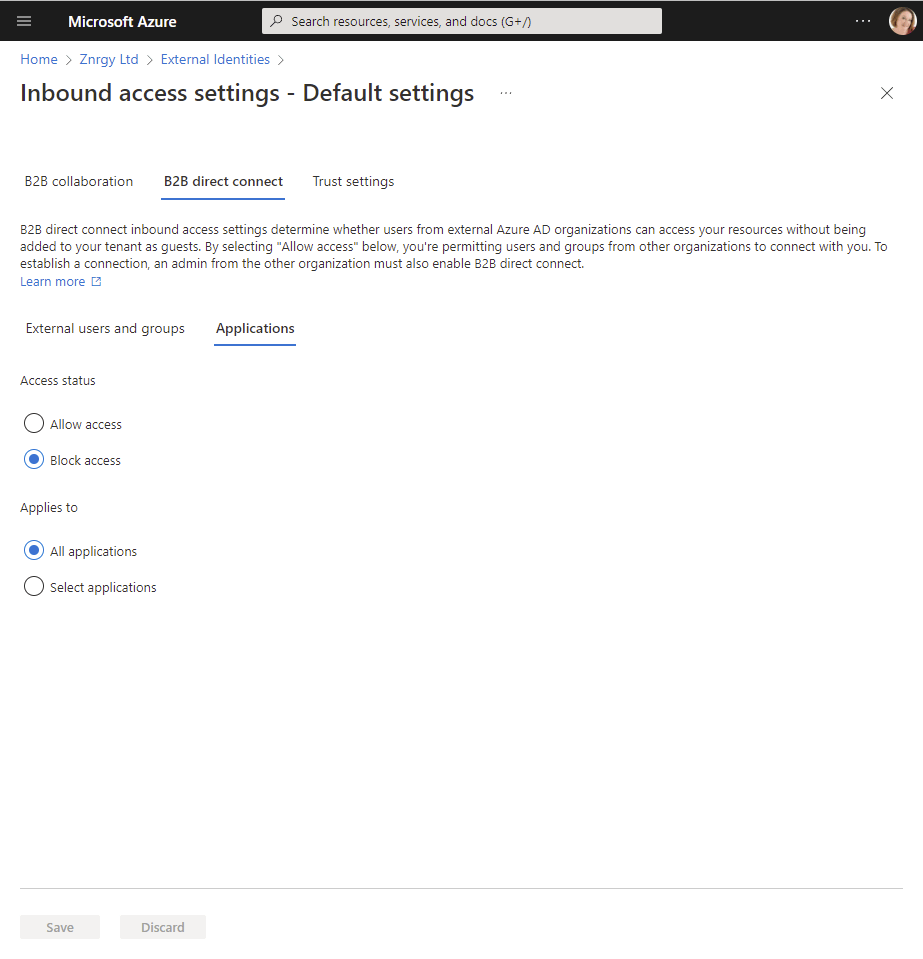
- Under B2B direct connect for both External users and groups and Applications select Customize settings and choose Allow access on both for either All users or selected users/apps. For Teams Shared Channels, if you choose selected applications you will need to add Office 365

- Verify Trust settings. I would recommend enabling Trust multi-factor authentication from Azure AD tenant as a minimum to reduce sign in and authorization friction for external users in shared channels.
NOTES:
There is no need to enable outgoing settings to HOST a shared channel, but for many organisations this is a two way collaboration so you may prefer to enable Outbound B2B direct connect settings too.
B2B collaboration is the ‘standard’ external sharing we are used to and is switched ON by default. These settings are outside the scope of this article, so for configuring Shared Channels, we recommend leaving those settings as the default.
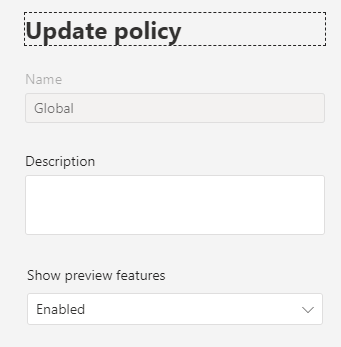
Step 2 – Teams Update Policy
To use Shared Channels during preview, users will need to be allowed to use Teams Public Preview. In our example all users in the tenant are to be permitted to use the preview features. The Teams Administrator in SaraFennahMVP sets the Global Teams update policy to enable preview features to allow this.
For more details about enabling and using public preview see this article on Microsoft Docs.
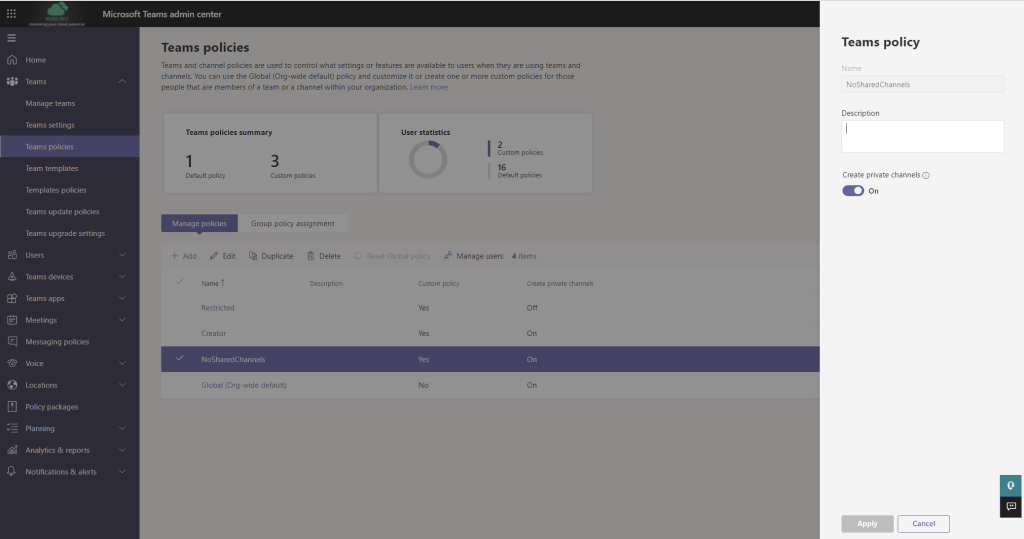
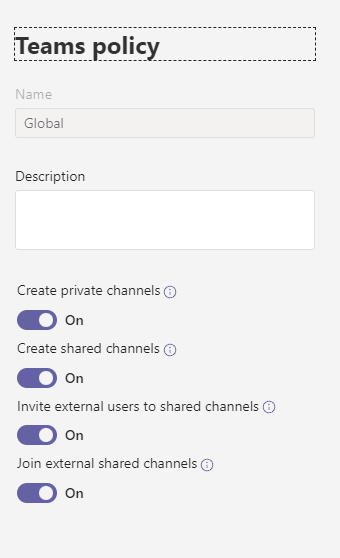
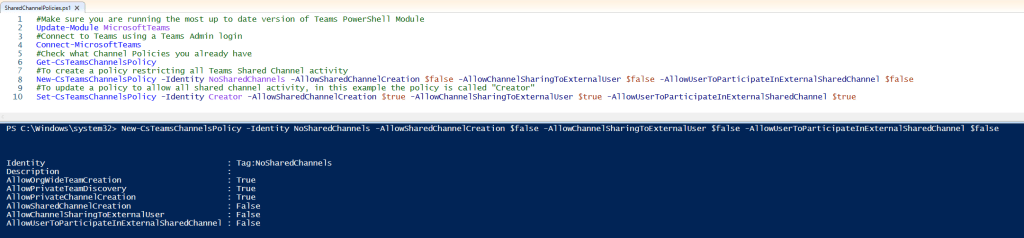
Step 3 – Teams Policy for Channel Settings
The Teams policy is used to control Private and Shared Channel features for your users. In our scenario the owners of the Viva Explorers channel will need to be assigned a policy which has the Create Shared Channels and Invite external users to shared channels settings enabled. In SaraFennahMVP all users are to be given the ability to create and join Shared Channel with organisations for whom we have configured B2B direct connect, so the Teams Administrator has updated the Global Teams policy.

You will then need to assign the policies to appropriate users. For details on the various methods of assigning Teams policies to users, please refer to this article on Microsoft Docs. In our scenario as the Global policy has been updated there is no need to assign the policy to anyone.
Step 4 – Create Channel
We now need to create the Shared Channel.
The owner of the team first switched to public preview and then creates the channel, picking the privacy of Shared Channel.
To create a shared channel in a team, from the … menu on the team choose Add channel


Step 5 – Invite Users to the channel
Before the host organisation can invite the external collaborators the collaborator organisation needs to complete their set up steps. The final step for the collaborator is to provide details of the users and/or teams in their organisation to be added to the shared channel.
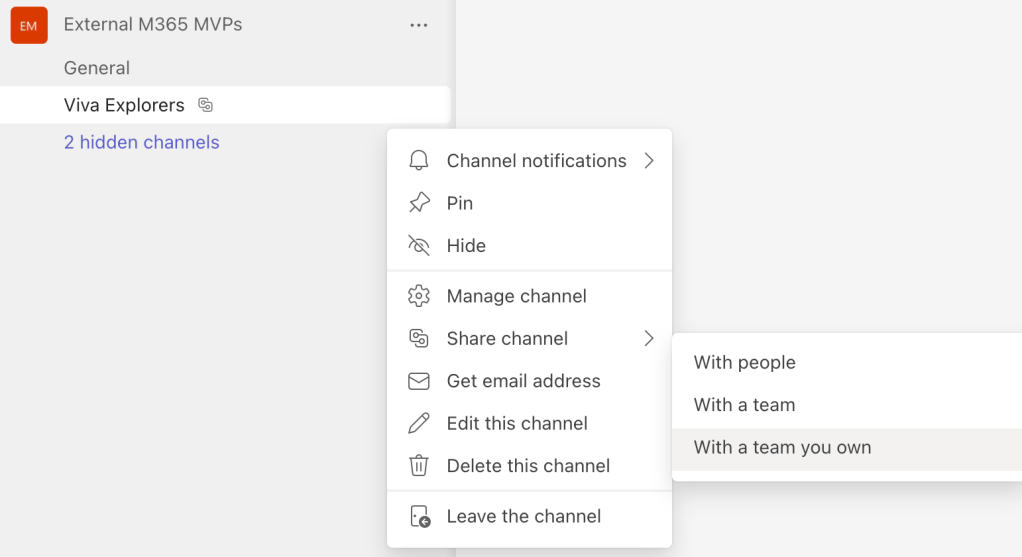
Once our team owner receives these details they can add users to the shared channel by selecting Share channel from the … menu on the channel.
Setting up to Join a Shared Channel
Step 1 – Configure Cross Tenant Sharing for a Specific Domain
In our scenario the Global Administrator for Contoso needs to configure external collaboration to allow users in Contoso to access shared channels hosted by SaraFennahMVP.
To allow this the Global Administrators in Contoso needs to:
- Navigate to the Azure AD Portal ( https://portal.azure.com/#blade/Microsoft_AAD_IAM/ActiveDirectoryMenuBlade/Overview)
- Select External Identities > Cross-tenant access settings (Preview)
- Choose Organizational settings
- Select + Add organization
- Search for the organization using domain name, this is case m365mvp.co.uk. Our global administrator has shared the tenant ID with the administrator at Contoso, so they can check they have found the correct tenant.
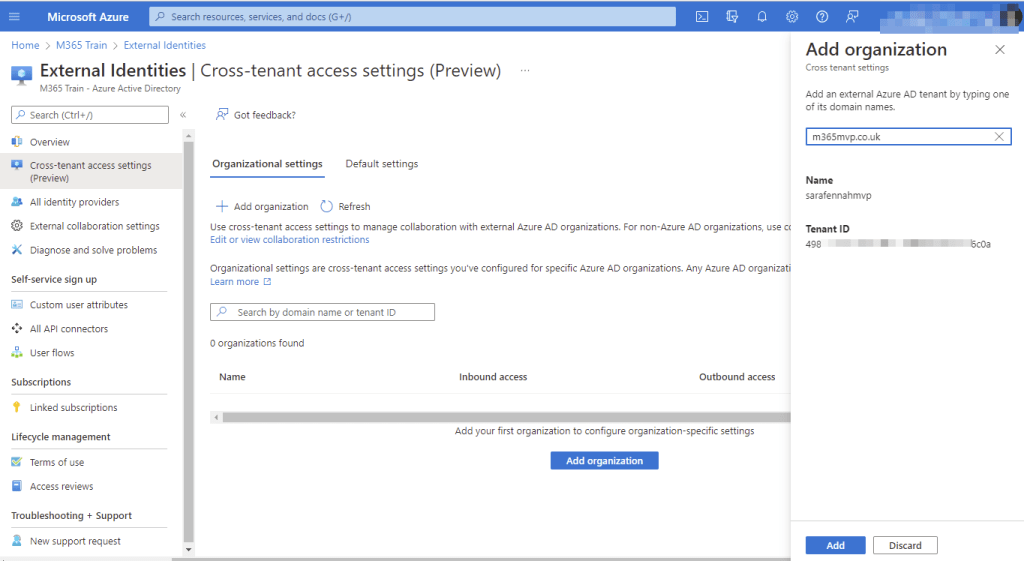
- Select Add
- The new tenant will be added with both inbound and outbound settings inherited from default settings.

- To enable users to be invited to shared channels hosted by SaraFennahMVP customise the outbound settings by clicking Inherited from default link
- Under B2B direct connect for both External users and groups and Applications select Customize settings and choose Allow access on both for either All users or selected users/apps. For Teams Shared Channels, if you choose selected applications you will need to add Office 365

- Verify Trust settings. I would recommend enabling Trust multi-factor authentication from Azure AD tenant as a minimum to reduce sign in and authorization friction for external users in shared channels.
- Click Save
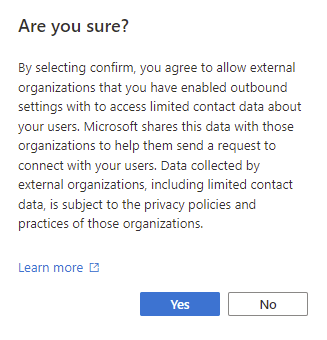
- Confirm that SaraFennahMVP users will be able to search for users and teams in your organisation
NOTES:
There is no need to enable inbound settings to JOIN a shared channel, but for many organisations this is a two way collaboration so you may prefer to enable inbound B2B direct connect settings too.
B2B collaboration is the ‘standard’ external sharing we are used to and is switched ON by default. These settings are outside the scope of this article, so for configuring Shared Channels, we recommend leaving those settings as the default.
Step 2 – Teams Update Policy
To use Shared Channels during preview, users will need to be allowed to use Teams Public Preview. In our example all users in the tenant are to be permitted to use the preview features. The Teams Administrator in Contoso sets the Global Teams update policy to enable preview features to allow this.

For details about enabling and using public preview see this article on Microsoft Docs.
Step 3 – Teams Policy for Channel Settings
The Teams policy is used to control Private and Shared Channel features for your users. In our scenario those who are to join the Viva Explorers channel will need to be assigned a policy which has the Join external shared channels setting enabled. In Contoso all users are to be given the ability to create and join Shared Channel with organisations for whom we have configured B2B direct connect, so the Teams Administrator has updated the Global Teams policy to allow all shared channel features.

You will then need to assign the policies to appropriate users. For details on the various methods of assigning Teams policies to users, please refer to this article on Microsoft Docs. In our scenario as the Global policy has been updated there is no need to assign the policy to anyone.
Step 4 – Provide Contact Details to Shared Channel Owner
In order to invite external people to the team, the team owner needs the email address of the people to be invited. In order to invite a team the team owner needs to be first invited, again using the email address. So the contact at Contoso needs to send a list of the email addresses of individuals or email address of the Teams Owners of teams to be invited.
In this scenario only 3 individuals from Contoso are going to be added to the Viva Explorers Shared Channel, so the Viva Explorers lead at Contoso sends the Teams owner at SaraFennahMVP the 3 email addresses.
Step 5 – Joining the Shared Channel
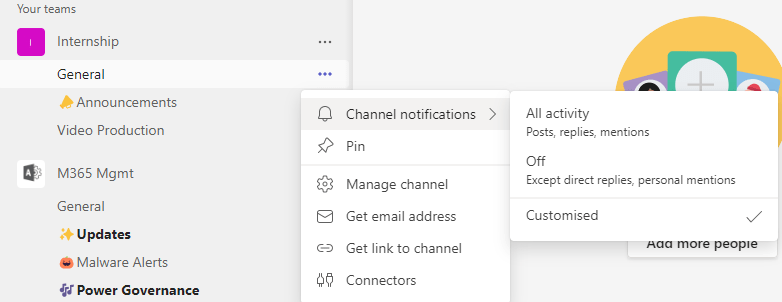
The users at Contoso will see a notification in Teams showing they have been added to the Shared Channel

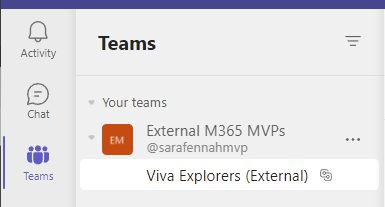
The channel has also shown up alongside their normal teams.
When they first access the channel they will get a permissions pop up confirming connection to the SaraFennahMVP tenant.

Shared Channel References
Microsoft have published a series of resources about shared channels.
- Shared channels in Microsoft Teams (Preview) – Microsoft Teams | Microsoft Docs
- Collaborate with external participants in a channel | Microsoft Docs
- B2B direct connect overview – Azure AD | Microsoft Docs
- Configure B2B collaboration cross-tenant access – Azure AD | Microsoft Docs
- Teams and SharePoint integration – SharePoint in Microsoft 365 | Microsoft Docs
- Sharing & permissions in the SharePoint modern experience – SharePoint in Microsoft 365 | Microsoft Doc
- Get context for your tab – Teams | Microsoft Docs
- Teams workflow in Advanced eDiscovery – Microsoft 365 Compliance | Microsoft Docs
- Search the audit log for events in Microsoft Teams – Microsoft Teams | Microsoft Docs
- Information barriers and shared channels (preview) – Microsoft Teams | Microsoft Docs
End user documentation