
The public preview of Teams Premium is now available and you can read the official launch blog here. In this blog I’ll look at how to sign up and how to enable Meeting Encryption, Water Marking, Meeting Templates, Advanced Webinars plus some of the meeting branding experiences. This blog is aimed at Teams Administrators.
Other features will follow in future blogs, as the settings update in my tenant and I get to test them out.
The trial is currently only available for up to 3 users in a tenant, though this should increase as we get closer to launch which is expected in February 2023.
Some of the upcoming Teams Premium features are not yet included in the trial. Custom branding is due to roll out into the trial in Jan 23, but intelligent recap is not included in the preview and RMTP in to webinars is not mentioned in the blog launching Teams Premium Preview.
There is a nice comparison of the features in Microsoft Teams as standard and in Teams Premium in the documentation around Teams Licensing on Microsoft Learn.
If like me you could not find the Teams Premium trial licences in your tenant, there is a way to add the trial. As per the Trial Licensing FAQ’s at the bottom of the blog, log in to your tenant and then visit https://aka.ms/tpdlnk. This will allow you to redeem one trial licence. You can use the same link to get the 2nd and 3rd trial licences.
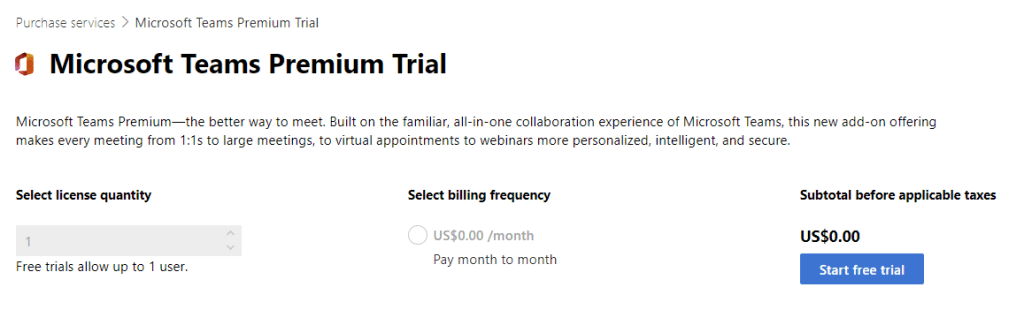
Click the Start free trial button.
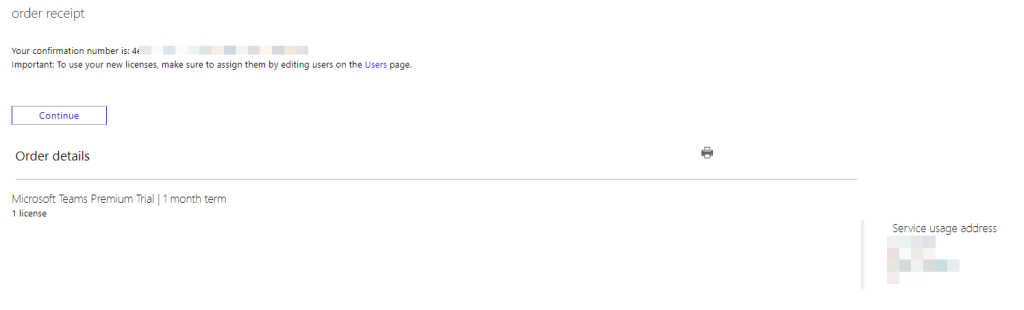
Confirm the service address and click Try now button

Once confirmed you can assign license to the user who will use the trial.
I recommend you redeem at least two trial licences. One for an admin to create meeting sensitivity labels and one test user to trial the features.
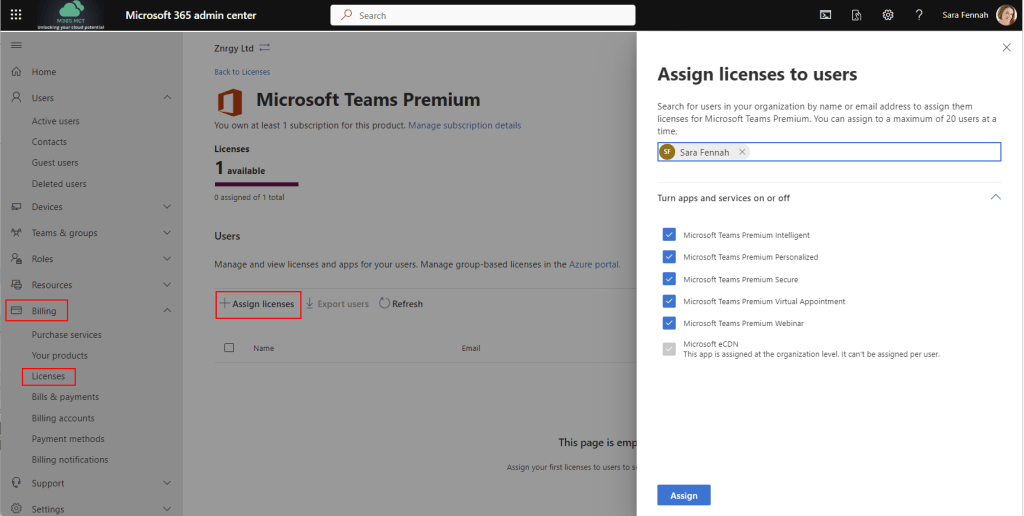
Once you have assigned the licences you can explore the features. As an admin you may need to enable features in policies which are assigned to the test users. That trial launch blog has a good amount of detail on each of the features, how to use them and how to enable them. However I have found that the images in the official blog are a little different to what I am seeing in my production tenant currently hence I’ve included my screen shots here.
Meeting Encryption
To test out meeting encryption change the appropriate encryption policy to allow users to apply encryption to meetings

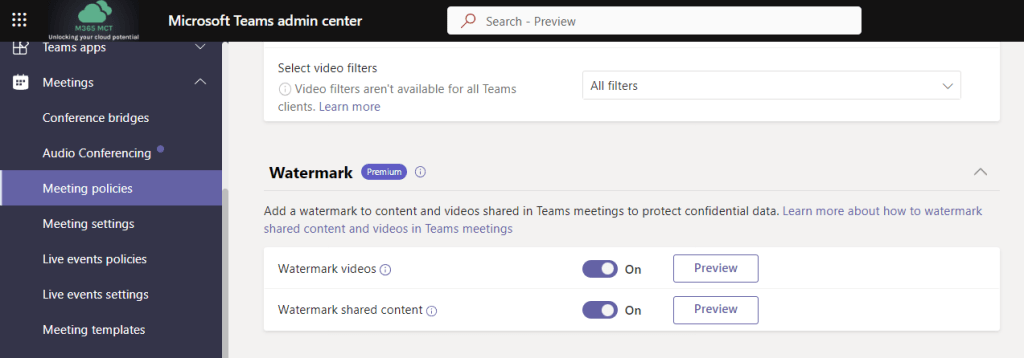
Watermarking for Content & Video
Watermarking adds the email of the attendee as a water mark on videos and/or shared content in meetings to discourage screenshots or the sharing of such when sensitive content is shared in meetings. To ensure the feature is available for users to apply via meeting options it must be enabled in the appropriate Meeting policy:
Meeting Templates
Meeting templates provide pre-set configurations for meeting options. They can be set up under Meeting templates in Teams Admin Center and published to users with a Meeting template policy. By default all new templates are added to the global policy and are only available to those licensed for Teams Premium, so there is no need to create a custom policy for testing purposes.

Custom Meeting Branding
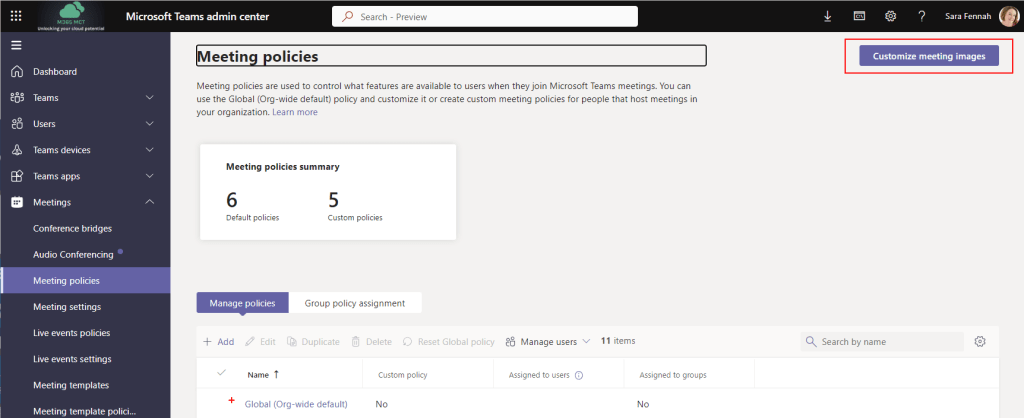
Not all of the meeting branding features have been released into the preview of Teams Premium as yet. Customisation will included a branded lobby and meeting themes and be created using Customization Policies in the Teams Admin Center when they are released. However for now you can try out pushing Organization backgrounds from the Customize meeting images button in the Meeting Policies page. This has been in my tenant for a while by virtue of having the Advanced Communications license.
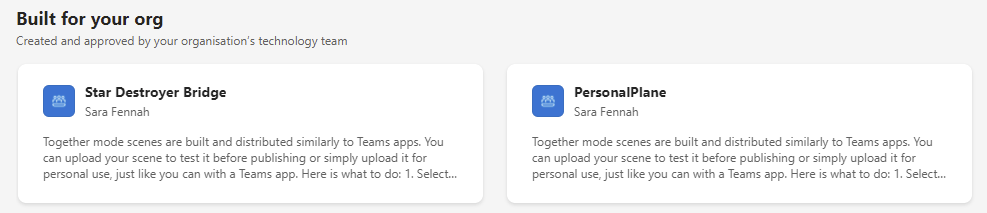
You can also create and publish Custom Together mode scenes for your Teams Premium users. Here’s an article I wrote about creating my first custom scene. Since that blog was written there are some small changes. You still create your custom scene using https://dev.teams.microsoft.com/, but once built you publish your app to your organisation by following the 3 steps shown below.


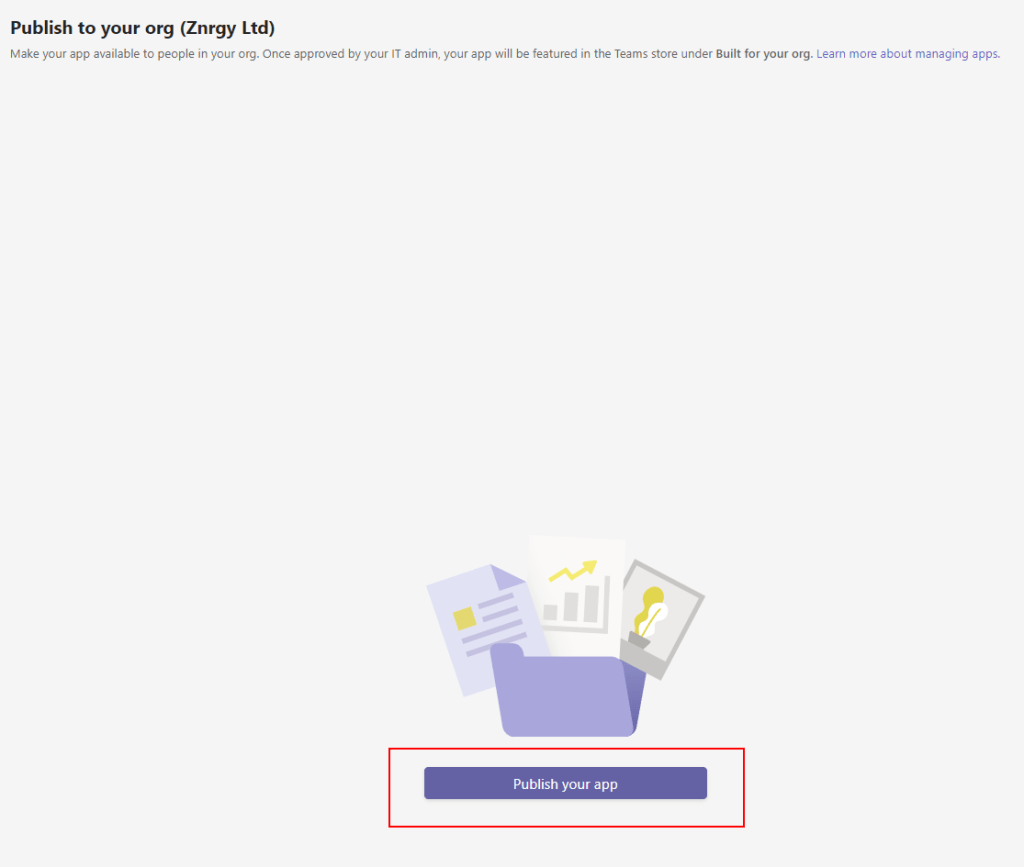
Once published to your org, the app will need to be approved before it becomes visible to your users and ensure it is not blocked by an app permission policy.
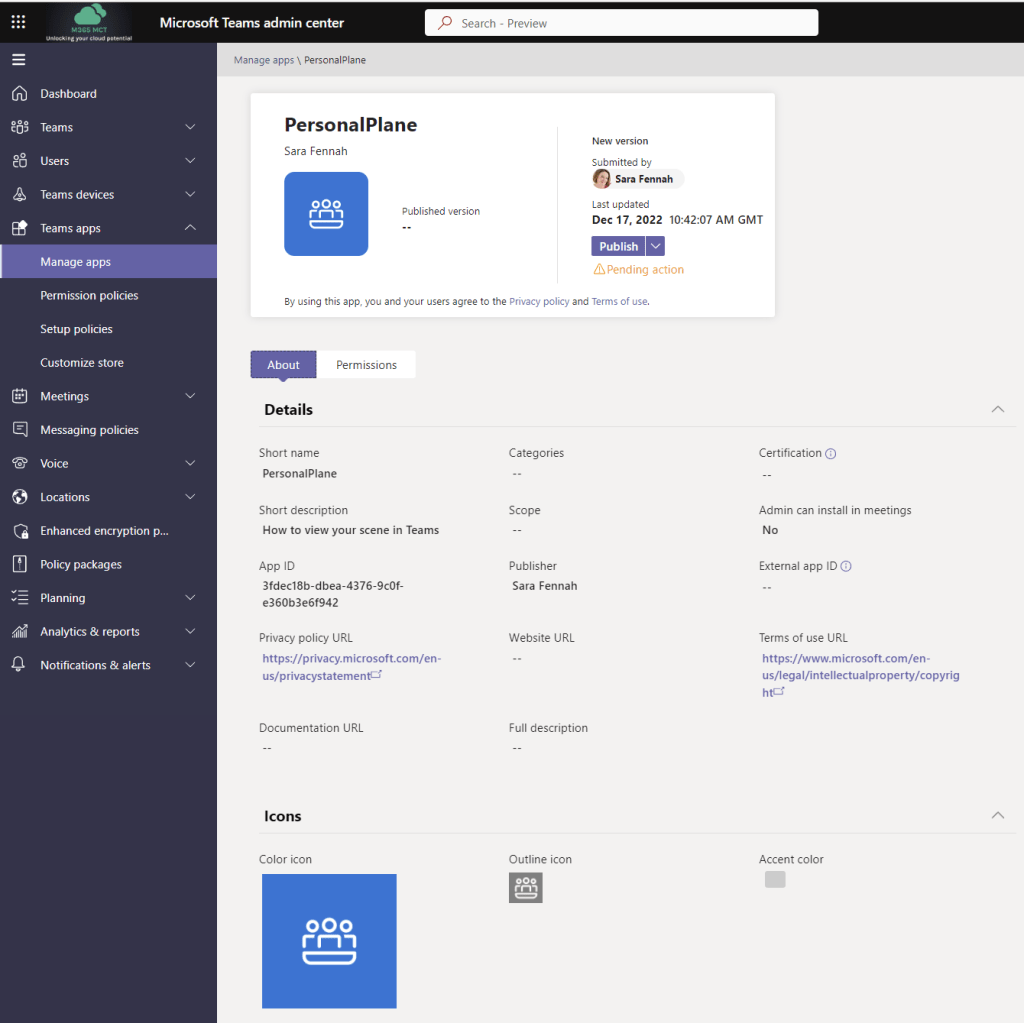
Once published and approved, users can add the apps from the teams client. Or, as an admin, you can add it for your users via a Teams App Setup Policy.
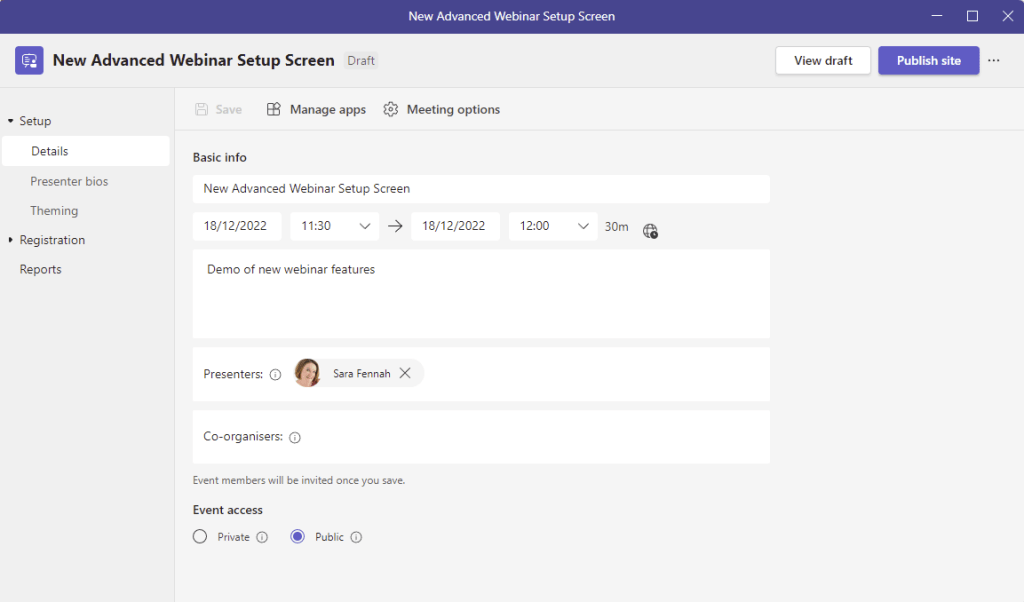
Advanced Webinars
To use the advanced webinar feature with the new set up screen, users will need to have the Meeting Registration feature enabled in the meeting policy, which can be set via Teams Admin Center. However a second setting in the new Events policy which can only be set via Powershell enables the new features. This is AllowWebinar. With both settings enabled the webinar set up screen looks like this:
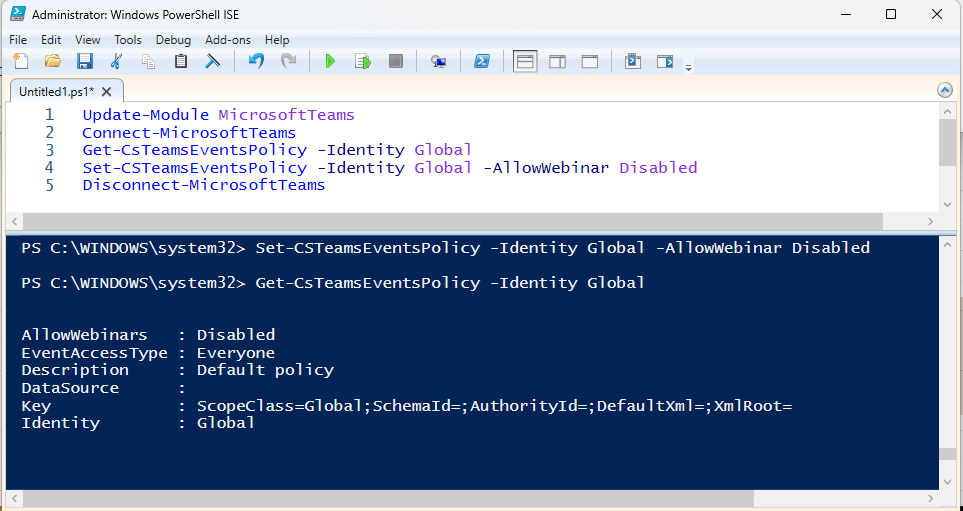
The default Events policy has AllowWebinar enabled by default.
The following PowerShell will disable allow webinar in the default Events policy:
Update-Module MicrosoftTeamsConnect-MicrosoftTeamsSet-CSTeamsEventsPolicy -Identity Global -AllowWebinar DisabledDisconnect-MicrosoftTeams
The new cmdlets for managing event policies are:
- New-CsTeamsEventsPolicy to create a new policy
- Set-CsTeamsEventsPolicy to change settings in an Events policy
- Grant-CsTeamsEventsPolicy to assign an events policy to a user
- Get-CsTeamsEventsPolicy to view events policies
See all my articles about Teams Premium here

2 thoughts on “First Steps with Teams Premium Public Preview”