Microsoft Teams Premium is an add-on to Microsoft 365 and brings additional features. In this blog series we’ll explore each of the 5 categories of features:
- Meeting Customisation
- Meeting Protection
- Meeting AI Features
- Webinars
- Virtual Appointments
I’ve also written an overview of Teams Premium and who needs it and a first steps guide for the public preview or all my Teams Premium articles on one place. The official getting started with Teams Premium guide for Teams Administrators can be found on Microsoft Learn.
The Meeting Customization features of Teams Premium allow organizations to add their own branding to meetings with a branded lobby, customized backgrounds, custom together mode scenes, custom meeting templates, meeting themes plus create and assign custom policy packages for easier administration.
Not all of the meeting branding features have been released into the preview of Teams Premium at the time of writing (December 2022). Customization will include a branded lobby and meeting themes which will both be created using Customization Policies in the Teams Admin Center when they are released. In this article we’ll look at the other meeting customization features which are available in the Teams Premium license as at Dec 2022.
Organizational Virtual Backgrounds
One feature of Teams Premium available in the preview are Organization backgrounds. This is a feature which is also part of the Advanced Communications license. To use organizational backgrounds the organisation must have at least one Teams Premium (or Advanced Communications) license and the published images will only be available to those users with the Teams Premium (or Advanced Communications) license assigned.
NOTE: Microsoft have not announced any plans with regard to the Advanced Communications license going forward. However as Teams Premium includes more features than the Advanced Communications license and is expected to be lower cost, I would expect organizations who had adopted the Advanced Communications licenses to move to Teams Premium.
To upload and publish organizational backgrounds in the Teams Admin Center choose Meetings > Meeting Policies and select the Customize meeting images button. This option is expected to move to Meeting Customization Policies when they become available.
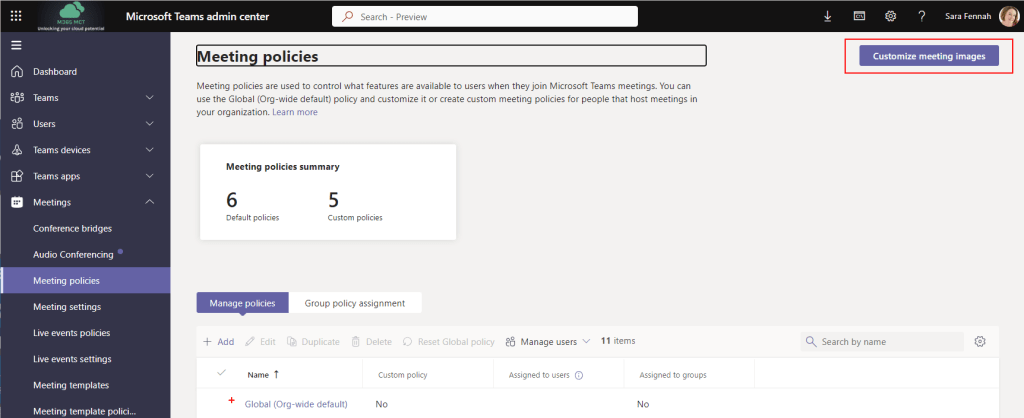
Use the Add button to upload images.

Images must be in JPEG or PNG format and between 360 by 360 px and 3840 by 2160 px. You can have a maximum of 50 images per organisation. For more details on custom meeting backgrounds review the official documentation on Microsoft Learn.
Custom Together Mode Scenes
You can also create and publish Custom Together mode scenes for your Teams Premium users. Custom Together Mode scenes can only be applied by those with a Teams Premium license, but a Together Mode scene can be set to be visible for all meeting attendees and this includes custom scenes.
Also note that custom together mode scenes are considered a custom Teams app. And as such the user publishing the scene will need to be permitted to add custom teams apps in your tenant via an app set up policy, the app will need to be approved by Teams Admin and included in the appropriate app permission policies for users who need access. More details on managing custom app in Microsoft Teams is available on Microsoft Learn.
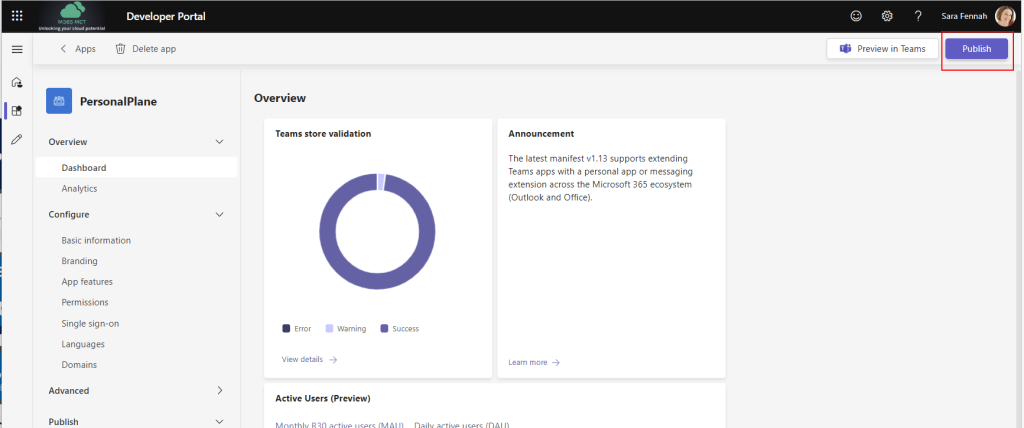
Here’s an article I wrote about creating my first custom scene. Since that blog was written there are some small changes. You still create your custom scene using https://dev.teams.microsoft.com/, but the publication process is different.
Whilst it is recommended that before publishing to the organisation, you test the scene in a meeting, take car how you undertake this. You can deploy the app to a single Teams client using the Preview in Teams button and follow the prompts to install. If using this method I recommend testing on a different device and Teams account to your default or renaming the app after testing. This is to avoid ending up with two copies of the same app once it is published, a sideloaded (preview) and full load (publish). As an alternative with Together Mode scenes, you could publish them and only deploy to limited number of users for testing using app permission policies.

To fully publish a scene, once the app/scene is created choose Publish button
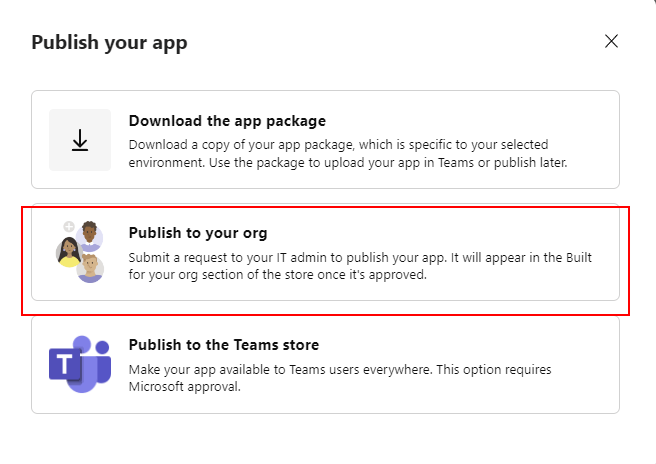
Confirm the publication method. If you are signed on to Developer Portal with an account which is permitted to publish app you can Publish to your org directly. Otherwise you will need to download the app package and submit for upload by a Teams Administrator using your internal processes.
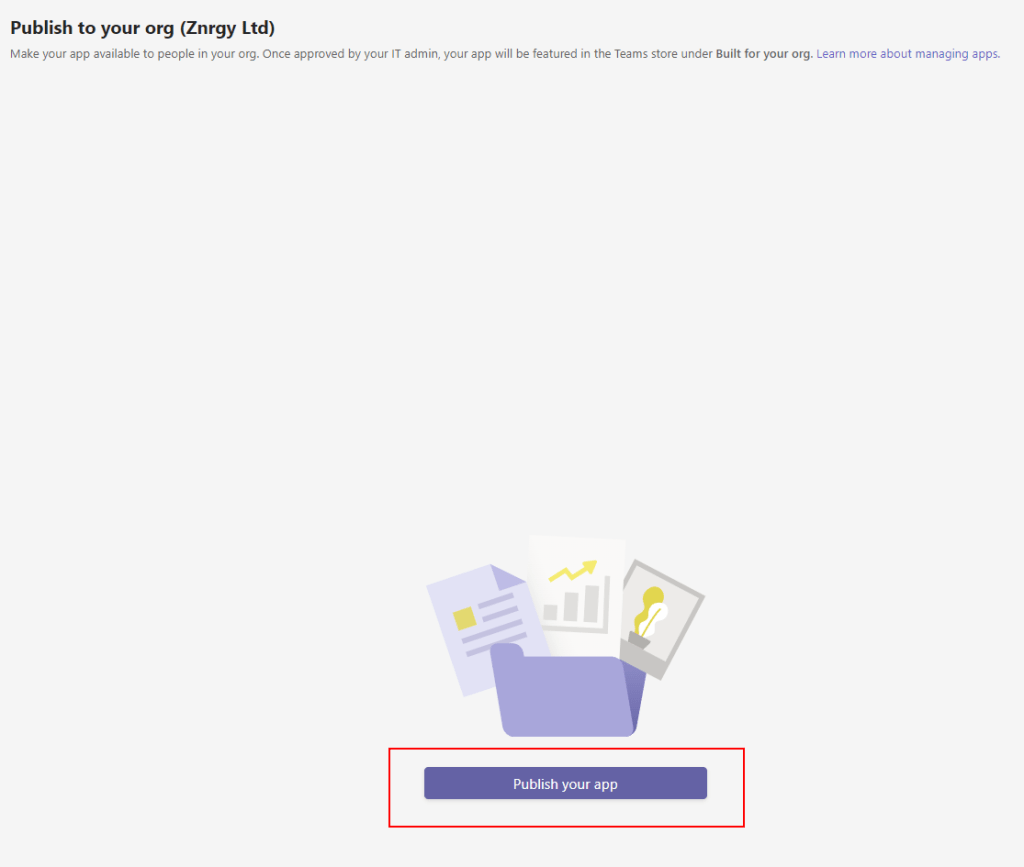
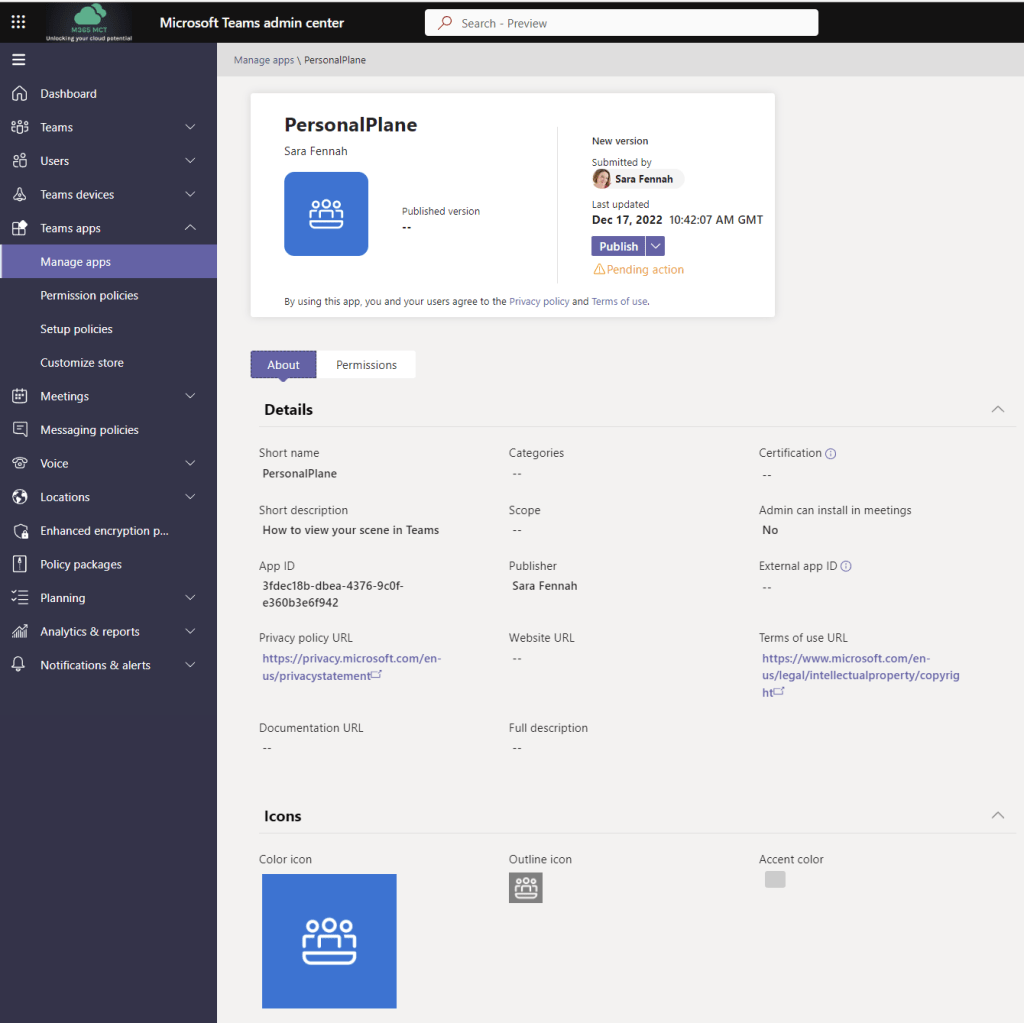
If you chose Publish to your org you will then confirm this by clicking the Publish your app button on the next screen.
Once published to your org, the app will need to be approved before it becomes visible to your users and ensure it is not blocked by an app permission policy. The screen shown below is used by the Teams Administrator to publish the app, thus approving it for use with the organisation. To reach this screen in the Teams Admin Center choose Teams apps > Manage apps, locate the app in the list and click the app name.
Once published and approved, users can add the apps from the teams client. Or, as an admin, you can add it for your users via a Teams App Setup Policy.
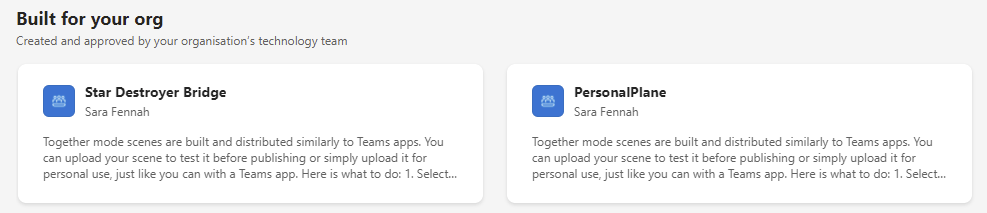
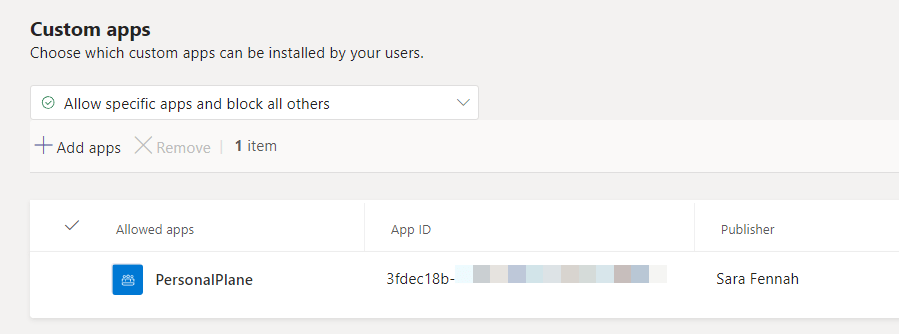
If the app does not appear for users in Microsoft Teams under Apps in the Built for your Org section then check to ensure the app is allowed in the App permission policies under Custom Apps section.
You can view the official guidance on Together Mode scenes on Microsoft Learn
