As of 8th December 2021 update the Teams Display supports portrait mode for Meetings and calls, as shown in the extract from Message Center post below.
Message Center post 302457 stating Teams Displays support Portrait mode in Calling & Meeting Screens
You will note that this is only for Calling and Meeting screens. I’ve been eagerly awaiting this release, so I thought I needed to try this out, as the camera position in the Teams Display is a weak point for me. Even though it is situated on a shelf on my desk, the camera is till a little low.
As my display does not support screen shots, I’ve used photos of the device. I’m not a photographer.
Conclusion: Nearly solves the limitations of the smaller Teams Display device, but really needs to be for all areas, not just meeting & calling.
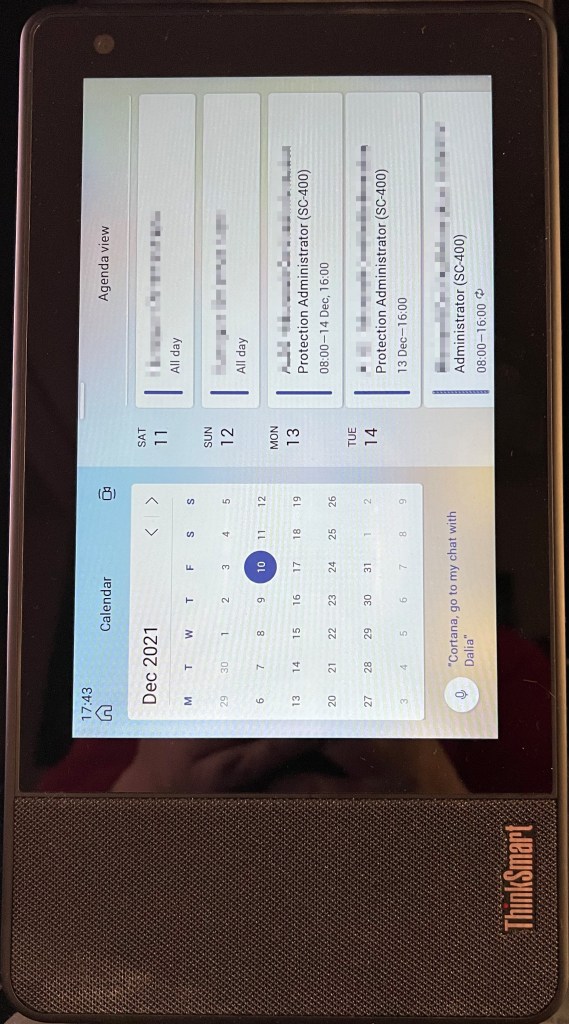
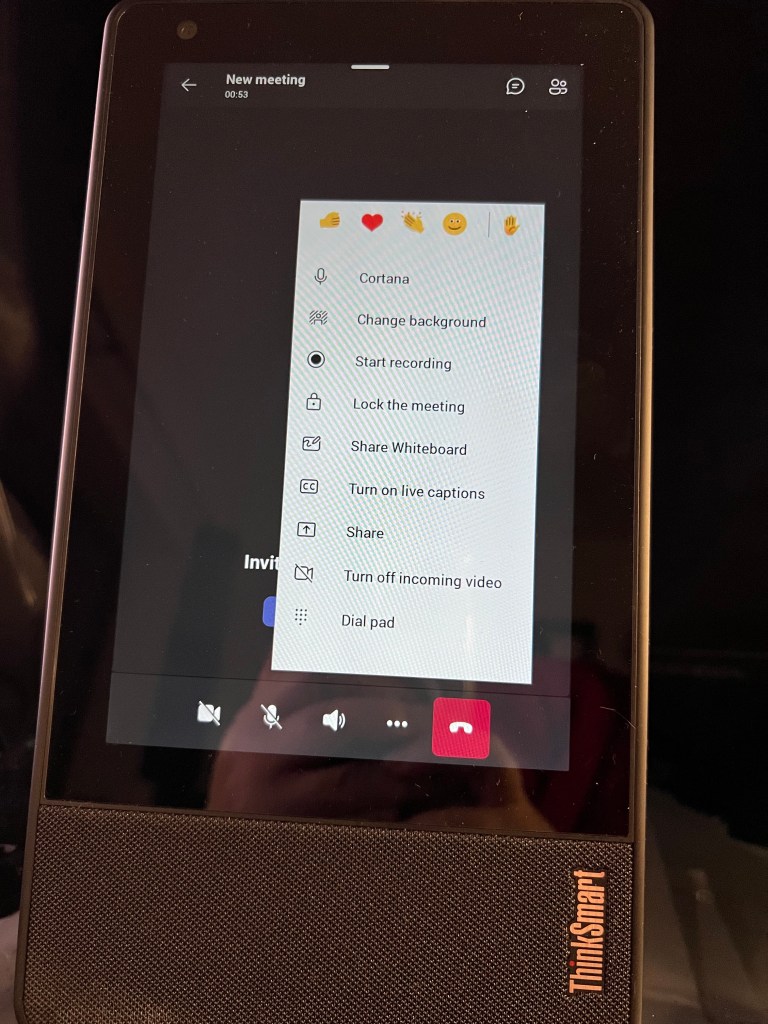
After doing the update you will notice that most screens do not work in portrait mode, this includes the calendar, home screen, chat, teams.
Device in portrait orientation with calendar screen displaying in landscape mode
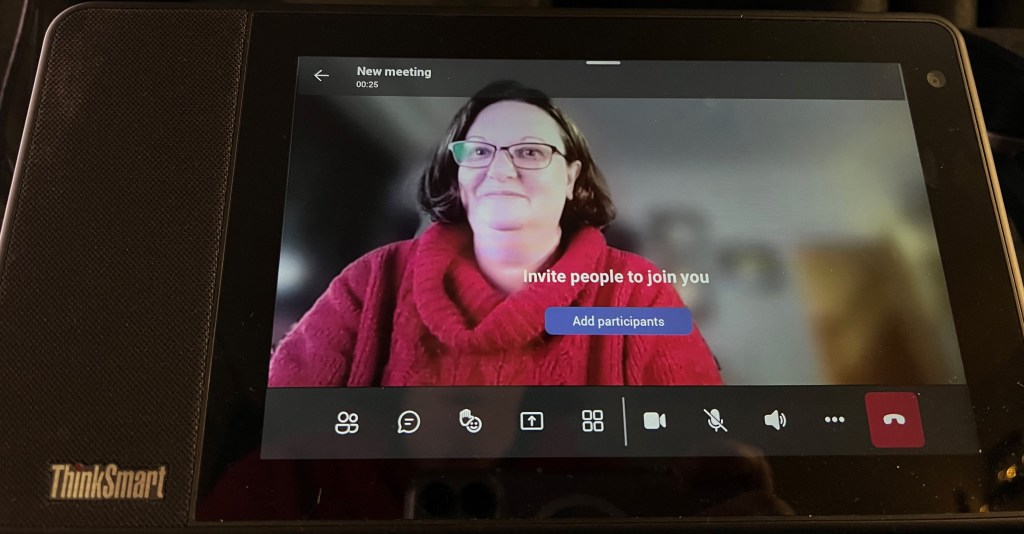
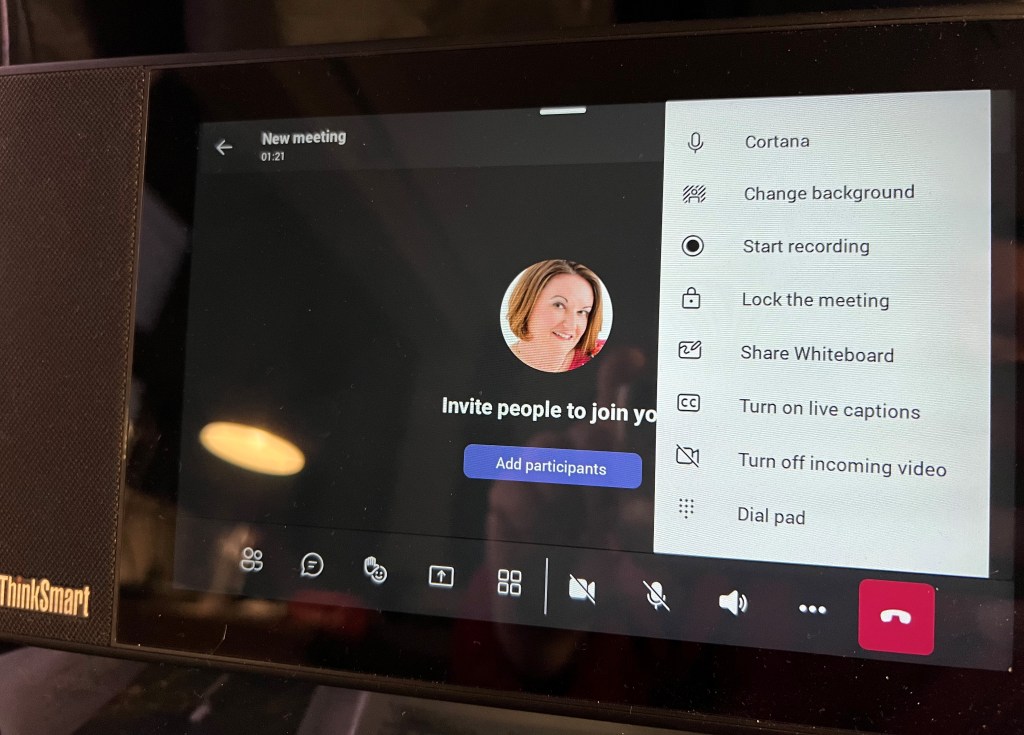
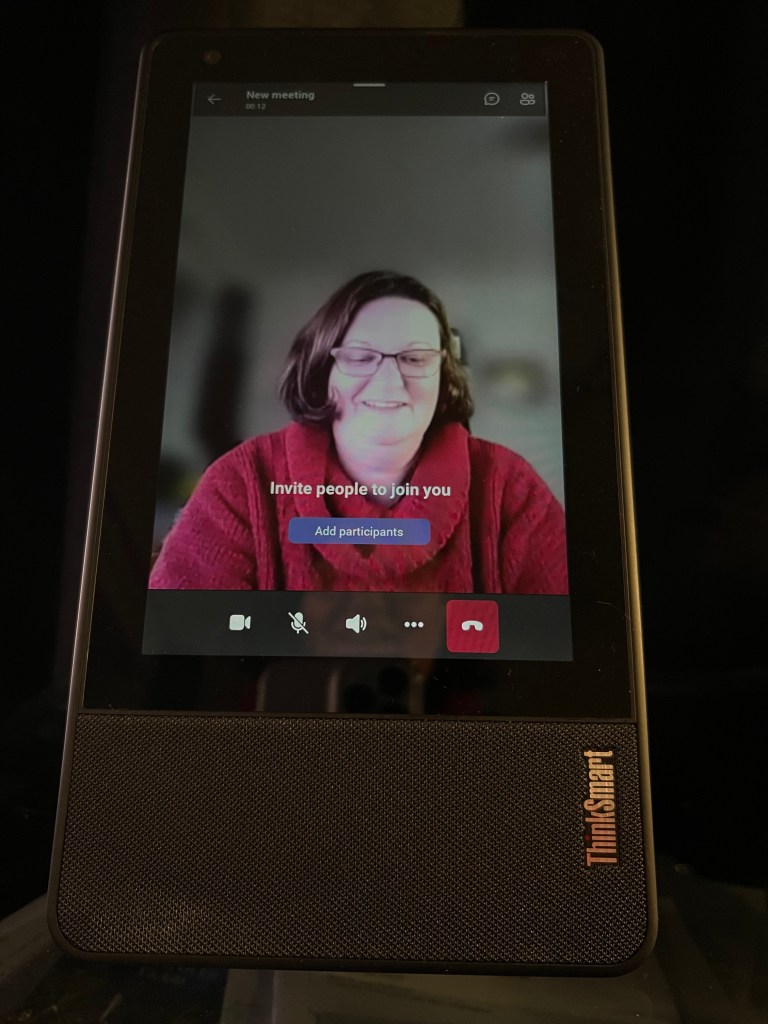
However as soon as you join or start a meeting/call with the device in portrait orientation, the device detects the orientation and rotates the screen automatically. Portrait mode is not really supported on the join screen, but it is still useable in either orientation.
Once in the meeting both Landscape & Portrait mode work well.
Did you attend the Microsoft 365 User Group on 8th December 2021? Lesley Crook (Twitter Linked In) & I presented “Microsoft Viva: The Pitch, The Use, The Config”.
Whilst Lesley is the Viva Visionary, I’m the Viva Realist, presenting the current state of the Viva tools as well as how to configure the Viva modules. You can get details of the Viva Vision (the pitch and purpose) from Lesley’s own blog here.
You’ll find more of my articles on Microsoft Viva, by clicking on the Vivalink at the top of this page.
Viva Connections
Connections brings your SharePoint based Intranet into Teams. With the use of the SharePoint Global Nav Bar and Viva Connections Dashboard & Feed webparts it can bring the whole of your SharePoint into Teams whilst simplifying the navigation process for users and integrating Yammer as well as custom tools to give a holistic approach to communication. The Viva Connections Feed combines SharePoint news with Yammer community announcements whilst the Dashboard uses cards to include other apps and tools, such as tasks, holiday booking apps, shift management, etc.
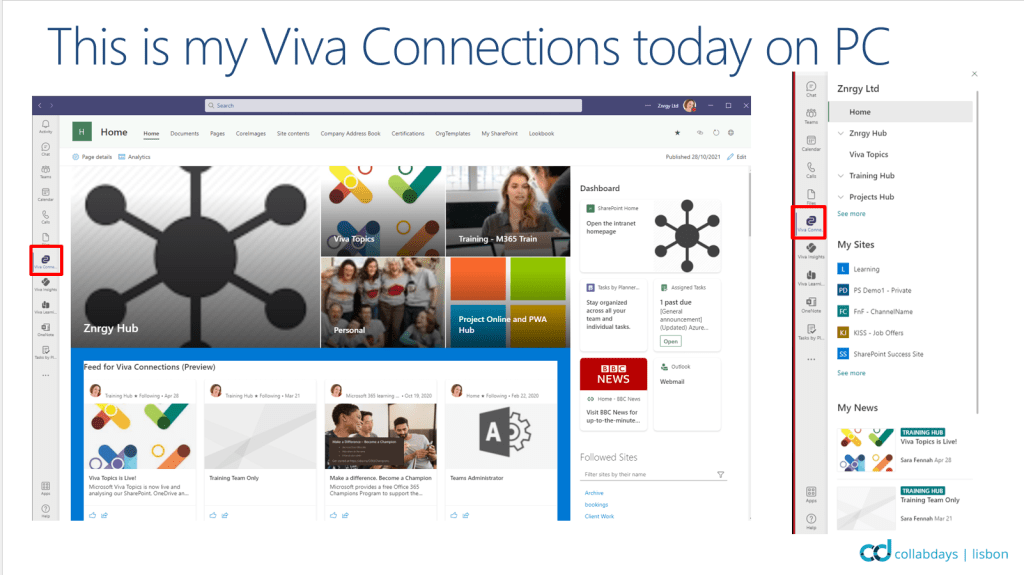
This is what Viva Connection in the desktop and web version of Teams looks like for me today:
Viva Connections with App icon highlighted in Teams side rail
Clicking onto the Viva Connections icon a second time brings up the SharePoint Global Navigation bar.
Global Navigation menu showing curated navigation, followed sites and news with Viva Connections app icon highlighted in Teams side rail
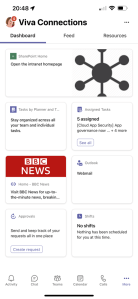
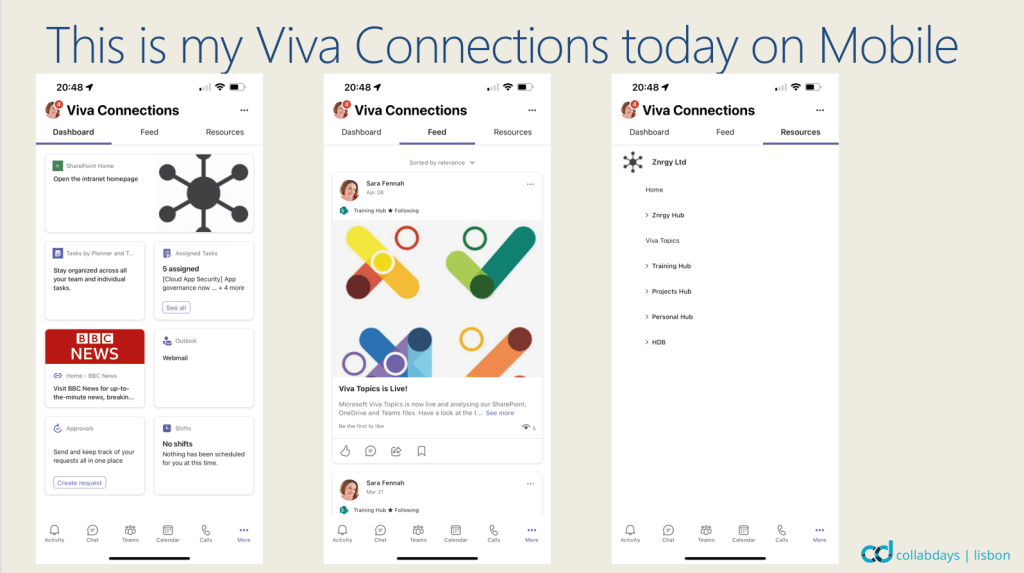
On mobile the first tab shown is the dashboard
Then you can pull up the feed, from the second tab
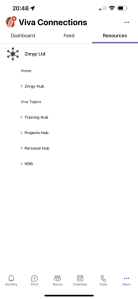
And the final tab give the resources or the SharePoint Global Navigation Bar
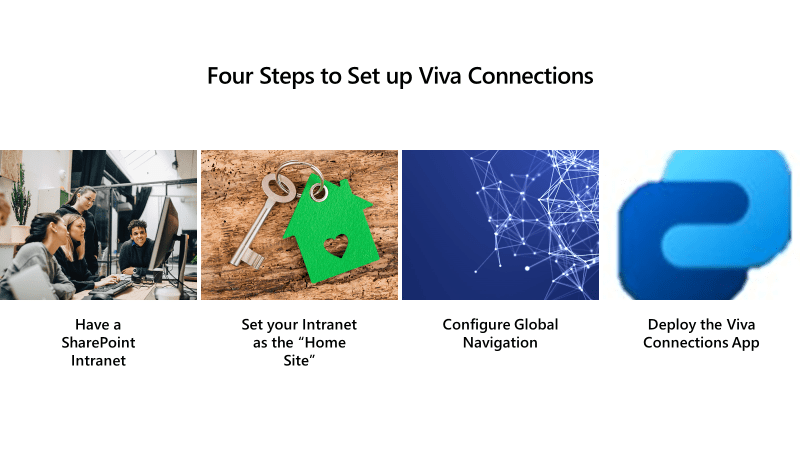
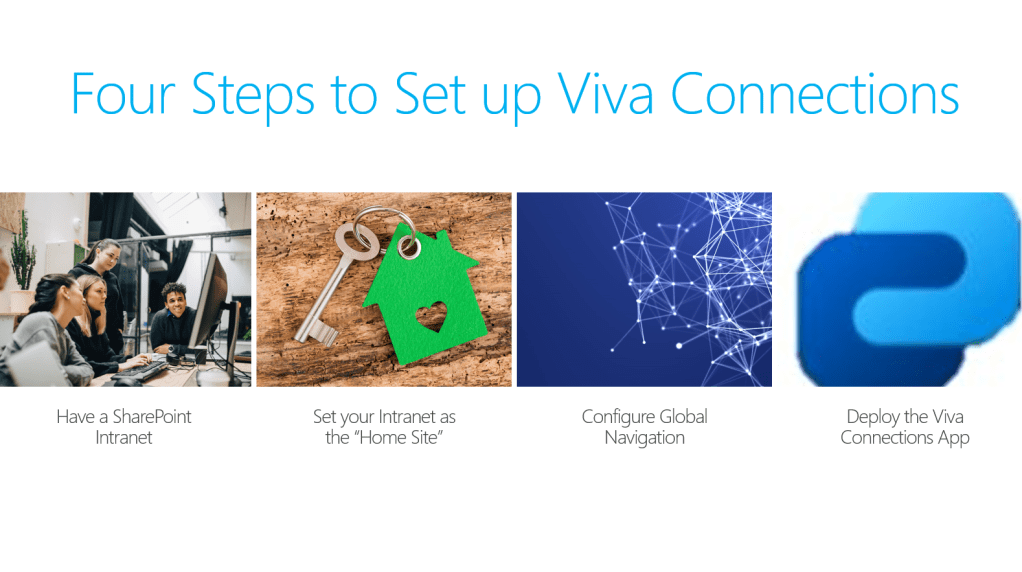
4.Deploy the Viva Connections App into Teams for your users (via Teams Admin Center)
What you get out of Viva Connections depends upon the use made of SharePoint intranet and Yammer. To bring Yammer into Viva Connections we use the Viva Connections Feed or Yammer web parts on your SharePoint Home Site. For details on creating a Home Site for use with Viva Connections use this article.
To make the most of Microsoft Viva you need to configure a dashboard, this is essential for your mobile users as they land on the dashboard first. You may also want to consider which cards go on the dashboard. We’ve added the SharePoint Intranet homepage as a card, so it’s available from the landing tab for mobile users. Your desktop users will also need the feed and dashboard so do add those as web parts to your home page.
Viva Connections is included in all Microsoft 365 plans which include SharePoint with no additional licensing requirements. At present there are no additional features available when purchasing the Viva suite but the suite will unlock integration between modules going forward.
With a brief step into the role of the Viva Visionary, the future promises more cards for the dashboard and further integrations with more of Office 365. Don’t forget you get the full visionary details from this presentation in Lesley’s own blog here.
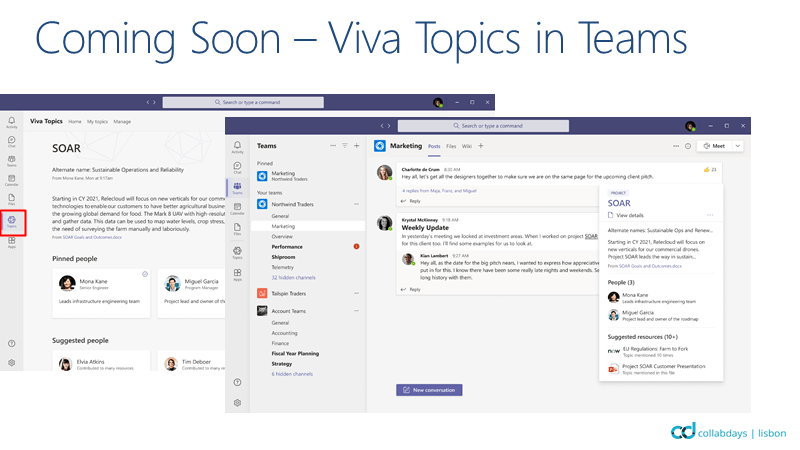
Viva Topics
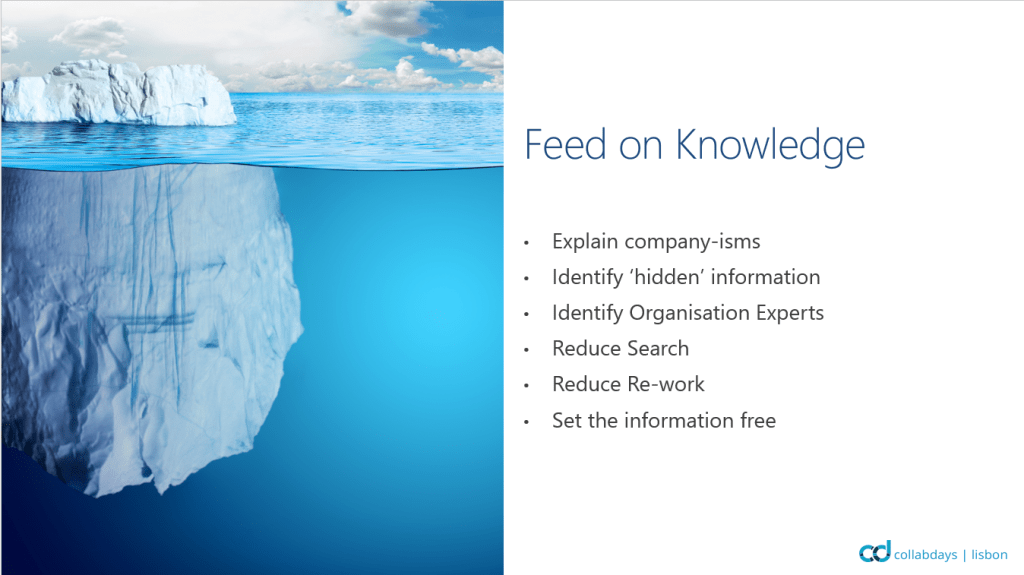
Viva Topics is about unlocking the knowledge trapped inside your Microsoft 365 silos. There must be millions of files which get created, used one and never see the light of day again, yet contain many gems of information. Viva topics is about using the power of AI plus human oversight to discover topics from this information and surface the knowledge to users in the natural flow of their work.
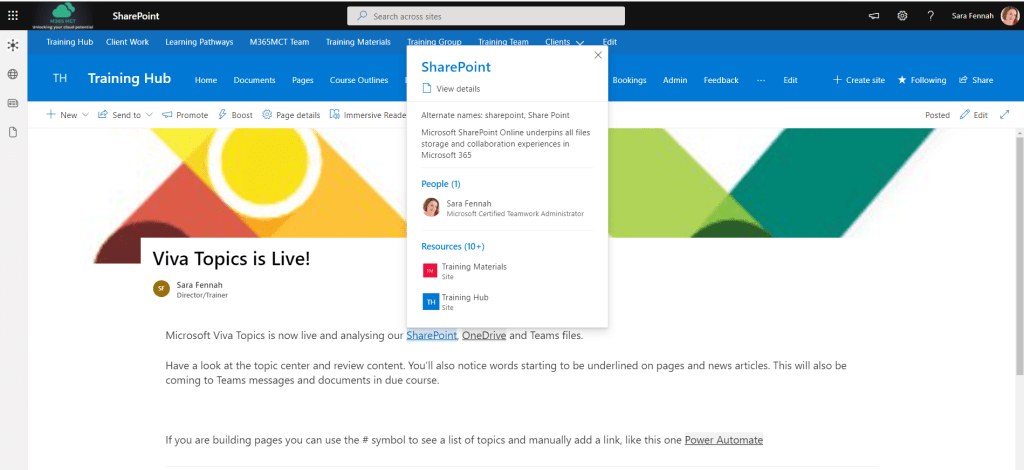
At present Viva topics ONLY surfaces in SharePoint pages.
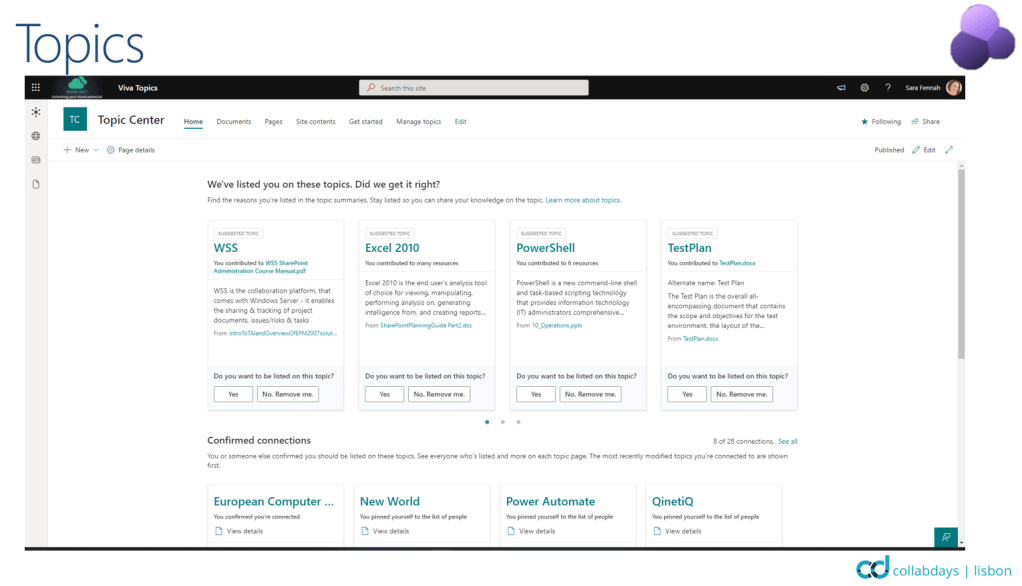
The Topic Center, from where topics are managed is not the most exciting looking SharePoint site, but its the topic pages themselves which are most interesting. Click the thumbnail below to see a full topic page example from my tenant.
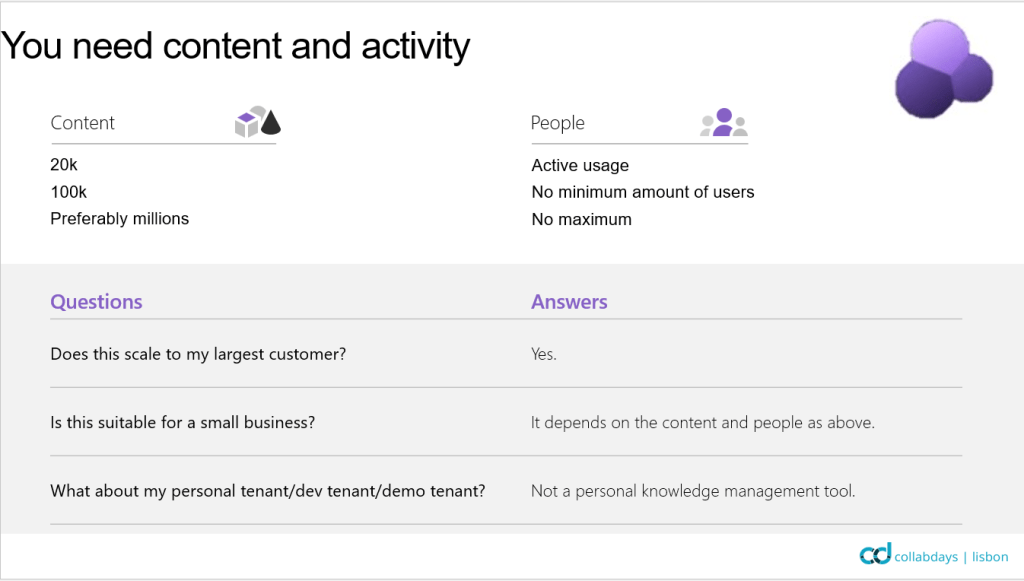
Viva Topics is not suitable for all organisations, there is a minimum amount of data and activity that you need before it can work as designed.
That said Viva topics is working in my tenant which is primarily a one user tenant, though it does have 20 years of training content in it and the files are in regular use including updating and reworking.
Set up Viva Topics
For more detailed information, view my blog on setting up Viva Topics.
Viva topics is not included in any Office or Microsoft 365 plan. Full details on Viva licensing is available here.
With a brief step into the role of the Viva Visionary, the future roadmap for Viva Topics is congested. Not just more places where topics will surface (Teams messages, Office documents and emails), but also controls for editing and creating topics, integration with SharePoint Managed Metadata, Sensitivity Labels and Yammer Q&A. Don’t forget you get the full visionary details from this presentation in Lesley’s own blog here.
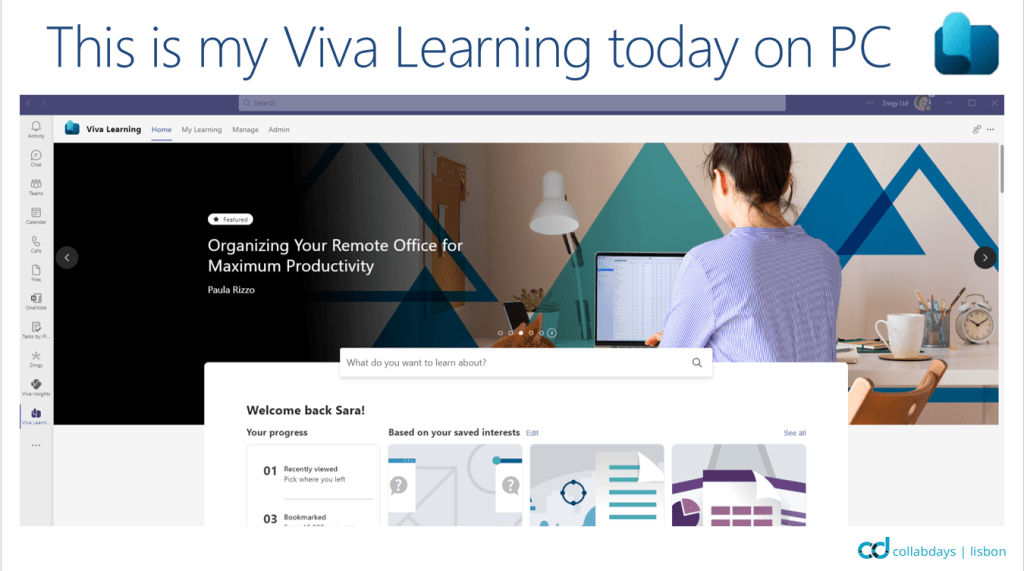
Viva Learning
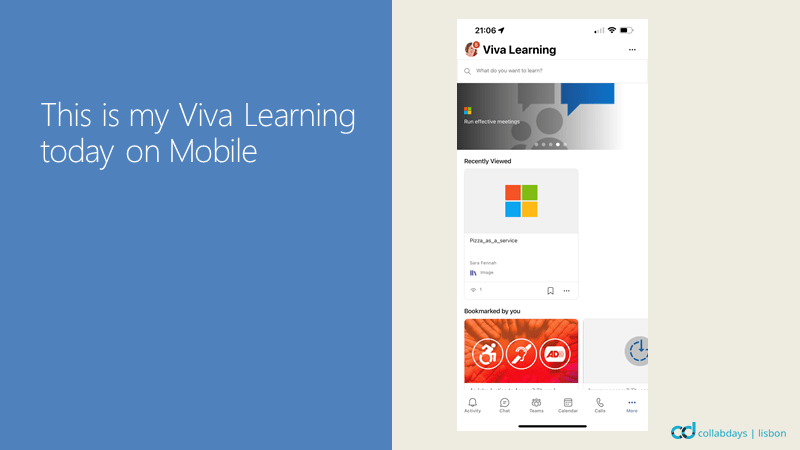
Viva Learning today is working nicely on desktop, mobile and web editions of Microsoft Teams and is properly the Viva module attracting the most attention today. Though it is worth while noting that Viva Learning on mobile is a simplified user experience compared to web and desktop.
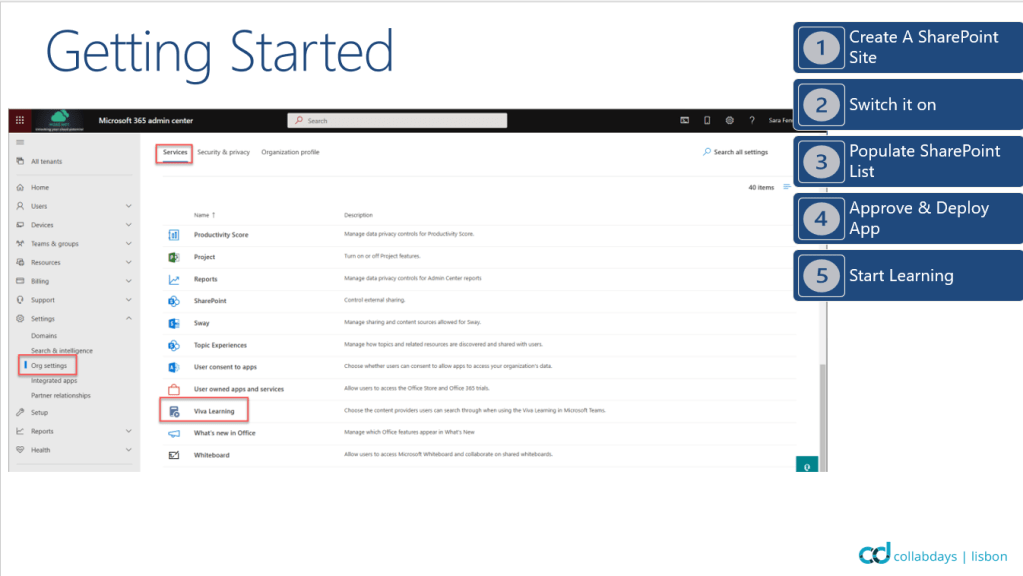
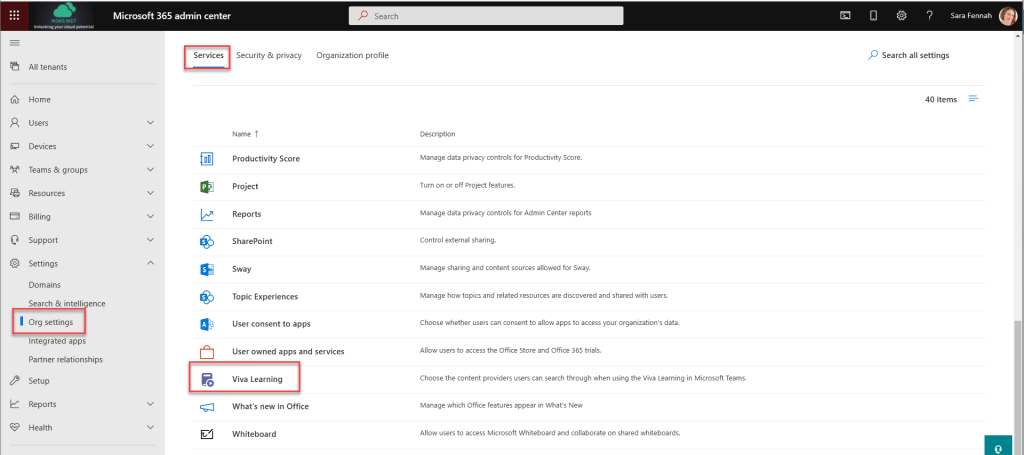
Setting up Viva Learning without integrating your own resources, requires only verifying the options in the Microsoft 365 Admin Center under Settings -> Org Settings -> Services -> Viva Learning then approving & deploying the app from the Teams Admin Center. Remember you will need to approve the app in App Settings, then ensure the app is approved for your users from the App Permission Policies and finally add to the appropriate App Set Up Policies if you want to automatically add to teams for users.
If you are going to add your own content to Viva Learning then you need to determine where you want to host the list of content to be added to Viva Learning. This site must be accessible to ALL users on your tenant, with at least read permissions. The content does not need to be held in that same site. Currently only 1 SharePoint site per organisation is supported.
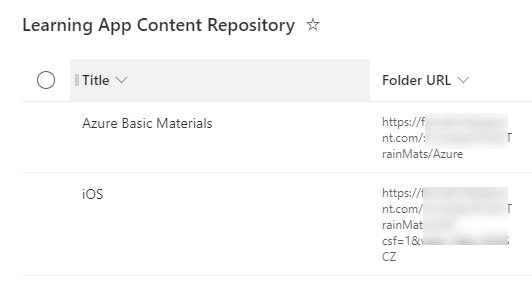
When you add the site to Viva Learning config in the Microsoft 365 Admin Center under Settings -> Org Settings -> Services -> Viva Learning then a new list is added to that site called Learning App Content Repository. To this list you add the URL of folders which contain the learning materials. Viva Learning users will see all content included in the list but only be able to access the content they have permissions to.
The basic edition of Viva Learning is included in every paid Office 365 plan which includes Microsoft Teams. However full functionality is only available with paid licenses.
You should also note that recommending learning is NOT the same as assigning learning. Assigned learning refers to a feature that is only available with LMS (learning Management System) integration and depends on the LMS supporting such integration.
With a brief step into the role of the Viva Visionary, please do note the future integrations available with the Viva Suite license. Microsoft are promising many more such integrations in the future which will only be available with the suite license, not the individual add-ons. Don’t forget you get the full visionary details from this presentation in Lesley’s own blog here.
Viva Insights
Viva Insights (personal) does not require much set up at all. It is, in fact, on by default within your tenant and the Teams app is approved and available by default too. You can configure the insights emails and Outlook add in in the Microsoft 365 Admin Center under Settings -> Org Settings -> Services -> Viva Insights.
Setting up the Manager & Organisation insights is a very different matter. This uses the Workplace Analytics functionality and is only available with the paid plan. For more details on setting up the paid plan see Setting Up Viva Insights With Per User Plan – The Teams Queen Blog
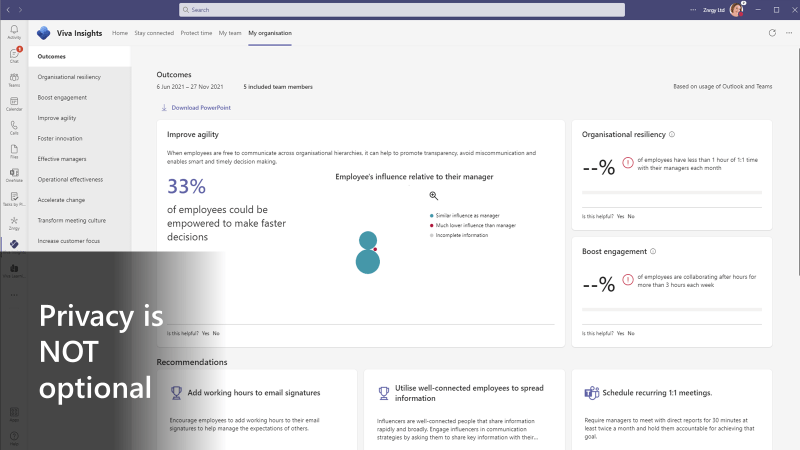
Privacy is a key principle to consider with Viva Insights and is hard coded into the product. The image below shows Viva Insights My Organisation view when the company is below 10 users. A minimum of 10 users are required in each category before the metrics are even populated! Personal insights are only available to the individual and very few metrics are available for managers of teams under 10 people. All to ensure the privacy of the individuals about whom the data is collected.
You can learn more about privacy in Viva Insights from these resources:
As already mentioned, Viva Insights has included and paid tiers. The ‘free’ version is included with paid plans that include Exchange Online. This version gives primarily personal insights. The Teams and Organisation insights are unlocked with the paid plan and so are “Premium Personal Insights”, which has not yet been fully defined by Microsoft.
With a brief step into the role of the Viva Visionary, personally I am looking forward to the delay delivery options for chat messages in Teams; Scheduling Quiet Time (like focus time currently) but muting all notification from the account on all devices and the extension of focus time to include productivity timers and music. Don’t forget you get the full visionary details from this presentation in Lesley’s own blog here.
A little while ago people kept saying to me “I still can’t see your presence”. For some reason my Teams online presence was not showing for people outside my organisation, no matter how many time I reset it, whilst it was still visible to my colleagues. I then did a bit of testing and discovered that no user in my tenant was sharing their presence externally.
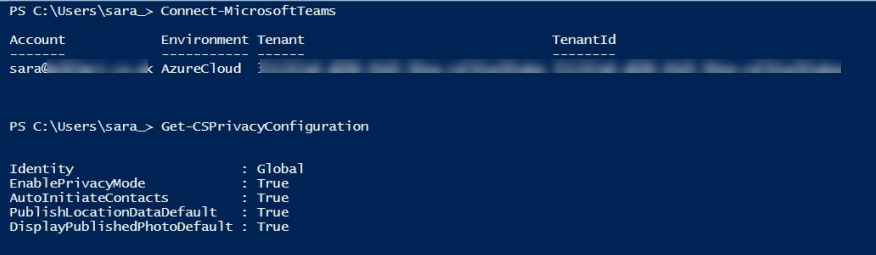
To find out if this was the cause of my problem (and indeed if those Skype commands were still available), I used Get-CSPrivacyConfiguration to obtain the privacy settings in my tenant.
And there was the issue. The Privacy Mode was enabled, which Terence’s article indicated would block presence for external users when we were communicating in Teams.
Now to verify if setting it to False (turning off Privacy Mode) made the presence of users in my tenant reappear for our external partners.
Then a bit more testing was in order, however before I could up pops the message: “You fixed it, I can see if you are online now”. Success!
But now I always need to remember to change my presence. I can highly recommend using the Duration setting to change your presence manually for a fixed period so you do not forget to set it back either
The other finding from this is that enabling Privacy mode does hide presence from external contacts as per Terence’s article
The set up is done from https://workplaceanalytics.office.com/en-us/AnalystSettings/Onboarding, however mine took 2-3 days to activate before the page was available, so I’ll come back to this later. Officially the guidance is that “Licenses can take from 24 up to 72 hours to activate after you purchase licenses. Until licenses are provisioned, unlicensed users will get a 500 error when opening Workplace Analytics”
PREPARATION: Whilst you are awaiting for the onboarding page to activate you may want to read the docs guide on getting set up Workplace Analytics setup | Microsoft Docs. I would recommend reading the user roles guide User roles in Workplace Analytics | Microsoft Docs and deciding upon the user who will need roles assigning. Once you have reviewed the role guidance and decided on the roles required for users, you can assign these in advance of the licence activation.
Assign Roles
Working as a Privileged Role Administrator, sign in to the AAD admin center.
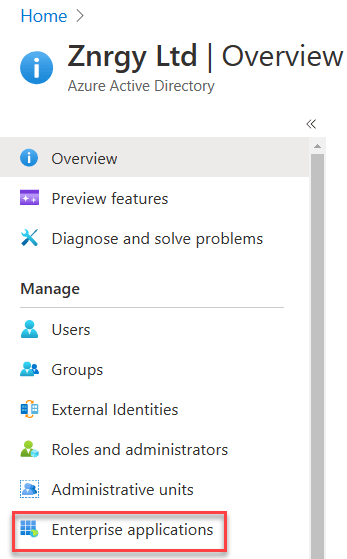
Navigate to Enterprise Applications
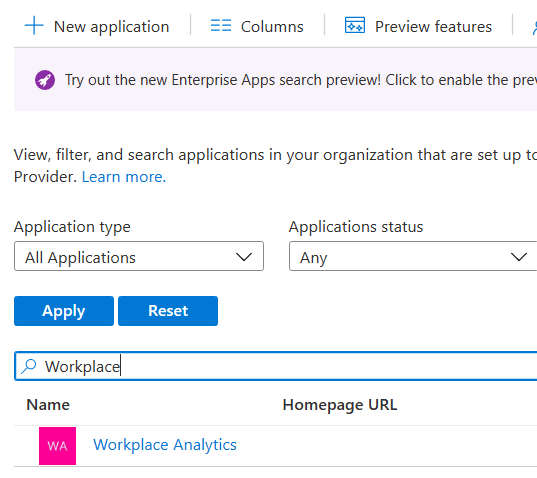
Choose All Applications in the Application Type box
Search for Viva Insights (currently I can only find Workplace Analytics, not Viva Insights as the transition takes place, so check for both if you have issues)
On the Overview page under Getting Started, choose Assign users and groups
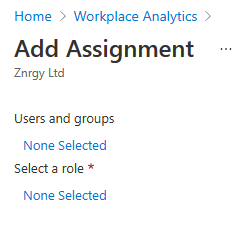
Choose Add user/group
Select a user or group by clicking the None Selected link under users and groups, then search for the required user(s) and/or group(s)
Then select the role. I recommend you start with the Administrator. You need at least 1 Administrator and 1 Analyst. Whilst you can assign the same user multiple roles, they need to be added as separate assignments
Whilst you can assign the same user multiple roles, they need to be added as separate assignments. If you do assign multiple roles to the same users you will see something like the following:
Users assigned roles will received an email informing them. This is the Administrator Email
It is important to include ALL licensed users, but you can include unlicensed users as well.
Your organisational data MUST include the following columns:
PersonID (the log on email of the user)
EffectiveDate (start date for the information about the user contained in this file)
Organization (the internal organisation the user belongs to)
ManagerID (the log on email of the user’s manager)
The file format is important, so be sure to pick the correct CSV file format.
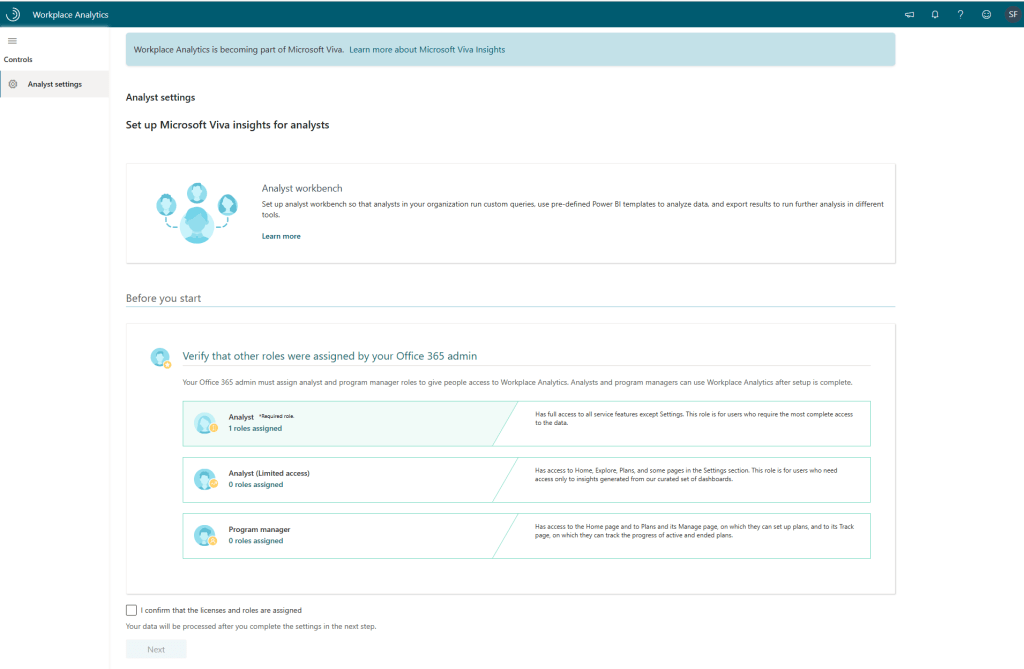
Once your licences have activated you will find the Onboarding page at https://workplaceanalytics.office.com/. You should see the number of Analysts and Program Managers you assigned permissions to.
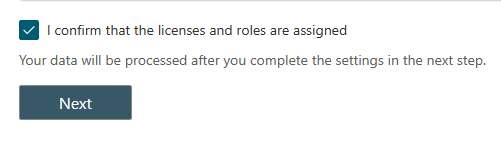
Confirm the correct number of roles are recognised by ticking the box and clicking Next
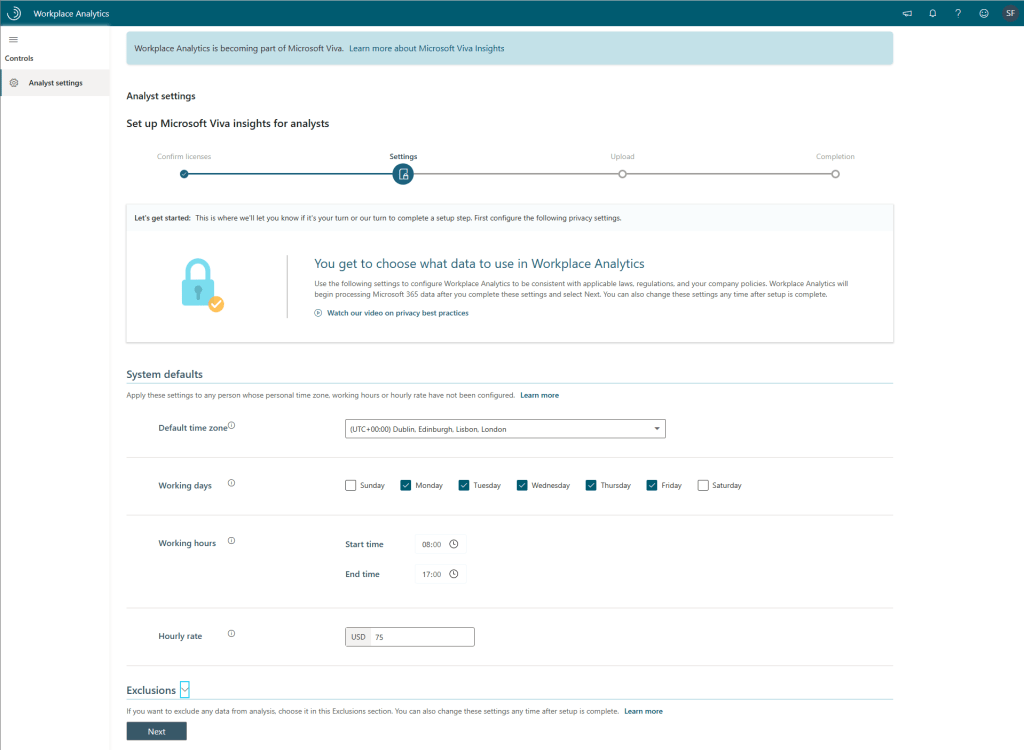
Next set your system defaults. These will apply to ALL users.
Before clicking Next expand the Exclusions section to add any required exclusions. Also note the minimum group size can be increased to help preserve the anonymity of users within your organisation. 5 is the smallest group for metrics.
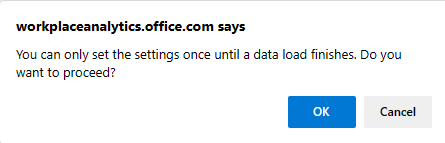
A warning will appear to confirm you cannot change these settings until after the first data load has been completed. However once the Organisational data has been processed then you will be able to adjust the settings, as required.
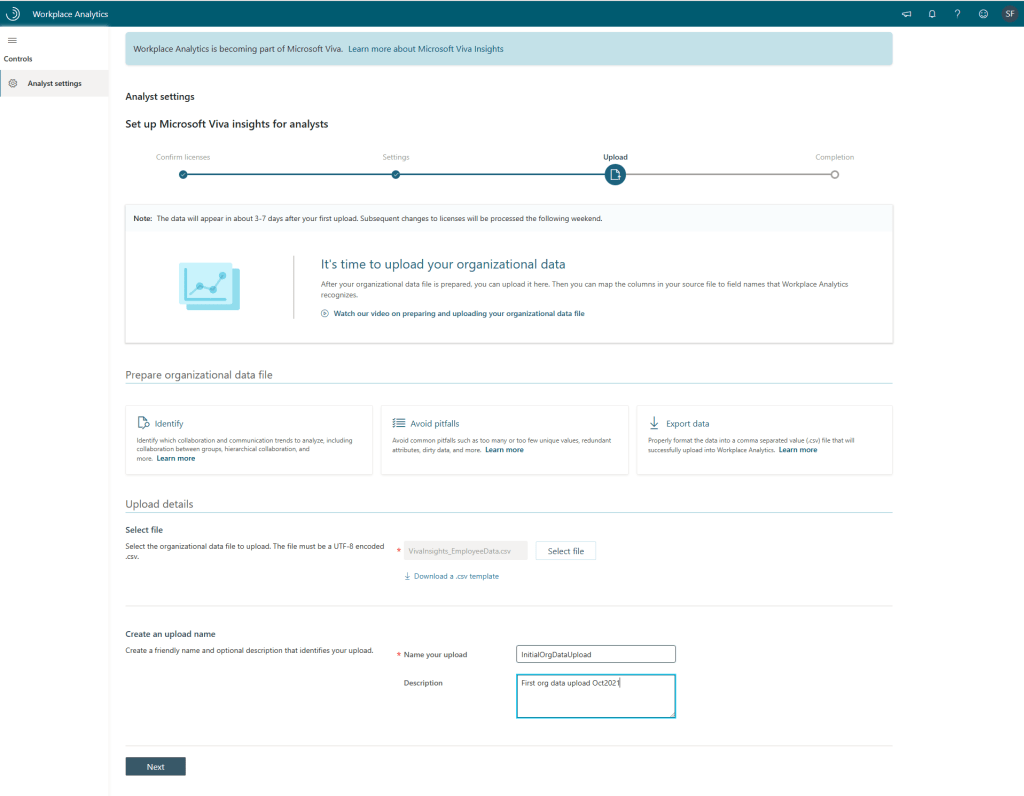
Next you will upload your org data file prepared earlier. There is also an opportunity to download a template at this point, which is shown below. I prepared my file earlier based on the Docs article
Upload your file, name and describe it, then click Next. The name and description will be useful as time goes on and you need to adjust or add to your organisational data.
You will then be asked to confirm the column matching to expected fields to ensure the analytics tool has correctly identified the columns in your organisational data file.
Your file will be uploaded and validated, with the following progress dialog box being displayed whilst this happens
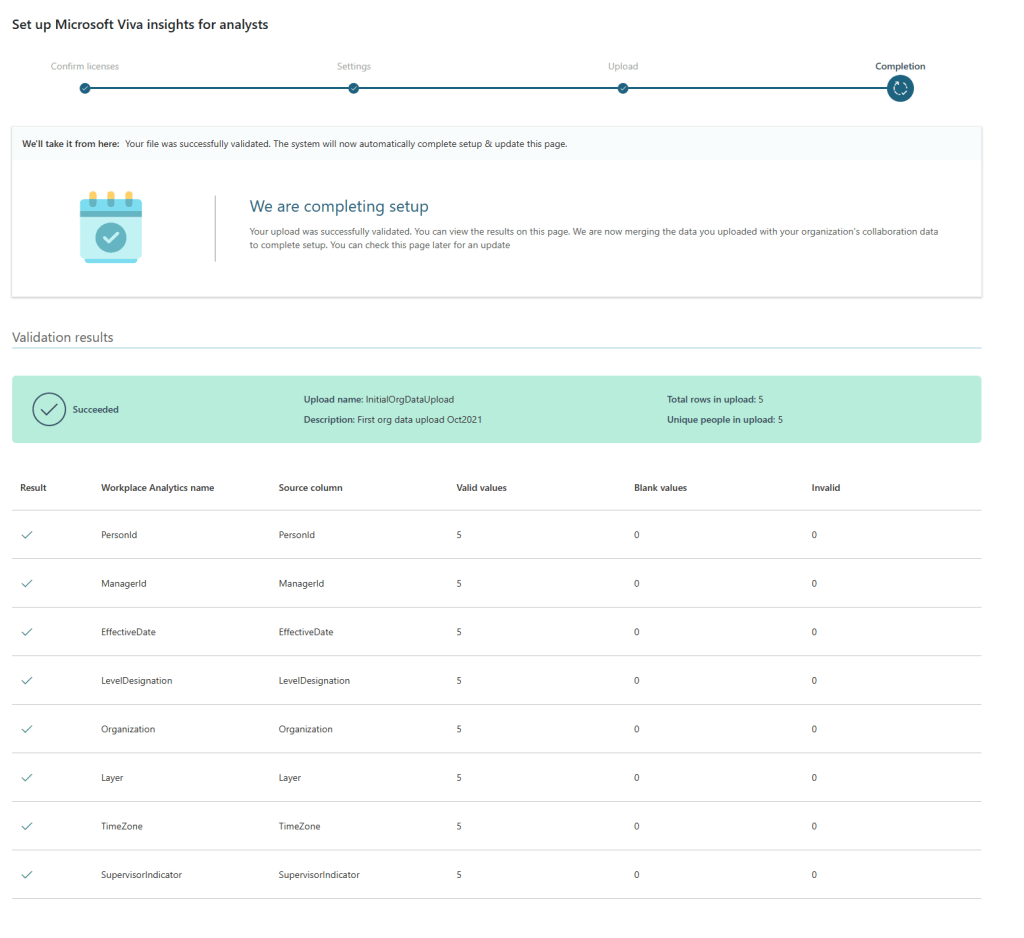
Finally you’ll see the confirmation page that your organisational data file was validated and that the set up is in progress.
And now you must wait again. The notifications appear to indicate this is processed over the weekend.
With my set up, I experienced an error.
Though after a day, it switched back to progressing. Though this was as far as I got with 1 license in the organisation.
It’s a learning curve. It turned out that with a single license the process could not completed. A minimum of 5 licensed users is needed in the tenant and those 5 need to be included in your organisation data upload too.
Once that issue was resolved in my demo tenant and the weekend update had taken place, we had success! The admin received email notification of such
And the https://workplaceanalytics.office.com/ page now shows the success message. On that page you now need to click Exit to homepage link to continue.
A First Look
The workplace analytics home page shows the key insights that have been discovered for the licensed users. Note that my users are light on activity and hence the majority of insights are empty. Indeed with only 5 licensed users we will fall below the minimum group size for many metrics.
You should also now see the My Organisation and My Team appear in the Viva Insights app in Teams.
If these do not appear, be sure to check permissions required and also verify the minimum group sizes are being met in the Leader & Manager Settings.
The organisation insights in Viva Insights have a series of different sections and provides a PowerPoint download option too.
The PowerPoint file includes sections which match the structure in the Viva Insights app.
One of the challenges with Private Channels in Microsoft Teams since they first launched has been retention. Now with the general availability of retention policies in for private channels, this is now in the past.
Before we look into the retention policies in more detail, let’s talk about what a private channel is and why it presented retention challenges.
A Microsoft Teams team is comprised of channels. Every team has at least one channel, General, and you can add others to suit for different work streams, project phases, task types, etc etc. All members of the team have equal access to all channels. Private channels offer the opportunity to create a channel where only a subset of the Team members have access.
To facilitate this private channels use separate storage locations than the main team. The messages are not stored in the group mailbox but in the mailboxes of the members of the private channel.
Retention policies covering mailboxes and Teams channel messages do not include these private channel messages. But now they have their own policies.
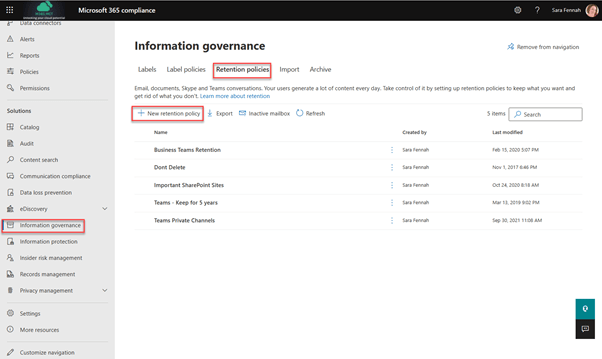
To create a retention policy for private channels:
In Locations, choose Teams private channel messages
Select users to includes or exclude from the policy Note: when choose items to include or exclude, the options are only users, as private channel messages are held in the mailboxes of the members of the private channel, so you choose which users you wish to retain private channel messages for, NOT which channels.
Click Next
On the Retention settings page choose the time messages should be retained for. These options are the same as for standard channel messages.
Click Next
Review the summary of the setting you have chosen on the Review and finish page then click Submit
Wait for the submission to complete. NOTE: As shown on the submitting screen below, the policy can take up to 24hrs to come into effect.
Once the policy has been created and saved click Done on the confirmation screen. The submission process can take several minutes, so be patient!
This blog post accompanies the session delivered at Collabdays Lisbon on 13th November 2021.
Agenda
What is Viva & how does it fit with what we already have?
Licensing the Viva tools
Getting Started – Deploying the Viva tools
Recent Updates Announced
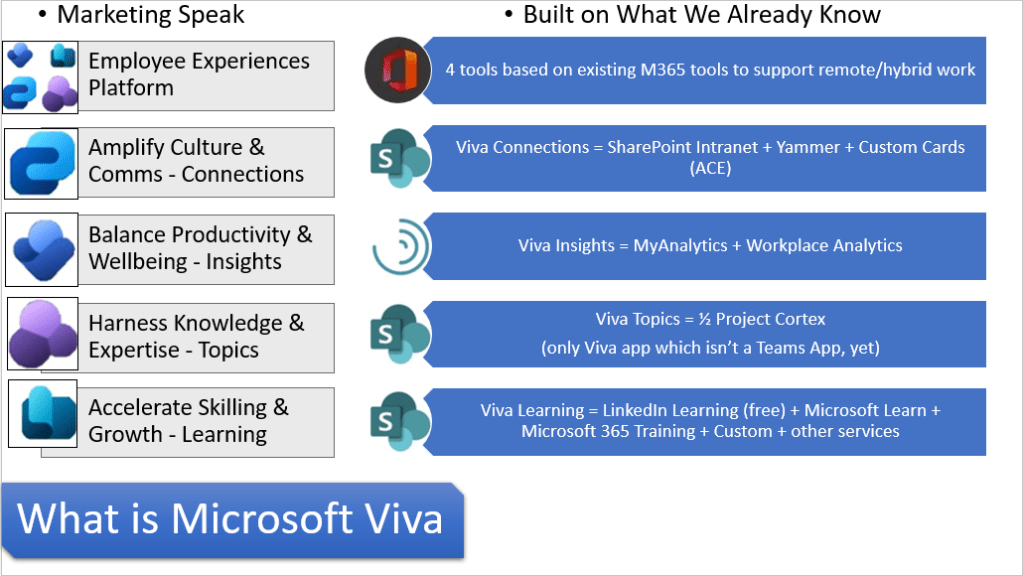
What is Viva
Microsoft launched Viva as a product to enhance the employee experience, but what does that actually mean without the marketing speak? In overview, Viva is a brand name that pulls together tools whose aim is to make it easier to be productive and maximise the investments we have already made in Microsoft 365, delivery in the tools we use everyday, primarily Teams. The aim is that pulling together the apps, content & communication you reduce the amount of jumping between applications needed to do the job.
Each Viva module does have its own focus and is based upon existing or previously announced features, with the normal feature development and continuous change that is part of the cloud.
The Microsoft Viva platform is made up of 4 modules (currently)
Viva Connections bring the SharePoint intranet into Teams and makes it accessible to mobile users too. It also surfaces Yammer content and can be extended to help provide access to custom tools as as well as standard tools such as Approvals & Shifts. The key word there was Amplify. Connections makes it easier to interact with the (SharePoint Online) intranet you already have.
Viva Insights builds on the analytics and reminders that My Analytics and Cortana emails were already bringing us. But with additional features to help balance work/life and productivity. For me, I find the some features more useful than others. I personally use love the Stay Connected reminders about tasks/requests I may have missed.
Viva Topics is about making the most of the information stored in Microsoft 365. Capturing the knowledge locked away in all those documents and making it useful, but letting the AI do the heavy lifting.
Viva Learning is aiming to bring continuous learning into the daily flow of work. If you work with the cloud you are familiar with continuous change and continuous learning, Most workers struggle with this and how to even find the learning opportunities and that is where Viva Learning comes in.
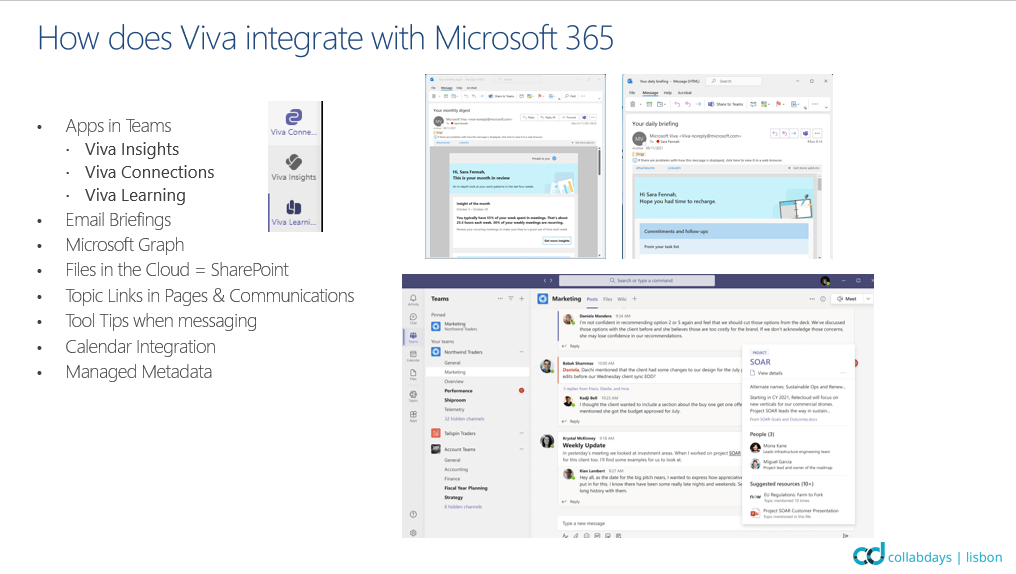
How does Viva integrate with Microsoft 365?
Microsoft Viva tools are built on the email, appointments, chat, meetings and files already in Microsoft 365 and integrate with those tools. With Topics & Insights there are some integrations which are not yet rolled out, such as being able to see topic cards from message and document content and delay chat message based on recipients working hours, but these are on the way.
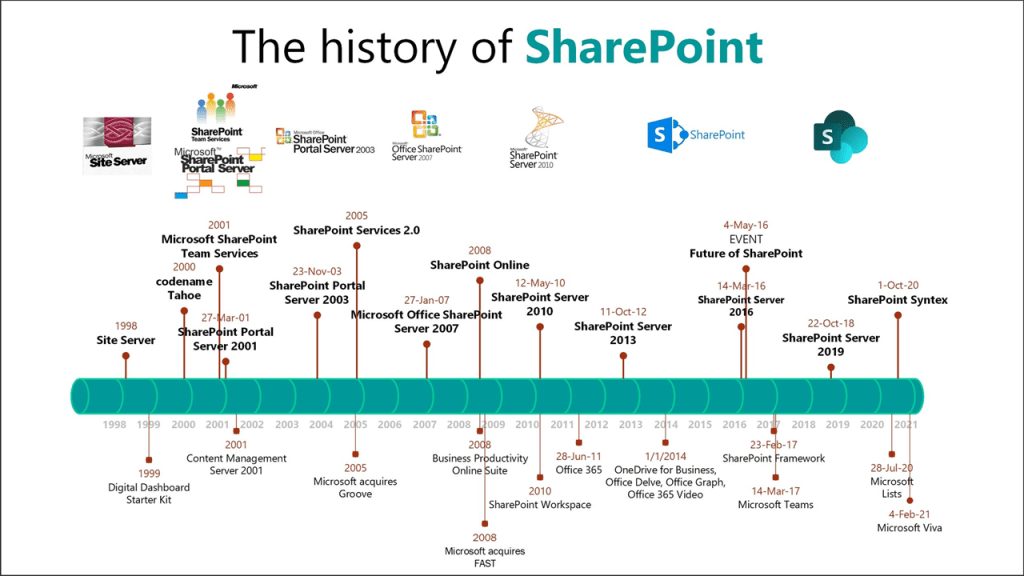
Does this replace SharePoint?
First, let’s be clear, all Microsoft 365 file storage is based on SharePoint which turned 20 this year (27th March 2021) – see SharePoint twenty 20 years young SharePoint’s twentieth birthday 20th (microsoft.com) So no, this does not replace SharePoint, though it may mean your users spend less time navigating to SharePoint pages in their browser and use Viva Connections instead.
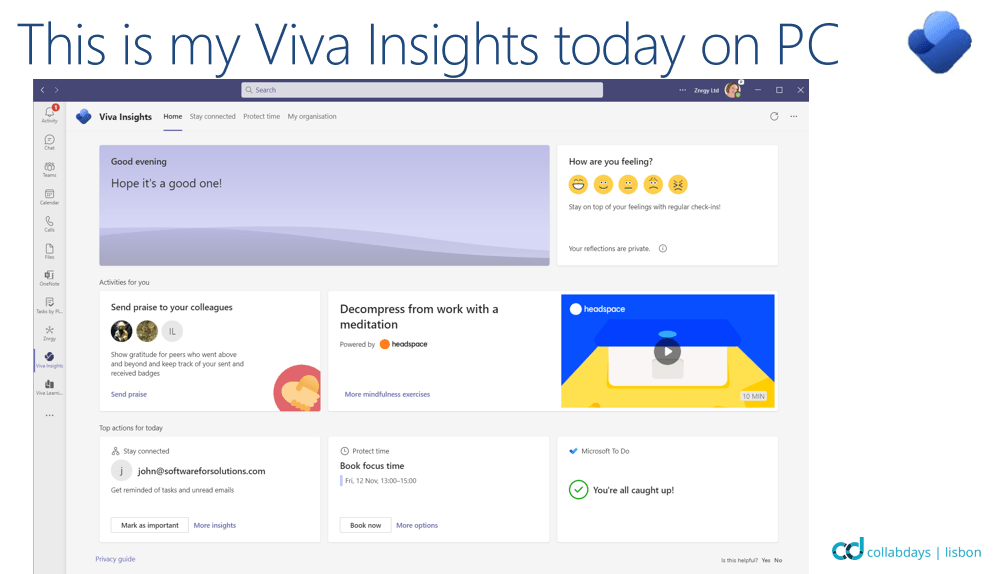
Viva Insights
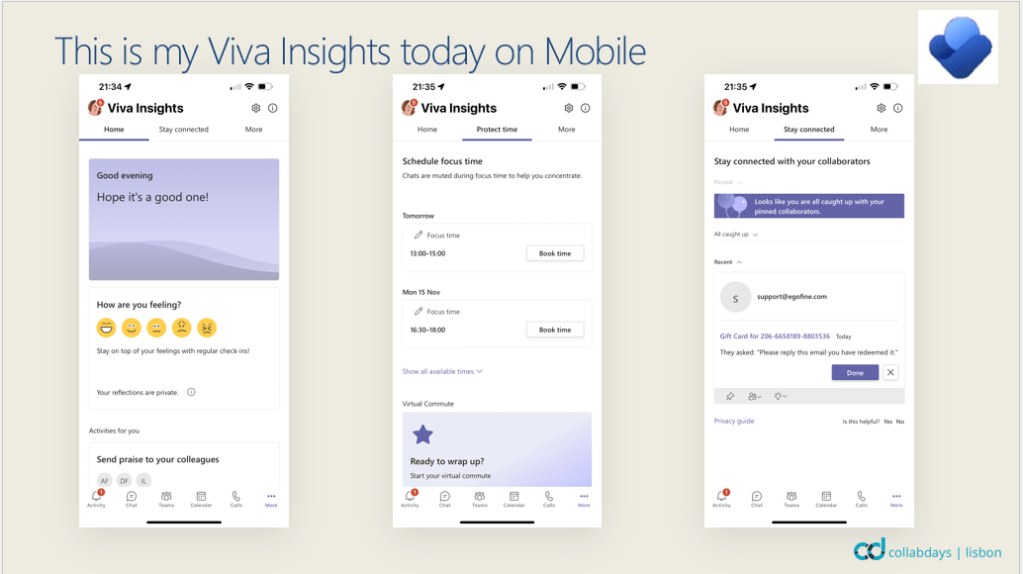
Today
The virtual commute feature helps close out the working day. Personally I find it a bit much every day, but on busy days it is helpful.
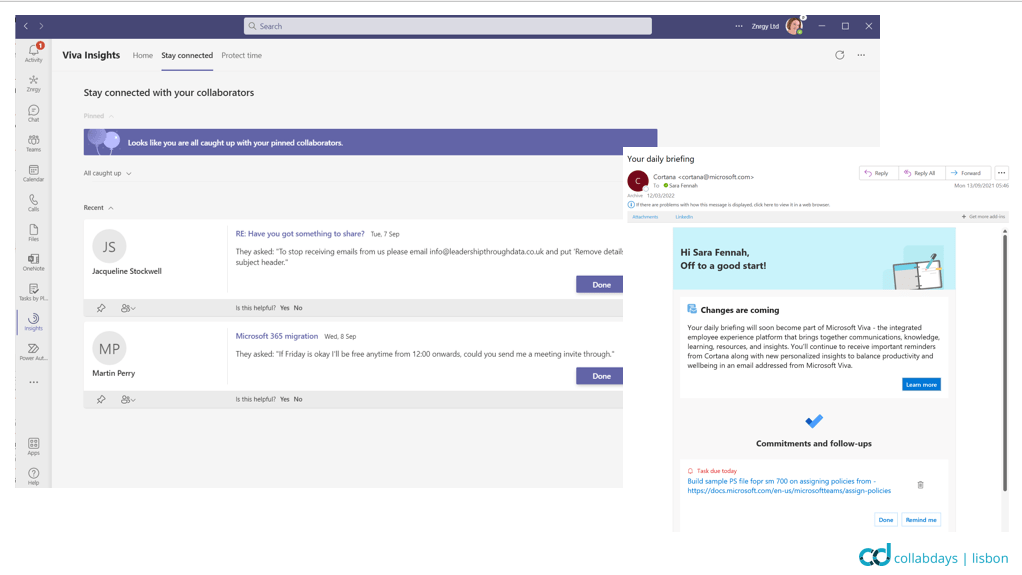
Stay Connected is the same information as the Cortana daily email and My Analytics Trend pane (both now rebranded Microsoft Viva).
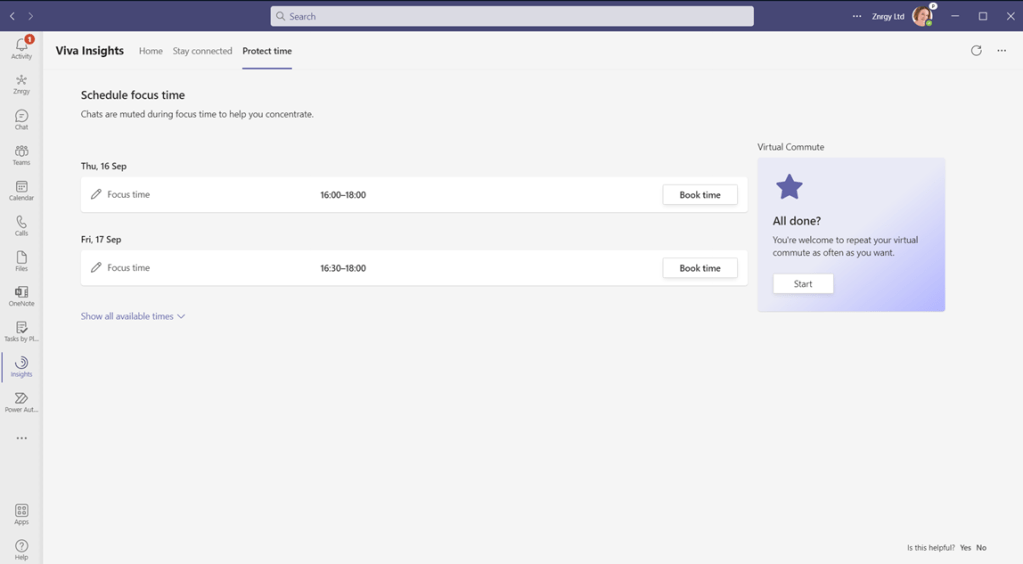
Protect time allows you to book focus time to avoid your colleagues filling your diary.
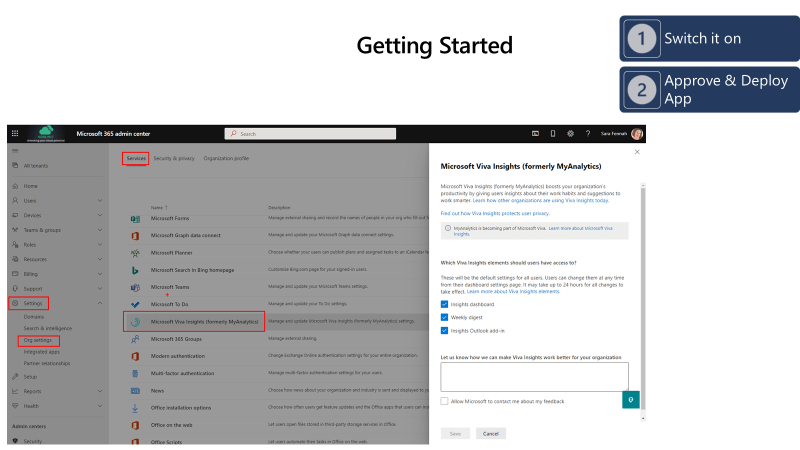
Getting Started
For the free version of Viva Insights, simply turn on the features from the Microsoft 365 Admin Center. In https://admin.microsoft.com/ choose Settings then Org Settings followed by Services and Microsoft Viva Insights (formerly My Analytics). Tick on the required features and click Save.
Adding a license for Viva Insights bring in the Workplace Analytics features. I’ll be posting a blog on the set up experience separately to this one detailing onboarding with Viva Insights per user licenses. With the per user license you add extra features.
Connections bring your SharePoint based Intranet into Teams and with use of the SharePoint Global Nav Bar, can bring the whole of your SharePoint into Teams and simplify the navigation process for users. With the use of the cards you can bring other apps and tools into Teams too, such as tasks, holiday booking apps, etc, etc.
Deploy the Viva Connections App into Teams for your users (via Teams Admin Center)
What you get out of Viva Connections depends upon the use made of SharePoint intranet and Yammer. To bring Yammer into Viva Connections we use the Viva Connections Feed or Yammer web parts on your SharePoint Home Site. For details on creating a Home Site for use with Viva Connections see this article.
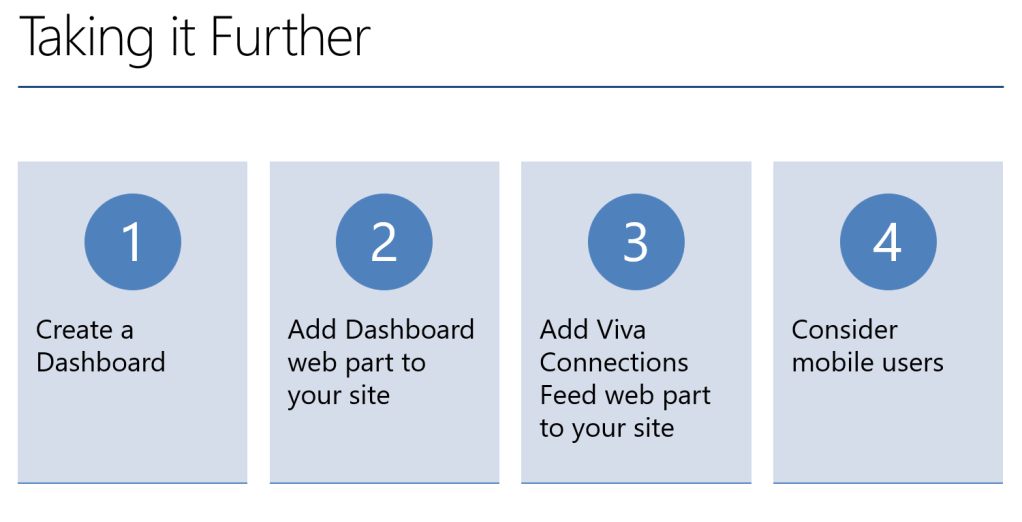
Getting More from Viva Connections
To get the most from Viva Connections you should
Add a dashboard as that’s where your mobile users land. Include at least a website card pointing to the intranet here.
Add the Dashboard webpart to your Home Site, so desktop users get the advantage of the dashboard cards too.
Add the Viva Connections feed web part to your home site to bring News and Yammer Conversations in. This could replace the News webpart.
Consider mobile users. Always check the mobile experience and make sure your mobile only users have easy access to the required tools.
Viva Topics
Topics itself is not very exciting looking a site. But that’s NOT the main benefit. Topics is there to help your organisation make more of the knowledge trapped inside your Microsoft 365 environment.
Viva Topics is not suitable for all organisations, there is a minimum amount of data and activity that you need before it can work as designed. However any organisation that meets these can benefit. My tenant has one main user (though 5 in total) and topics is still benefiting me, saving me a lot of searching and rewriting. This will only improve with the items on the roadmap (such as managed metadata integration plus messaging & content links to topics).
Very simple to set up, but it does take 3 days to 2 weeks before topics really start to appear. You then need to review and publish your topics before the links in content start to work. Currently only SharePoint pages will surface the topic links, so be sure to test there first.
Viva Learning
Today
Viva Learning is all about collaborative learning, it isn’t a LMS, but many of the tools that can surface learning their learning materials via Viva Learning have their own LMS built in.
With the free license you only get integration with
Microsoft Learn
LinkedIn Learning Free or Enterprise Subscriptions
Microsoft 365 Training
Your Own SharePoint based Content
Currently the paid license adds (with * indicating some content shown without subscription to that service):
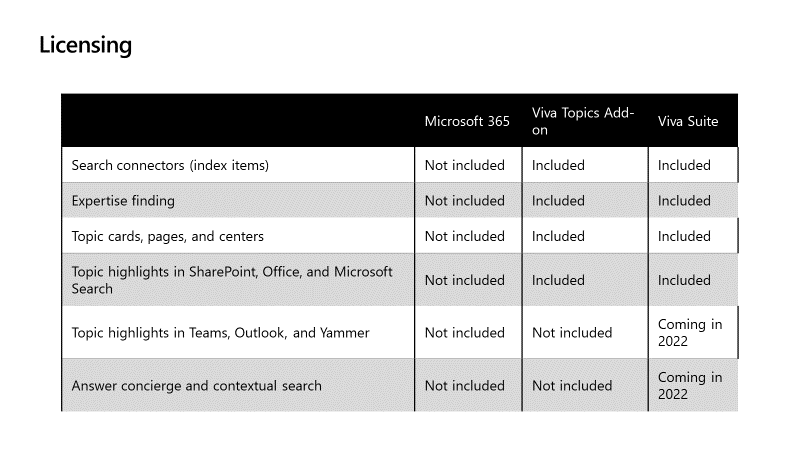
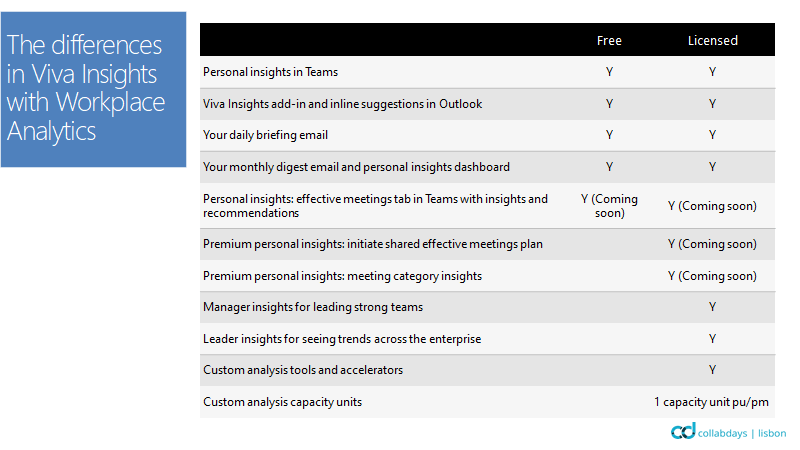
Some of the features of each module are included in Microsoft 365 licenses, except Viva Topics. You can license the modules separately or (announced at Ignite on 2nd November 2021) via a suite license. Currently the suite license is discounted from £12 to £6.80.
All prices quoted are UK cloud direct pricing. Please check with your licensing organisation for exact pricing.
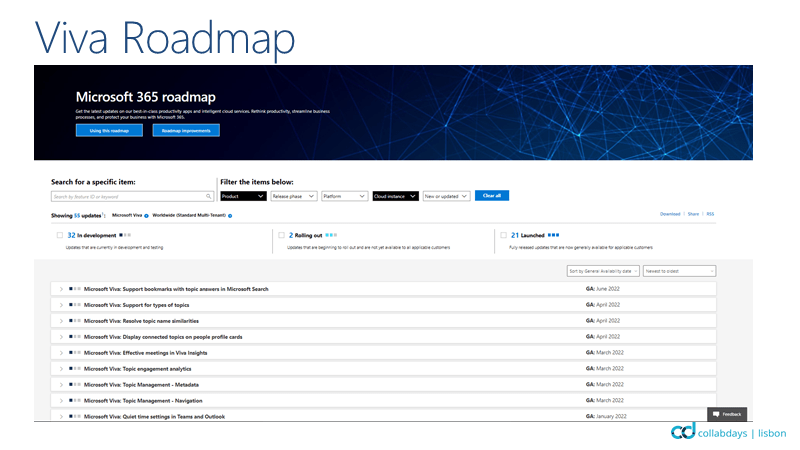
Coming Soon
All Viva module updates are detailed on the Microsoft 365 Roadmap. This link directs you to the roadmap filtered for only Microsoft Viva updates.
One thing that is missing is the Viva Topics App in Teams, which keeps showing up in many marketing images, hopefully that will come when Teams supports showing topics cards from messaging content.
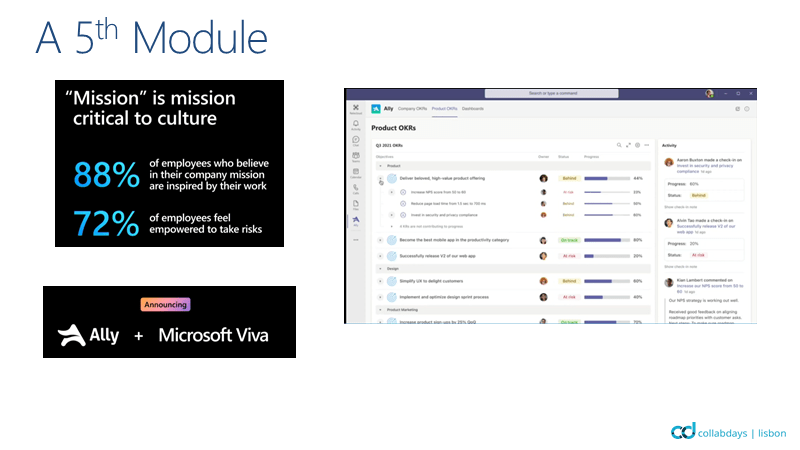
Another key announcement from Ignite which was trailed when the deal to purchase Ally.io was signed is that Ally will be the 5th Viva module.
Ally is a Targets and Goal management tool to help align organisation objectives & mission with individuals targets and key performance indicators. See announcement of purchase for more info on the tool.
Viva Topics is the second product (after SharePoint Syntex) which has come out of Project Cortex and is available as a 30 day trial now from https://aka.ms/BuyVivaTopics.
Call me curious, but I wanted to have a go. According to comments in the Viva Tech community it takes 2 hours to 2 weeks before Viva Topics is ready to go. It did take 2 days before my first suggested topic showed up, and I’m still at just the one suggested topic. So I’m not quite able to write a blog about how it works yet. But I thought I’d share the set up experience.
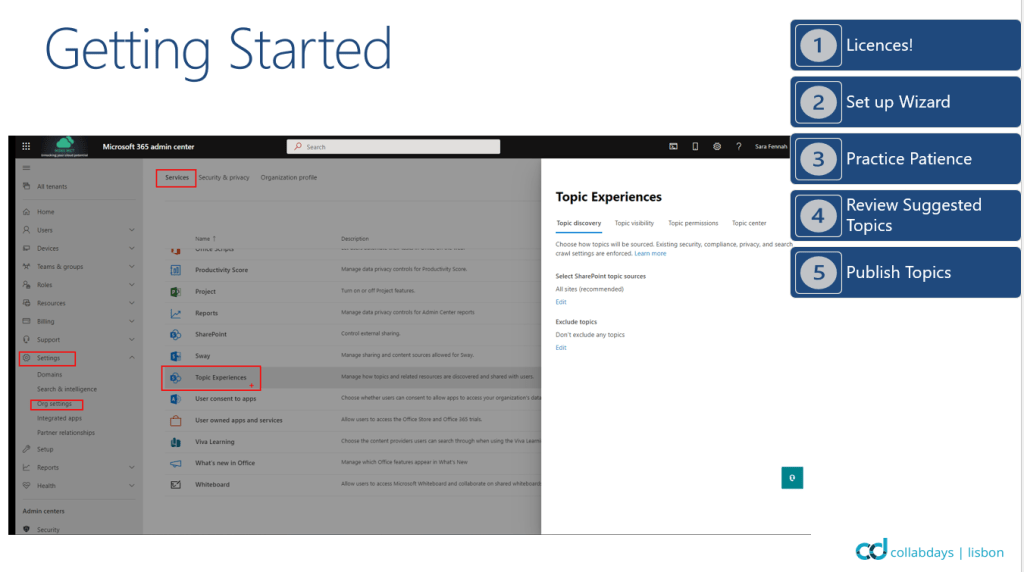
Having signed up for a trial and assigned my admin user a licence, I started in the Microsoft 365 Admin Center under Settings – > Org Settings -> Services and captured the screens as I went. I’ve also shared the information links shown on these screens.
When you first visit the Topics dashboard (i.e. the SharePoint site you created) it will be blank and you may think it hasn’t worked. Just leave it to do it’s thing for at least 2 hours and then you’ll see the Get Started page and Manage topics page populate with the webparts. Here’s the Get Started page and it’s links.
Eventually, your home page will start to show you recommended topics but these will take a bit longer to have more information in, so I’ll return with another post when I have more to see.
eDiscovery is used to conduct content investigations in Microsoft 365. There are 3 eDiscovery solutions with slightly features. All 3 can be used to discover Teams data, though not ALL Teams data is discoverable.
Discoverable Teams information and where it is stored for compliance purposes such as eDiscovery is shown in the table below.
Content
Stored in
Notes
Chat Messages
User Mailbox
This includes emojis, gifs, stickers and inline images as well as content displayed in ‘cards’
Files Shared in Chat Messages
OneDrive
It is also possible to set retention so the version of the file shared is discoverable (see Ignite 2021 updates in Further reading)
Teams Channel Messages
Group Mailbox
This includes emojis, gifs, stickers and inline images as well as content displayed in ‘cards’
Files shared in channel chat messages
SharePoint
It is also possible to set retention so the version of the file shared is discoverable (see Ignite 2021 updates in Further reading)
Edited Chat & Channel Messages
User/Group Mailbox
For users/groups on hold, then the previous version of the messages are also available to eDiscovery
Meeting Chat (Private Meetings)
User Mailbox
Files shared in Meeting Chat (Private Meetings)
OneDrive
It is also possible to set retention so the version of the file shared is discoverable (see Ignite 2021 updates in Further reading)
Meeting Chat (Channel Meetings)
Group Mailbox
Files shared in Channel Meeting Chat
SharePoint
It is also possible to set retention so the version of the file shared is discoverable (see Ignite 2021 updates in Further reading)
Meeting & Call Metadata
User Mailbox
This includes start/end time of meeting & join/leave time for each participant
Stored in OneDrive of user who starts the recording/transcript. Recordings can only be
The following content is NOT discoverable using eDiscovery:
Audio recordings
Code snippets
Channel name
Reactions
Feed notifications
The storage location shown above is important for two reasons:
To help choose locations to include in the eDiscovery search
To understand where the data show up when exporting the results. Anything stored in a mailbox will be exported into a pst file, while OneDrive & SharePoint content is exported in file folders.
In the walk through we are going to use the Content Search functionality as we are focusing on the search and export functionality. Core eDiscovery and Advanced eDiscovery can both be used to find the Teams information and have different additional functionality to the Core Search.
The features of the different eDiscovery solutions are summarised in the following table which is sourced from the Microsoft Docs article on eDiscovery (see further reading at the end of this article)
Content Search
Core eDiscovery (additional to Content Search)
Advanced eDiscovery (additional to Core)
Search for data/content Keyword queries and search conditions Export search results Role based permissions to use
Case management Legal hold
Custodian Management Legal hold notifications Advanced indexing Review sets incl filtering OCR Conversation Threading Collection Statistics & Reporting Tagging Analytics Predictive coding models Error Remediation Computed document metadata Transparency of long running jobs Export to Azure storage location
Content Search Walk Through for Teams Data
In this walk through we are conducting a search to check for content related to a new project. This content has been spread across multiple Teams, including private channels and in direct 1:1 chat with files having been created and saved in various locations.
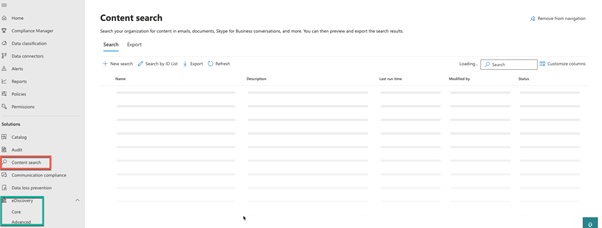
Navigate to the compliance center https://compliance.microsoft.com and choose Content Search. Although Content Search is an eDiscovery function it is not included in the eDiscovery sub menu.
Click New search, then complete the Name and Description for the search you want to perform.
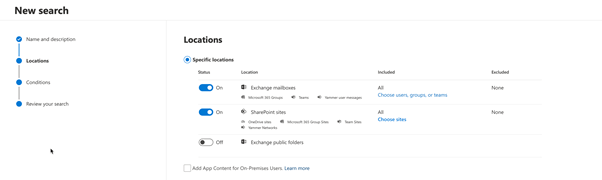
Click Next then choose the locations to be searched. To cover all Teams locations you will need to include mailboxes for all Teams users including guests and all SharePoint sites for the Teams.
There are potential issues with the example here, in that we have included all mailboxes and all SharePoint sites. The results will include all discoverable Teams content but also emails and files in other SharePoint sites. This may not be detrimental but you should be aware that the result will include more than Teams data.
Click Next and then create your search using combination of keywords and conditions such as creation date, sender, etc.
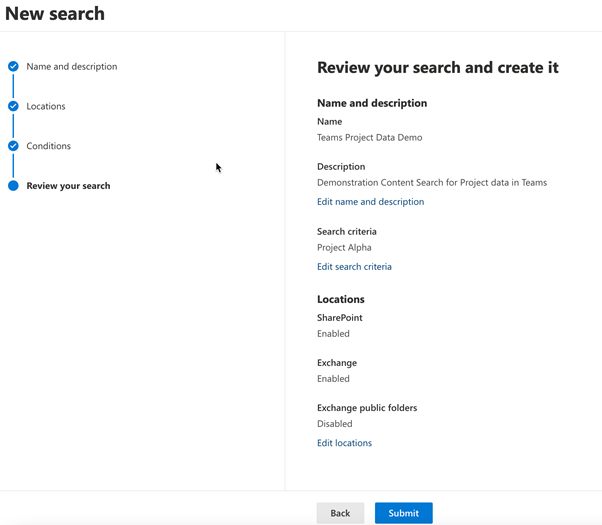
Click Next and review the summary of the setting you have specified before clicking Submit to start the search.
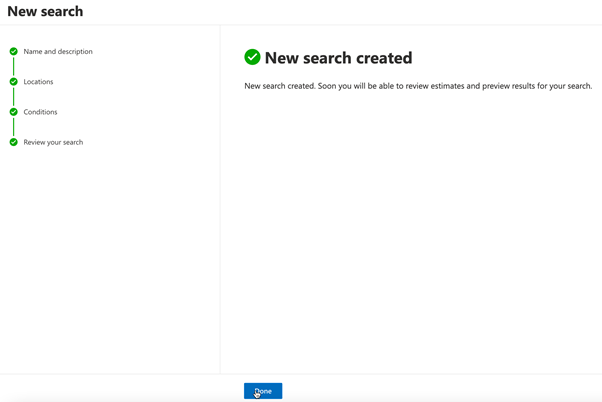
Next you will see confirmation that the search has been created and is in progress. Click Done. How long it take till the results are available will depend on the volume of content being searched.
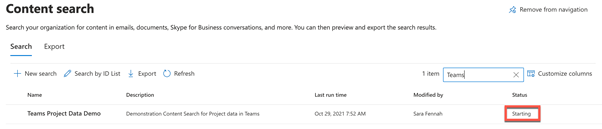
When you click Done you will return to the Content Search page and will be able to see the status of your new search
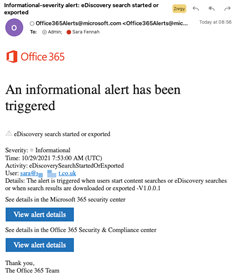
Note that an alert has been sent to all Global Admins that an eDiscovery Search has been started. This is the default behavior.
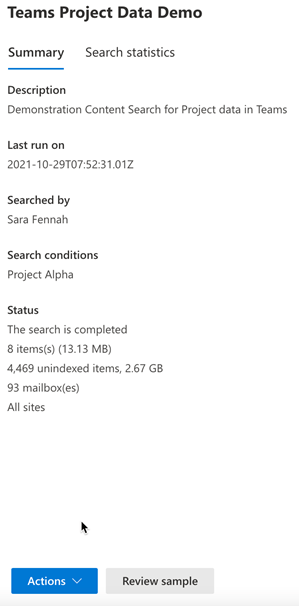
Once the search is showing as completed, click onto the search name to load the results.
You can see the search statistics, showing how many items have been found.
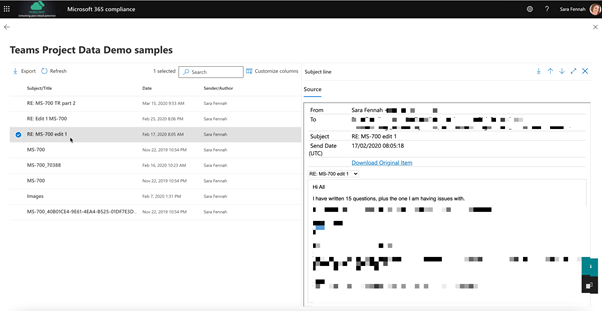
Click Review sample to check the information which has been found to verify your search worked as expected.
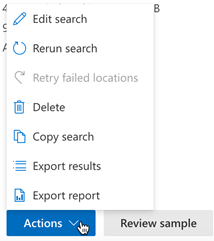
You can then export the results or a report on the results from the Actions menu.
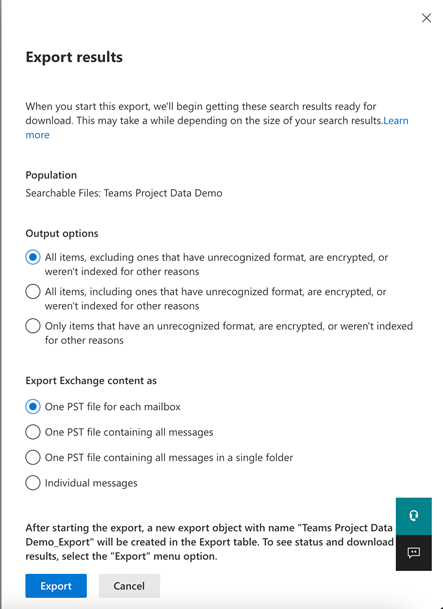
If you choose to export the results then you will be presented with options of how you want to export the discovered data.
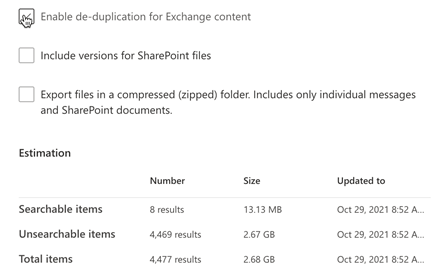
Don’t forget to scroll before clicking the Export button as there are further options, which never seem to fit on the one screen.
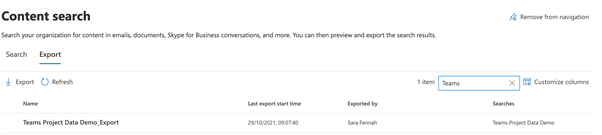
Your export will be prepared and once ready will be found under Export on the main Content Search screen. Click on the name of the search you want to export data from.
You will need the Export Key, so be sure to copy it! Click Download results to start the download of the exported results.
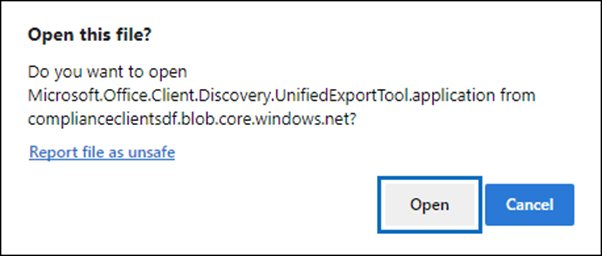
You should see a pop up asking to open the file. This is the specific tool used for eDiscovery, called the eDiscovery Export Tool.
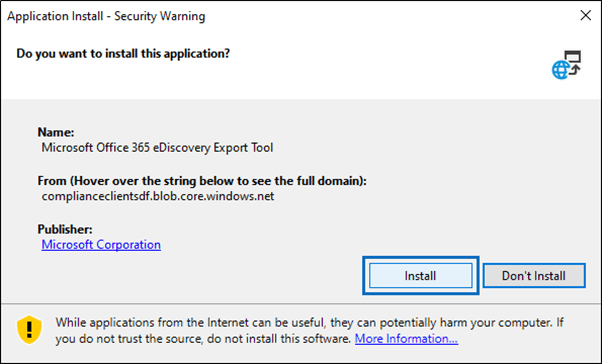
Install the application.
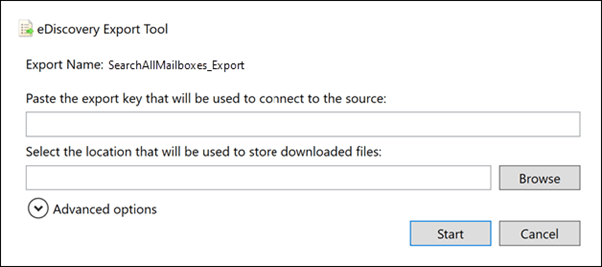
The next prompt will ask for that Export key and the location you want to save the exported pst and file folders to.
Once extracted you will be able to open the file folder and add the PST files to Outlook to review. Remember teams messages will be in the PST files in Teams Chat folder.
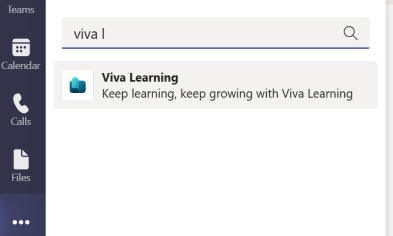
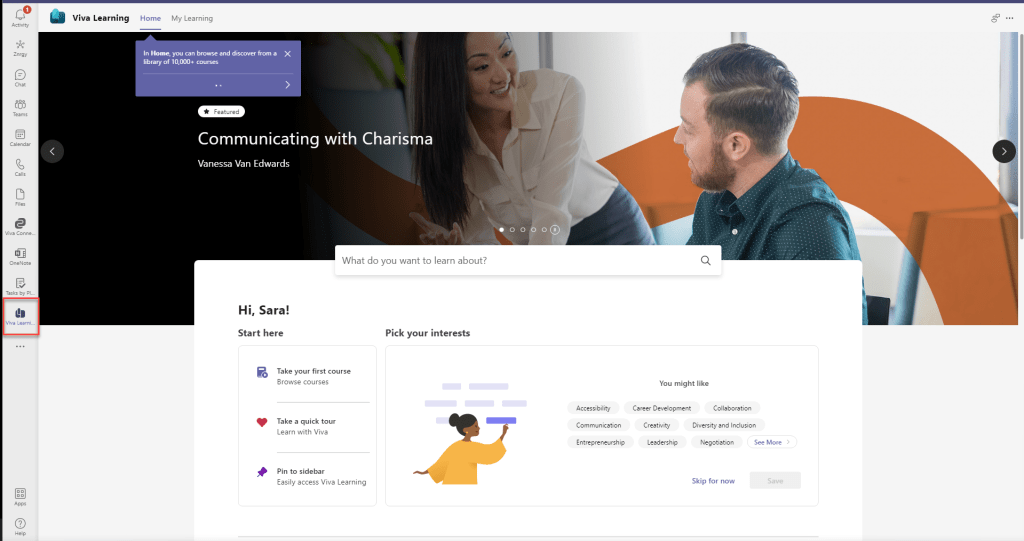
Once your organisation has given you have access to Viva Learning, you will find it on the app under the … on the side rail and searching for Viva Learning.
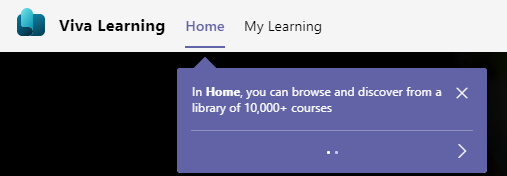
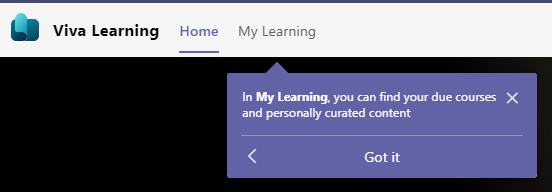
On first run, you will see tips on Home, My Learning and Settings links, as shown below.
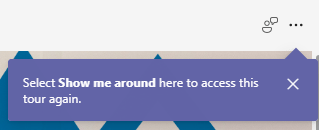
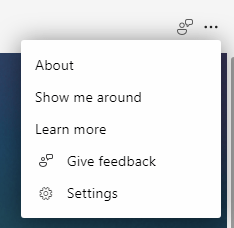
The … menu will allow you to run these tool tips again using Show me around
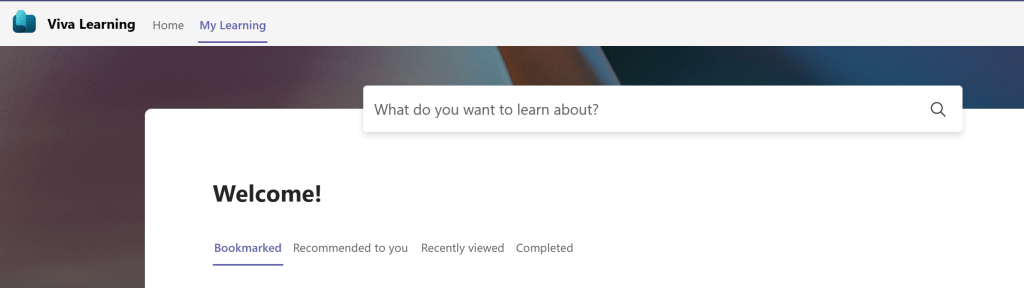
On the home page you see featured content, which is controlled by Microsoft, followed by a guide to help get you started.
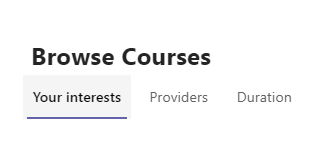
Below that you can browse all available learning content grouped by your Interests, the Providers, or course Duration.
On the My Learning page you can view learning you have Bookmarked, which has been Recommended to you by colleagues or your manager/employer, those you have Recently viewed and also those you have previously Completed.
Personalise Your Viva Learning
It is recommended that you start by picking your interests
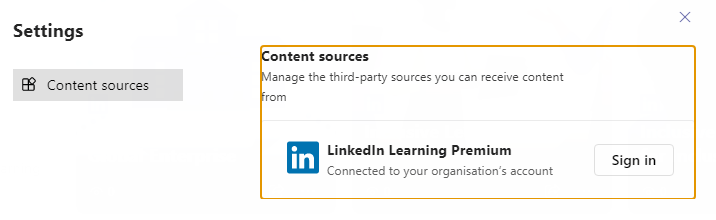
Next make sure you are getting all the content you are entitled to by checking sign in/permissions for your available content sources from the … menu and choosing Settings.
Please note that the LinkedIn Learning premium option only works with LinkedIn Learning organisational accounts but not personal premium LinkedIn accounts.
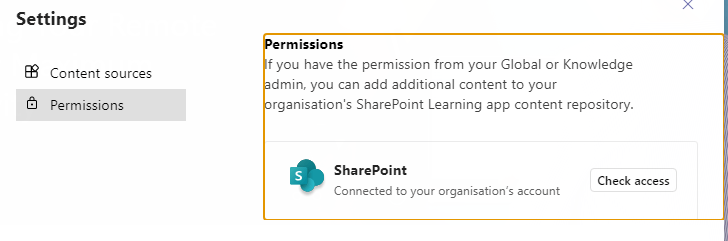
Under Permissions you can check that you have access to the SharePoint site which populates the list of resources from your own organisation.
Clicking the Check access button will open the SharePoint list which is used to publish the information into Viva Learning. You will most likely have read only access to this. If you do not have the required permissions you will see a Request Access page when you click on the Check access button.
You are now ready to get started using Viva Learning.
Finding and Bookmarking Content
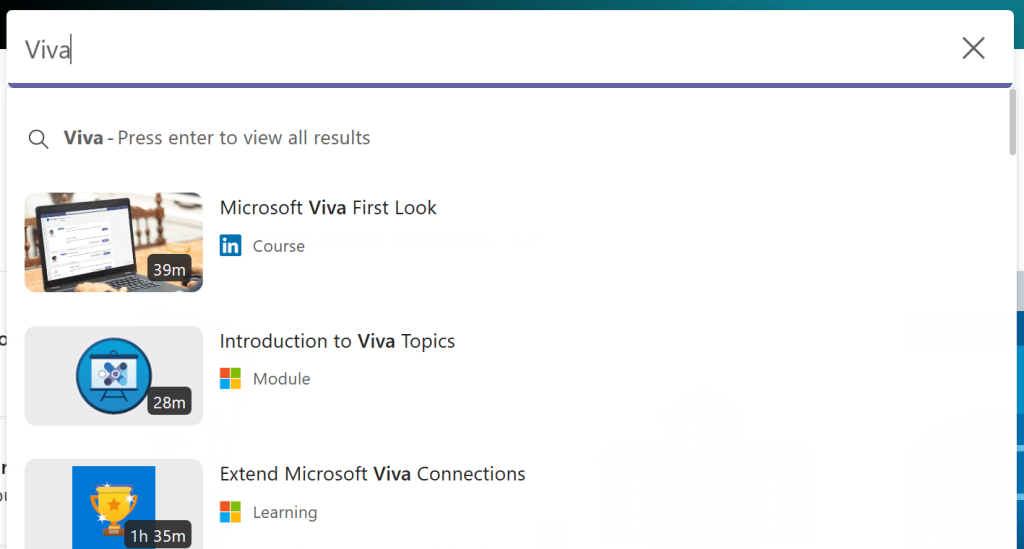
To find learning content you can use the Browse courses section of the home page or use the search box to search for specific terms.
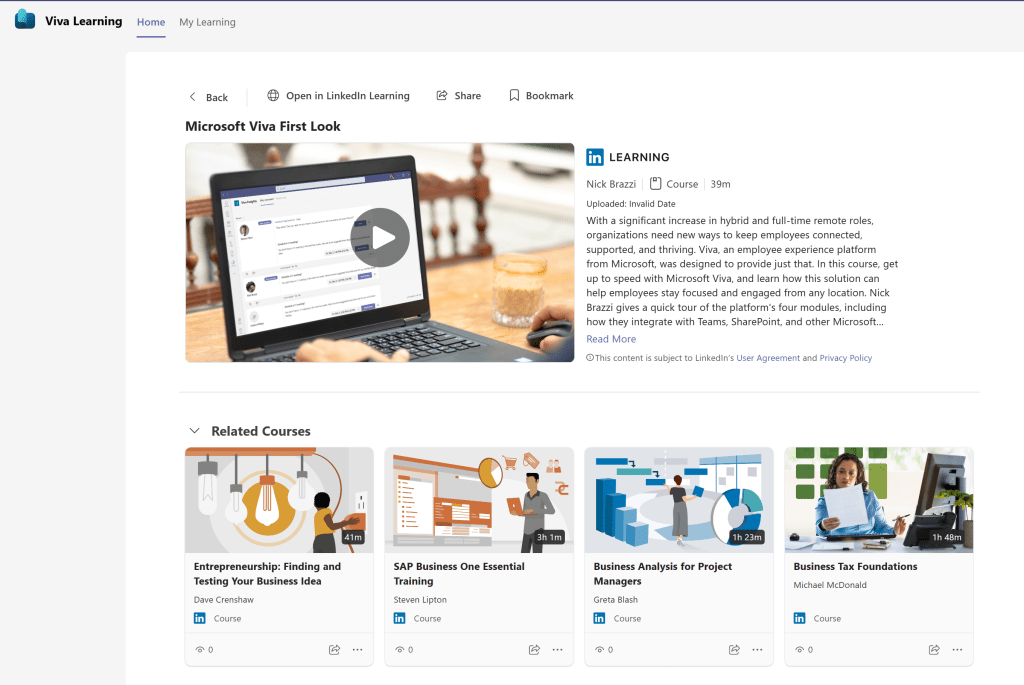
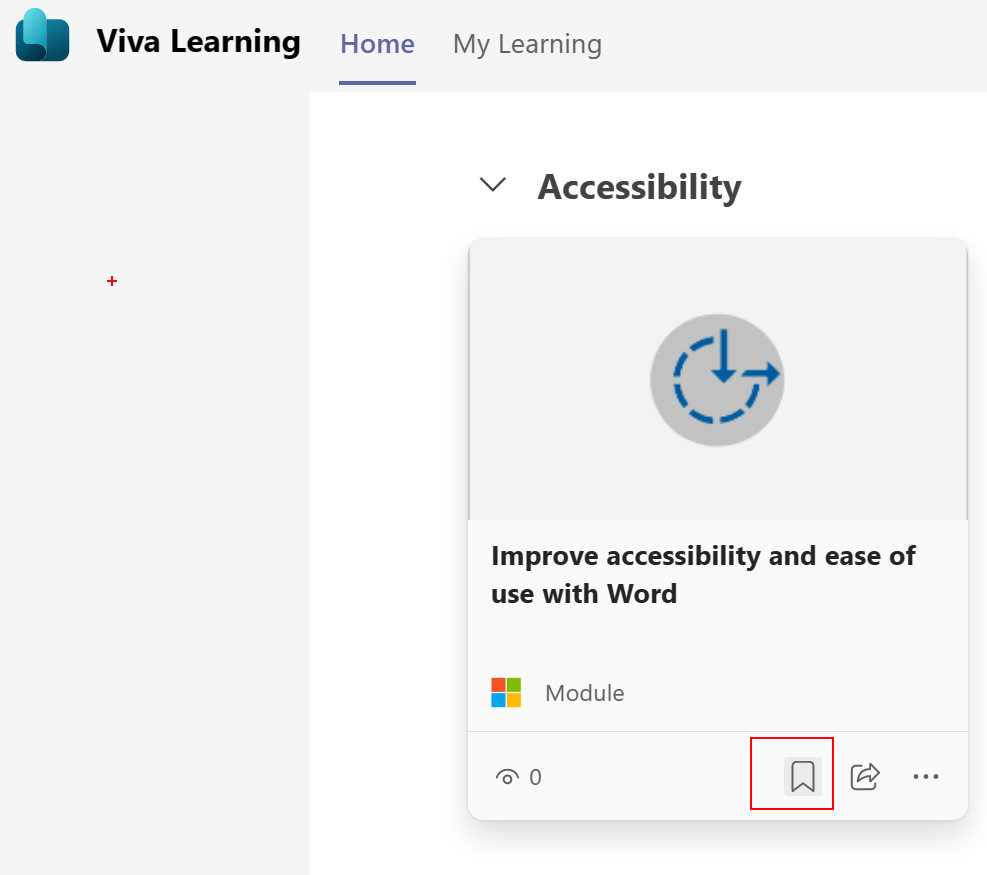
When you click onto the learning topic, from search or browse, you can see a summary of the content plus you have the ability to Bookmark the content to find it again more quickly from the My Learning page.
You can also bookmark directly from the browse courses page.
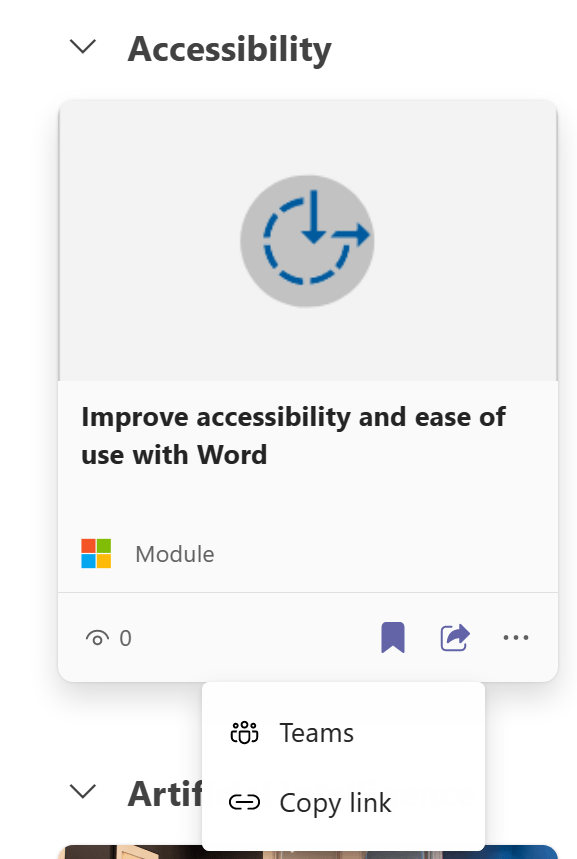
Share Content with Colleagues
Both the course detail and browse courses pages, also include the ability to share learning content with colleagues via Teams Message or by copying the link to share in a different messaging tool, such as email.
The process for setting up the free version of Viva Learning for your organisation starts in the Microsoft 365 Admin Center https://admin.microsoft.com/
Navigate to Settings then choose Org Settings and Services where you will find Viva Learning
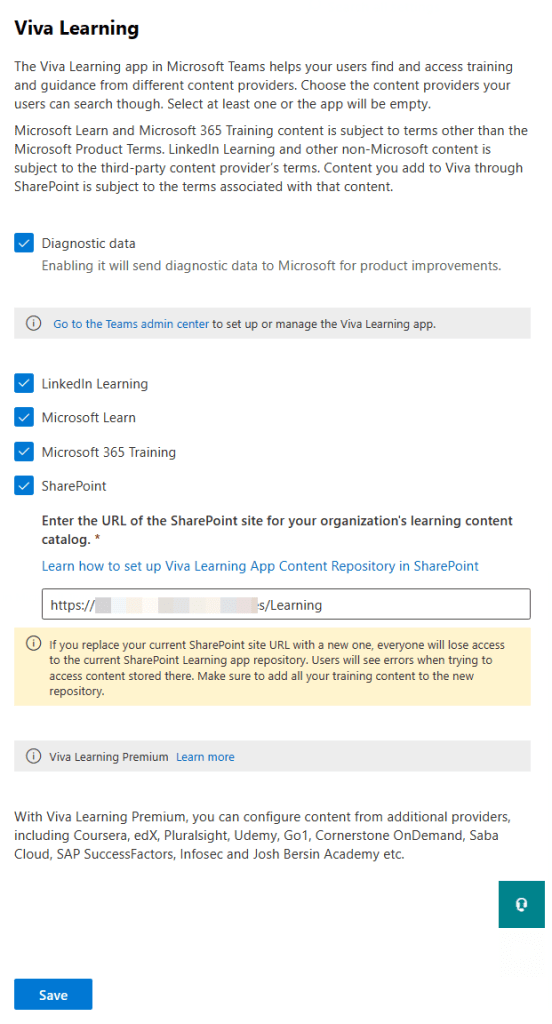
In the Viva Learning blade, check the items you want to make available to your users, including inputting the address of the SharePoint site which will host the Learning App Content. (more on this in a little bit), then click Save.
If you add any number of Viva Learning paid licenses to your tenant, you will see additional options within the settings screen, but they do require their own subscriptions, as does LinkedIn Learning premium.
Whilst this is a new system and we all need to build up expertise, it appears best at this time to create a new site for this. This should simplify permissions and support for Multi-Geo organisations. You can only have one nominated site per organisation and all Viva Learning users will need read access to the list, though you can modify item permissions if needed to limit visibility. If users do not have access to the linked resources they will stillsee the folder & what files (learning resources) are in it, but not access those files.
The site used can be changed but you will need to recreate the list if you do change sites. Please do read the guidance before picking & setting your site.
In this walk through I created a new site and gave everyone in the organisation read only access to the site.
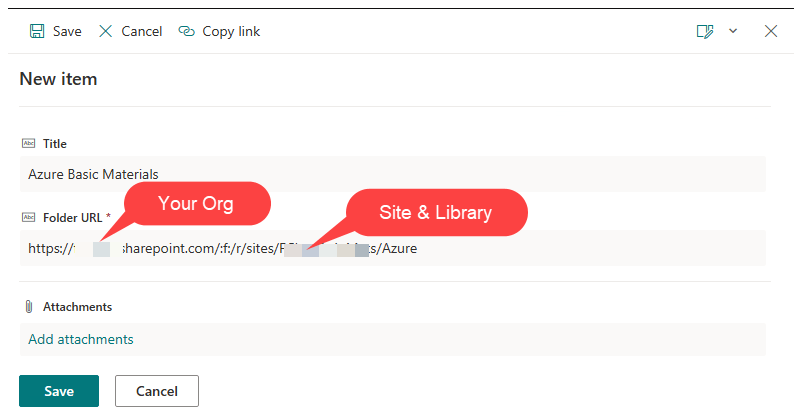
Once declared as the site for Viva Learning the Learning App Content Repository list is added to the site which will hold the list of other folders/libraries in SharePoint that contain learning materials.
Content is added to Viva Learning by creating an entry in the list to the folder containing the learning content. Remember that everyone who has access to the site will see the folders you add, including file details but only be able to access content they have permissions to. Newly added folders take up to 24hrs to appear in Viva Learning.
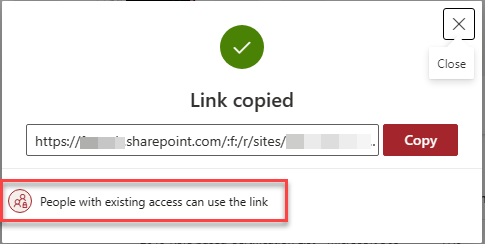
To add a filer or folder to the list of resources, locate the file/folder and choose copy link from the …
Be sure the link is for people with existing access
And copy the link then paste into a new entry in the Learning App Content Repository list
Teams Admin Center
To make the app available in Teams for your users you need to set up the Viva Learning App in Teams Admin Center https://admin.teams.microsoft.com/
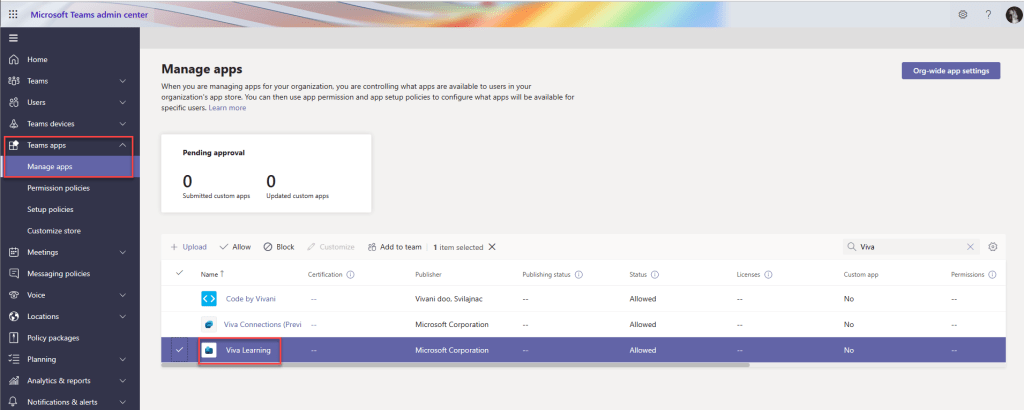
First under Manage Apps in Teams apps section, locate the Viva Learning app
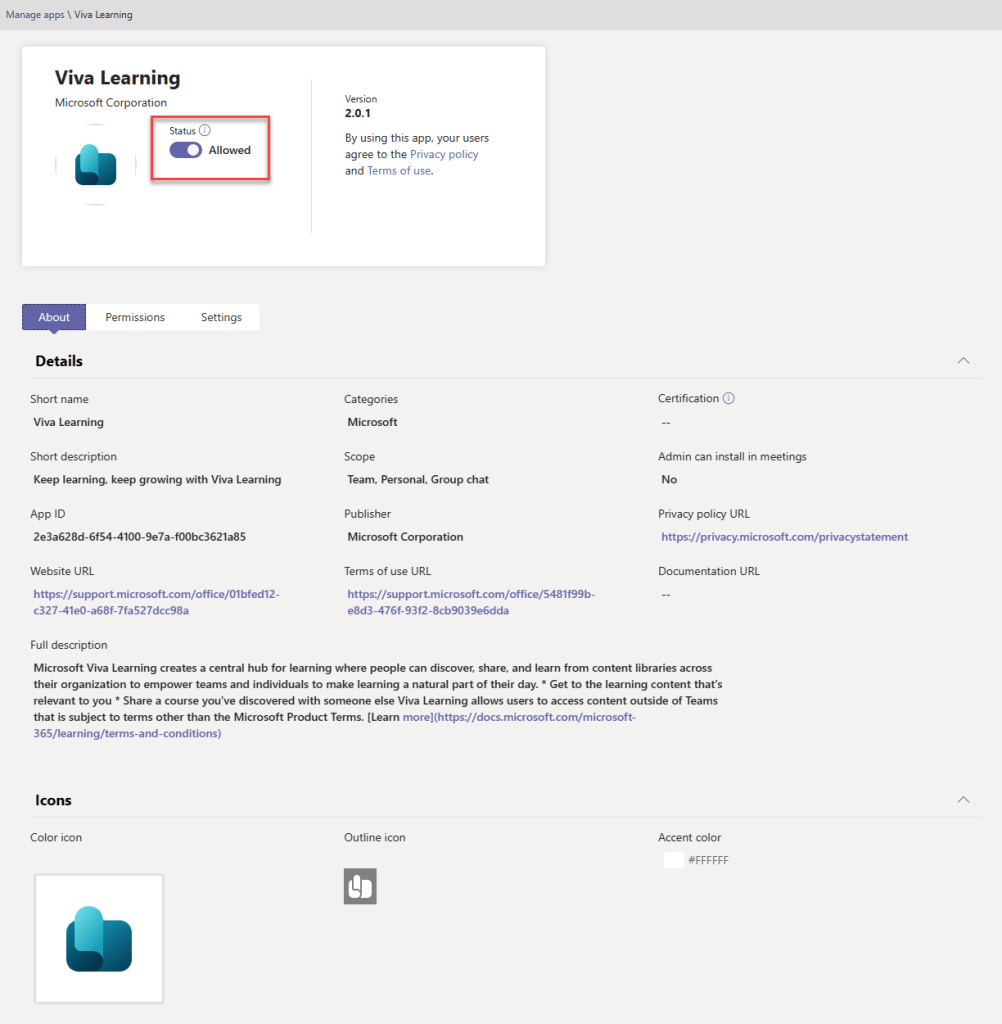
Ensure the app is set as Allowed
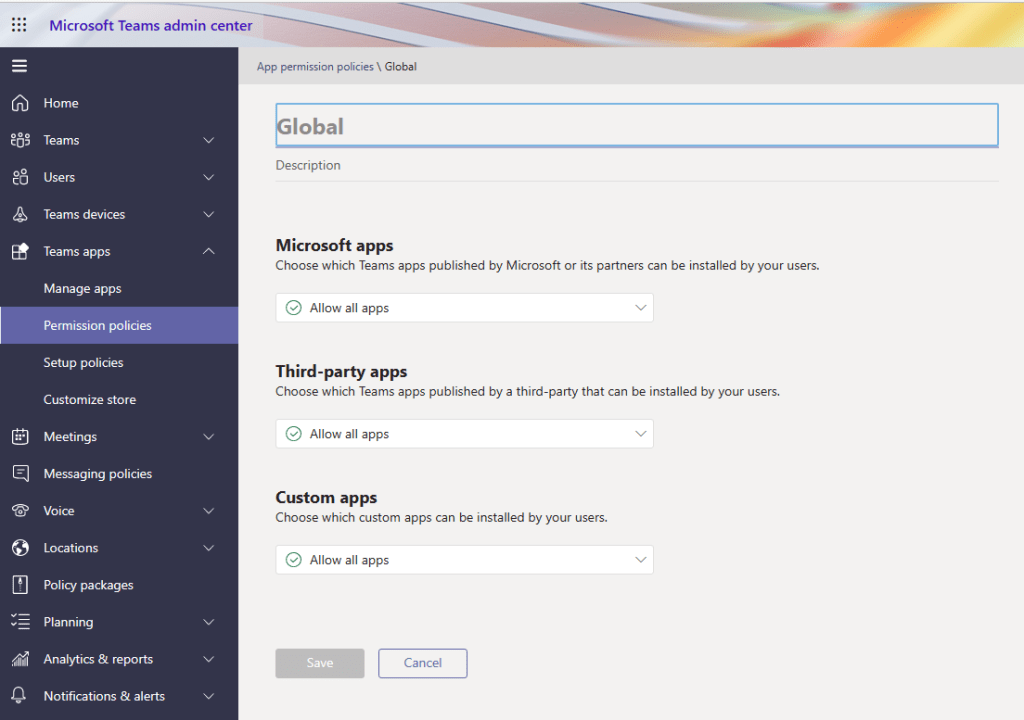
Next ensure the users are allowed to use the app in the App permission policies. Depending on your Apps permission policy settings you may need to enable Viva Learning in each policy. Viva Learning is a Microsoft app, so will automatically be available for your user if you allow all apps in that section.
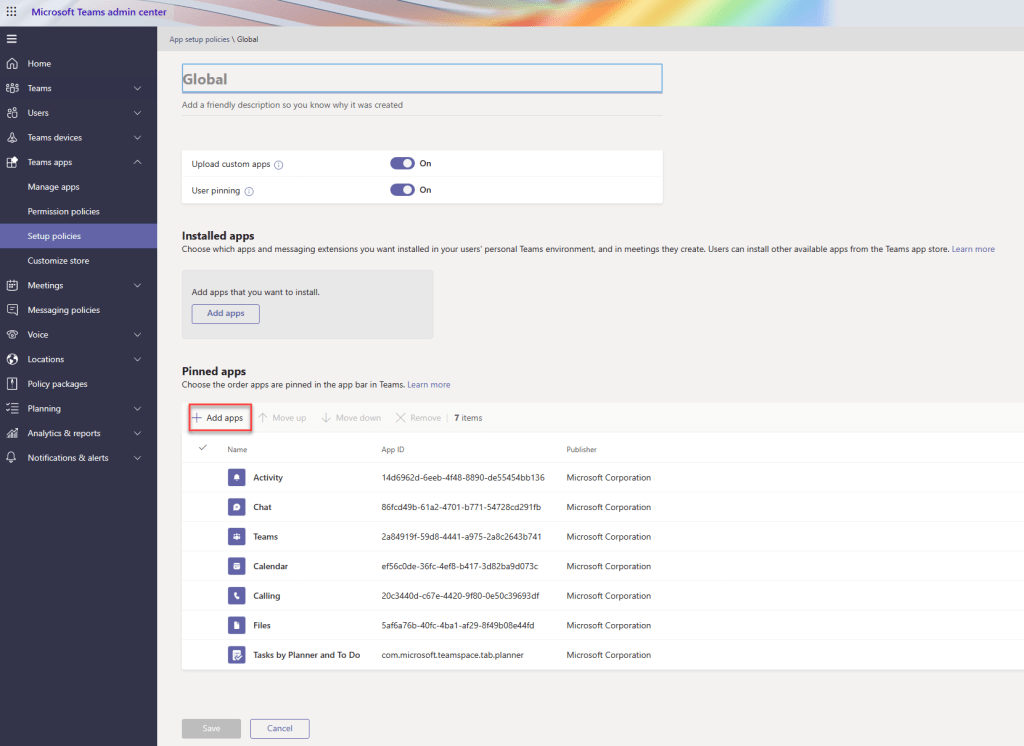
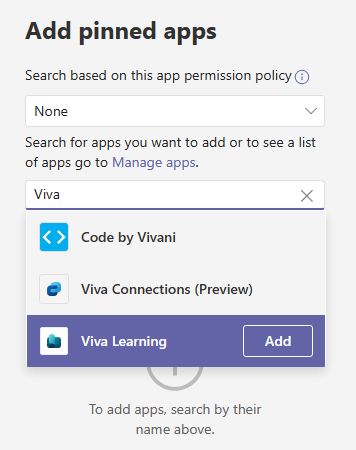
To add to the side rail for all users automatically you need to install the app using one or more app set up policies. To add the app, click Add apps under the Pinned apps section
Search for Viva Learning and click Add
Save the policy and navigate to Teams to check if it is available. This may take a little time and you will need to restart Teams desktop app or log in fresh to Teams web app to check availability.