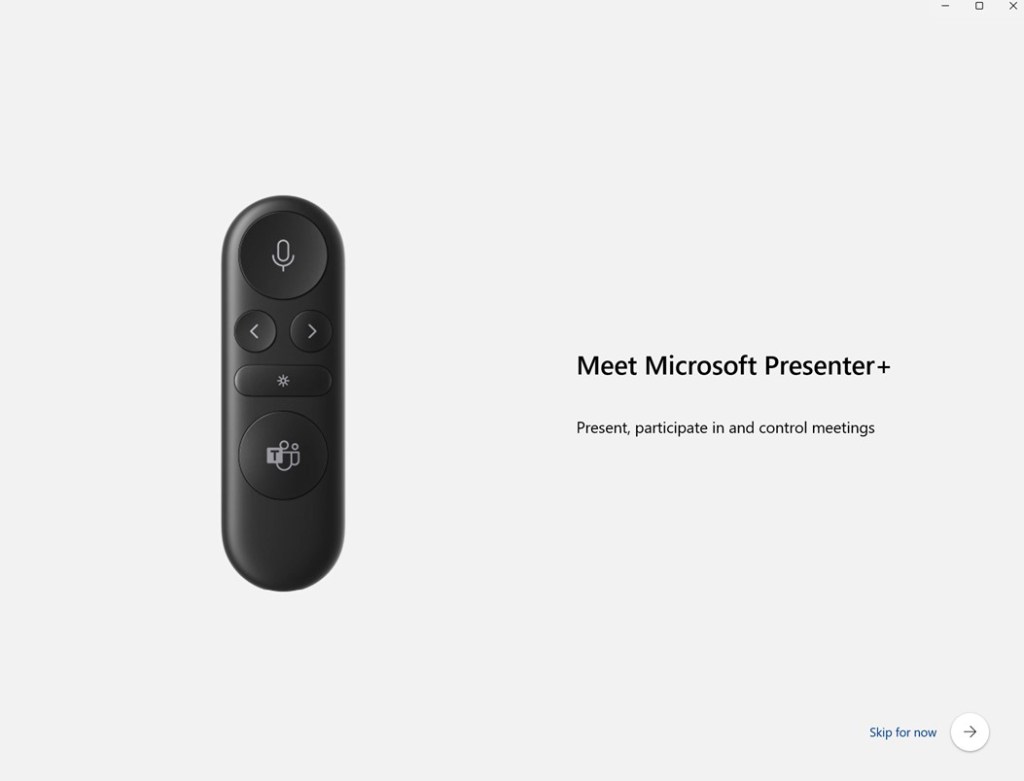
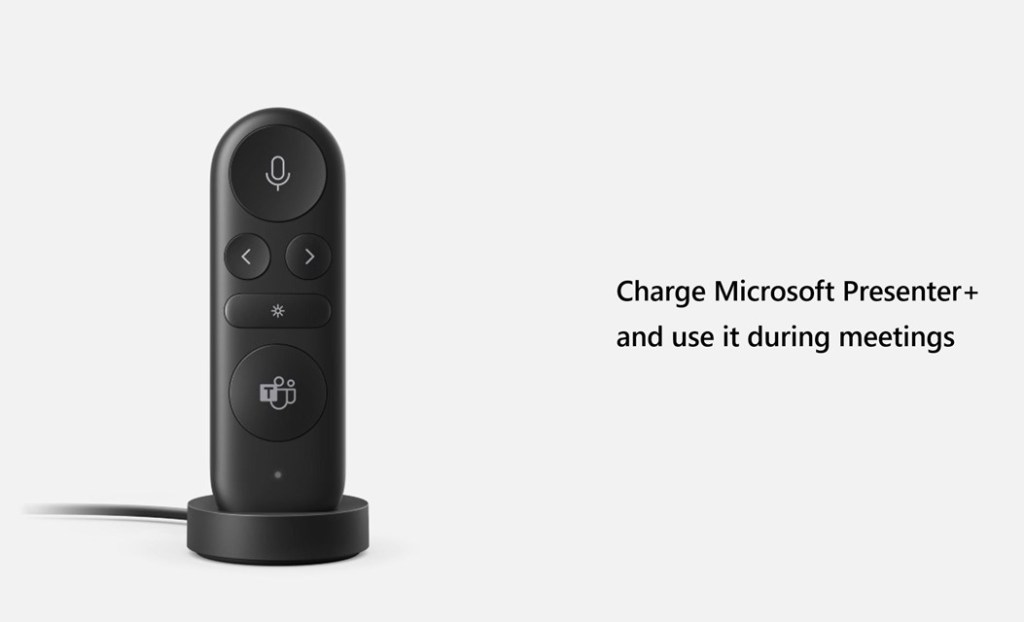
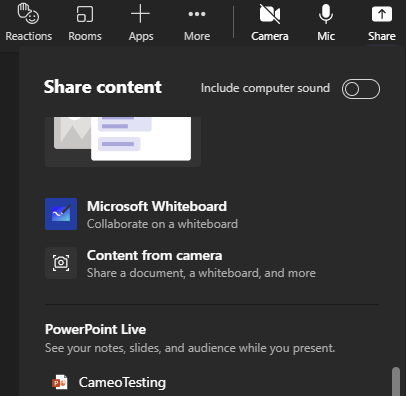
The Microsoft Presenter+ is a presentation remote device and Microsoft Teams remote in one device. Whilst many presentation remotes do advance slides in Microsoft Teams meetings, including when presenting with PowerPoint Live inside Microsoft Teams, but you will still find yourself reaching for the mouse to mute or use the pointer on your slides. This is where the Presenter+ comes in.
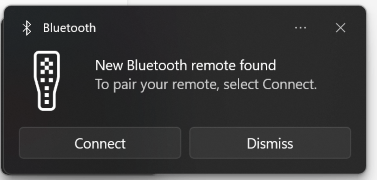
Step 2: Add as bluetooth device, either by from the prompt or manually
Smart Connect Bluetooth Device Prompt in Windows 11
Step 3: Open the Microsoft Accessory Center or follow the prompt to continue setting up your device. Work through the screens to review how the presenter works.
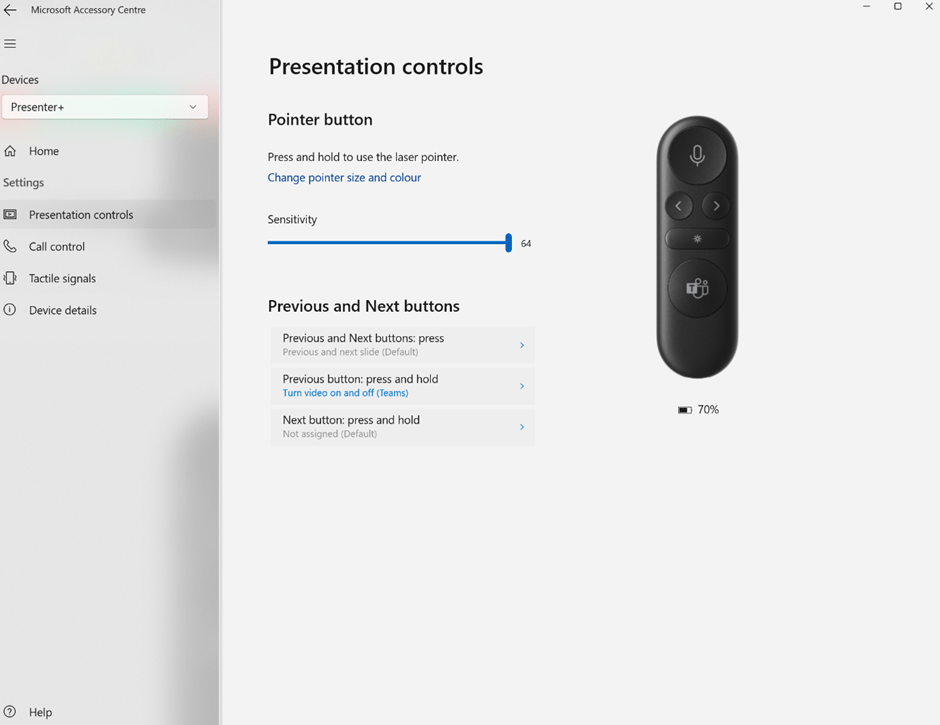
Once set up, the Accessory Center app allows you to customize the Presenter+.
Accessory Center Presenter+ settings
The previous and next buttons have a number of different options for press and hold. The ones marked as (PowerPoint) work with desktop version of PowerPoint only.
Previous button press and hold options
The device also has tactile feedback, also known as vibrations you can customise
Tactile signal options
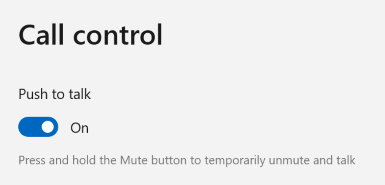
Call control options allow you to enable or disable the push to talk, or temporary unmute feature.
Call Control options
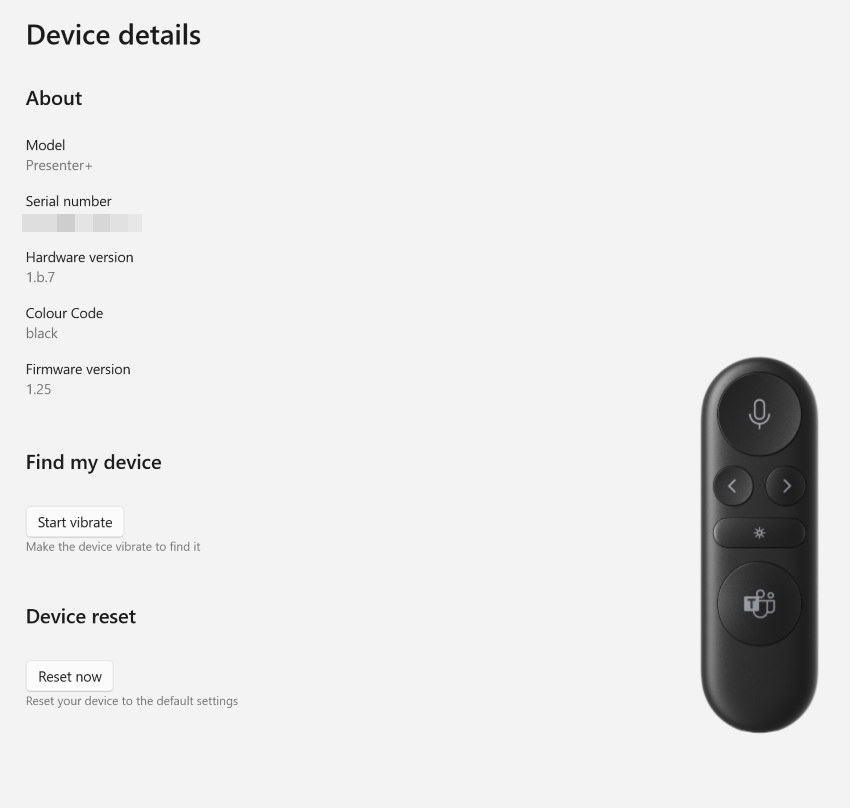
The last screen is Device details, but what I really liked here was the handy find my device button!
Device Details
If you choose to pair the Presenter+ with multiple devices the setting carry over so simply pair and get the same configuration on each device.
In conclusion, although I have yet to use the Presenter+ to present with, in the testing I’ve done I can easily see it becoming the device I use during meetings and my trusty Logitech Spotlight will be my presenter remote for in person as I love the magnify and spotlight options on that device especially when presenting in larger rooms.
Sorry for the bad pun, but it is MS Ignite starting today. The Microsoft community tends to get quite excitable at this time with promises of new toys to play with. But this year Ignite is taking place all over the world at the same time with in-person “Spotlights” as well as the digital conference – a true example of hybrid.
There are also a number of community events happening at the same time. In the UK this weekend we have South Coast Summit, where you can also join in remotely to MS Ignite on Thursday 13th October 2022 see https://www.southcoastsummit.com/ for more info.
As for Ignite, these are my top picks to watch live or on demand. Most sessions will be available on demand 24-48 hours after live broadcast.
And finally after the keynote starts so will the publication of all the blog posts, but my recommendation is to always start with the book of news, which should use the same aka link as previous years https://aka.ms/ignite-book-of-news
You may have seen the information about the changes to licensing for Teams rooms announced at the beginning of September 2022. If not, Tom Arbuthnot did a great write up on it on his blog.
Notifications are now rolling out into the Teams Admin Center for Teams Administrators letting them know about the changes.
If you have a Teams Room device on the older licence, going to the Teams Room pages under Teams devices in the Teams Admin Center, will trigger notifications.
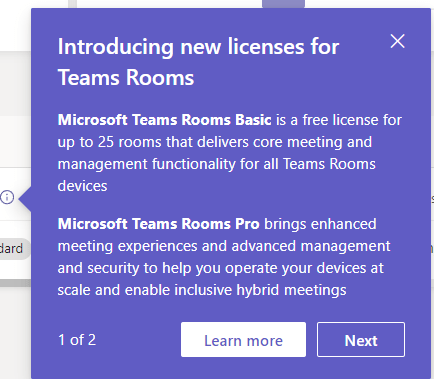
There are two steps to the notifications. Step 1 offers a high level explanation of the two new licences
Step 1 of the tool tip reads:
Introducing new licenses for Teams Rooms
Microsoft Teams Rooms Basic is a free license for up to 25 rooms that delivers core meeting and management functionality for all Teams Rooms devices
Microsoft Teams Rooms Pro brings enhanced meeting experiences and advanced management and security to help you operate your devices at scale and enable inclusive hybrid meetings
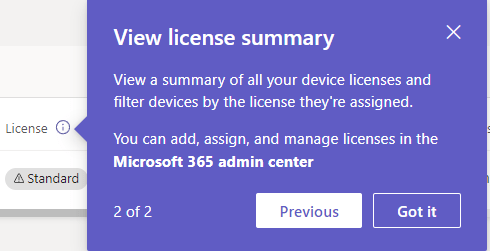
Step 2 offers advice on viewing licenses on existing Teams devices.
Step 2 of the tool tip reads:
View license summary
View a summary of all your device licenses and filter devices by the license they’re assigned.
You can add, assign, and manage licenses in the Microsoft 365 admin center
When hovering over the license column where a device has a standard license the advice is to upgrade.
This notification from reads:
Microsoft Teams Rooms Standard
To use Pro features upgrade this device to a Microsoft Teams Rooms Pro license in the Microsoft 365 admin center before the current license expires.
There is also a warning banner at the top of the page advising an upgrade to pro licenses.
At the time of writing this upgrade option is not available but I understand that the option to upgrade is coming. This is usually done in the Product details page from the Microsoft 365 Admin Center under Billing -> Your Products. On the Product page there should be a link offering upgrades recommended for your org. Currently this is greyed out until upgrade is possible.
Accessibility note: The images included in this article are described in the article including text displayed on them and therefore no AltText has been added to the images. The images show the dialogs/tool tips/warning described in the article.
With the announcement that Shared Channels in Microsoft teams is now generally available, it’s worth considering how you can use this feature within your organization. There are now three types of channels available within a Team:
Standard Channel – Permissions set by the team, available to all team members
Private Channel – Permissions set on the channel and accessible to a sub set of team members
Shared Channel – Permissions set on the channel and available to team members and non team members
Whilst Shared Channels have had a lot of exposure for their use between organizations, you can also use them within a single organization to support cross-team working without the need for an extra Microsoft Teams team.
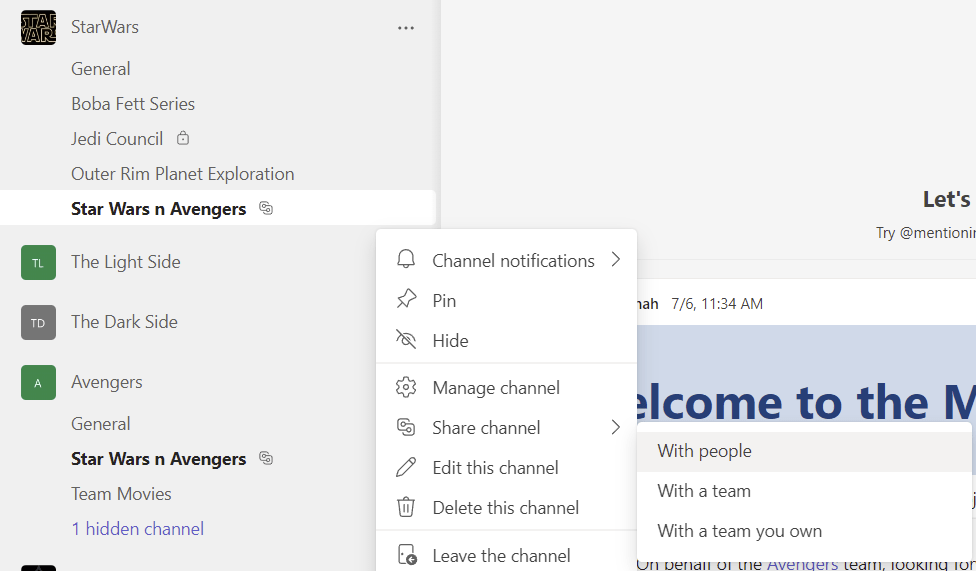
In this scenario, we are the owners of the Star Wars team. In the same organization we have an Avengers team and the two teams want to work together on a joint project. We are the team leader and owner of both teams, so can do all the steps ourself.
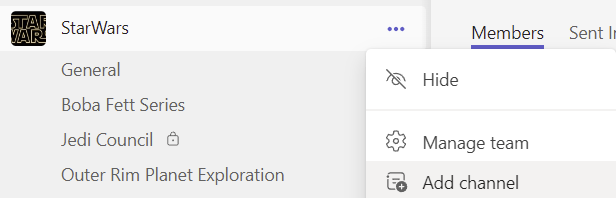
The Star Wars team already has several channels including a private channel.
Star Wars Team channels list with 3 standard channels and a private channel, the Jedi Council.
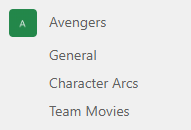
The Avengers team is also an established team with multiple channels.
Avengers team with 3 standard channels
Rather than create a new team for the collaboration, we create a new channel in the Star Wars Team
… menu expanded with Add channel command highlighted
The privacy for this channel is set to Shared and the whole Star Wars team is added to the channel. If required, you could include only a subset of the team members, by unchecking the Share this channel with everyone on the team checkbox.
Create channel dialog with channel name StarWars n Avengers entered, Privacy of Shared selected and share this channel with everyone on the team option checked
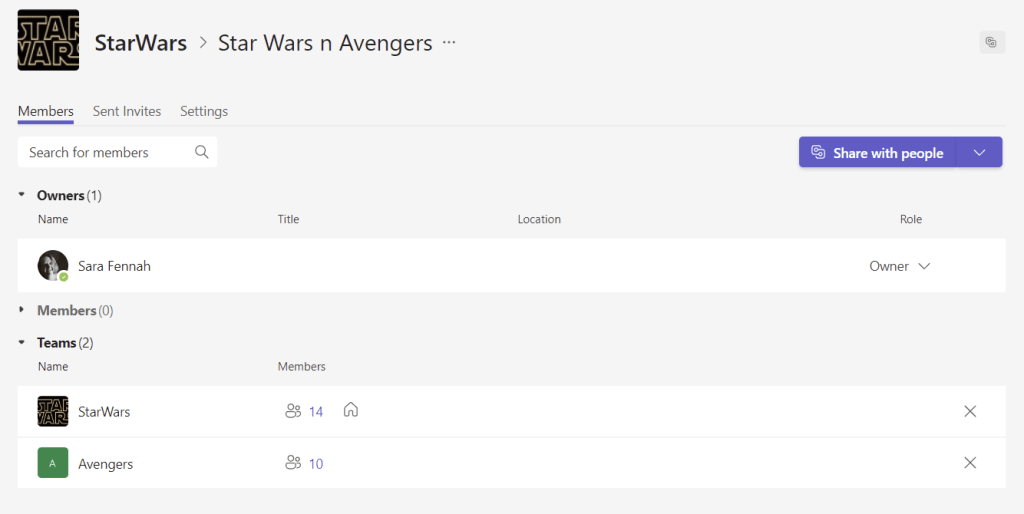
Rather than the individuals from the Star Wars team the shared channel shows the Star Wars team as members of the channel. This means that as people are added or removed from the Star Wars team, they are also added or removed from the shared channel.
Channel setting page on the members tab, showing current user as the owner and StarWars team listed as a member under the heading Teams, showing the team has 14 members. The number of members of the team is a link to the a list of the current members.
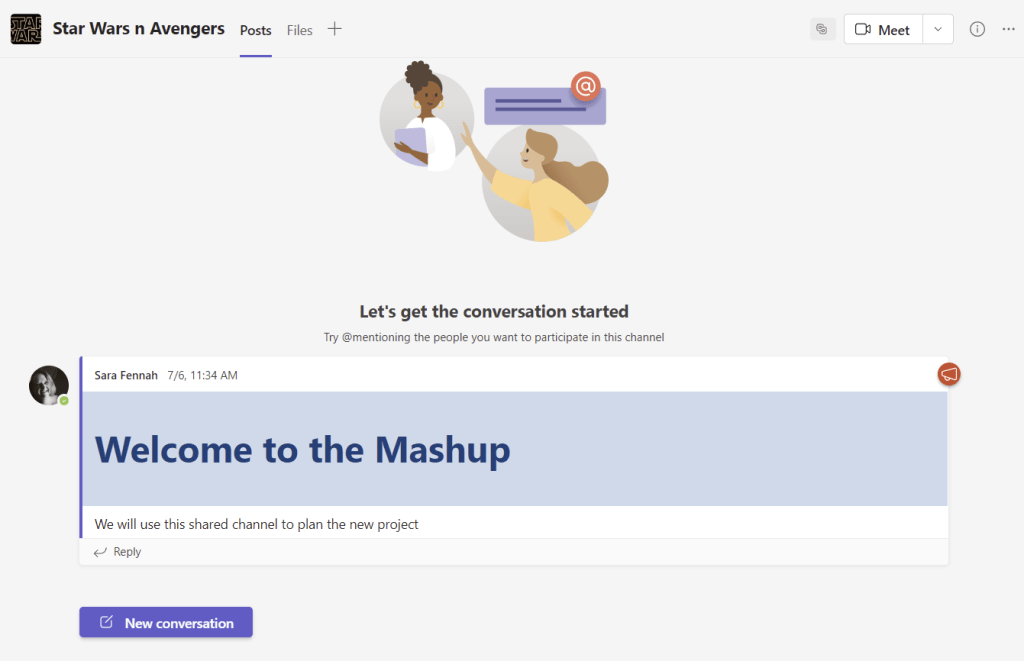
The members of the Star Wars team, can now use the channel from their team as with any other channel in the team.
Channel content on the Posts tab, showing an announcement style message welcoming members to the Mashup, stating the channel will be used to plan the new project.
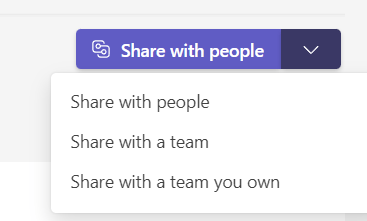
To add the Avengers team to the channel, we choose Share with a team you own from the members page. As we are also owners of the Avengers team, we have full permission to add the team. If we were not the owner we would choose Share with team and initially invite the owner of the team for them to approve add in the team.
Share with people button expanded showing options to share with people, share with a team or share with a team you own.
We can now pick from the teams we own and select Done
Pick Team dialog box, showing Avengers team which has 5 members. Avengers team is not yet selected, so Done button is greyed out.
The confirmation that the other team has been added will display.
Confirmation message
And we can now see both teams listed on the team members page
Channel setting page on the members tab, showing current user as the owner with both the StarWars and Avengers teams listed as a members. The Avengers Team now shows 10 members, illustrating that as team membership changes this is reflected in the shared channel.
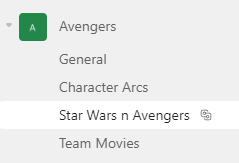
Members of the Avengers team will not see the shared channel in the list of channels within their own team.
Avengers team list of channels including 3 original channels, plus the Star Wars n Avengers channel with the shared channel icon beside the channel name.
All the channel content is exactly the same across both teams and both teams can use the channel from within their team as any other channel.
Teams for Black Widow, showing only Avengers team with shared channel selected showing the same welcome announcement. There is now also a reply from Black Widow “On behalf of the Avengers team, looking forward to this project”. Avengers in this post is an @ mention so notifying the Avengers team of the post.
As we are members of both teams we see the shared channel in both teams.
List of channels for user in both teams showing the same shared channel, Star Wars n Avengers, listed in both teams.
Another way to share the channel is from the … menu next to the channel, rather than needing the access the channel management page first.
… menu for the shared channel expanded and Share channel option selected to bring up options to share the channel with people, with a team or with a team you own. These are the same options as from the Share channel button on the members tab of the channel settings page.
External Collaboration settingsB2B Direct Connect settings
*Note: That Channel sites used to create a channel folder in the Documents library as for standard channels. However this is no longer the case going forward. Older private channels will keep their existing structure.
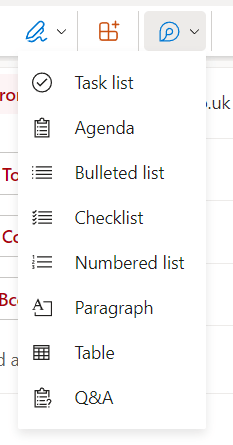
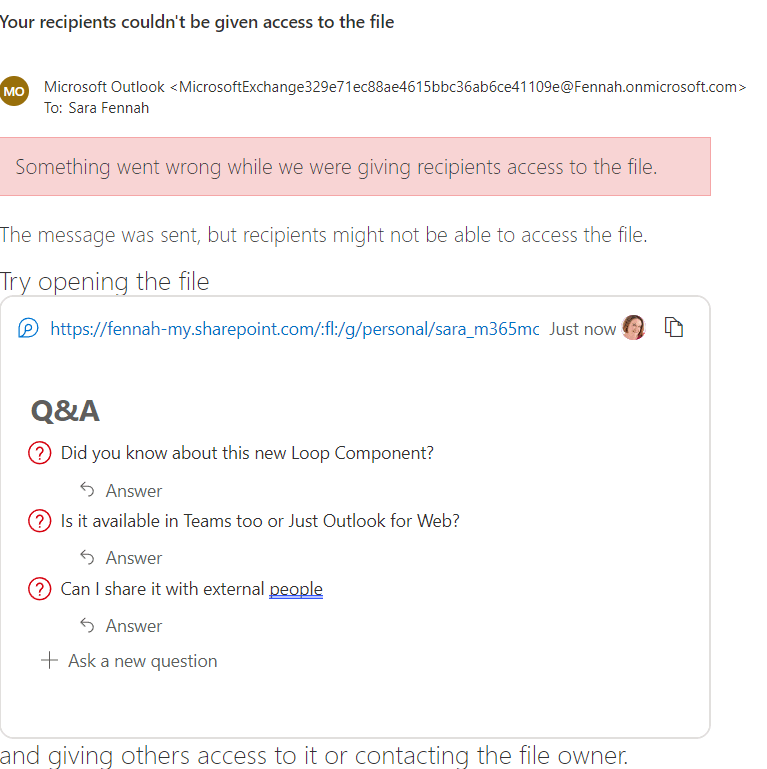
I was very excited to note that Loop had appeared in my Outlook for web mail compose window, so had a quick “play”.
The button is on the ribbon at the top and tollbar at the bottom of the message compose screen.
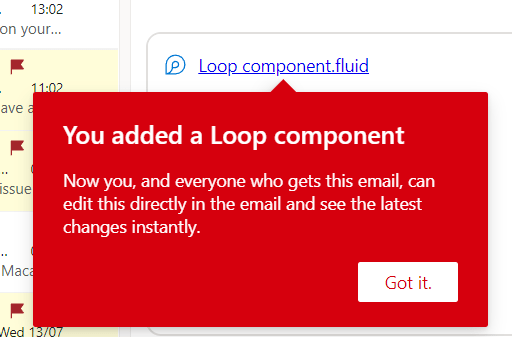
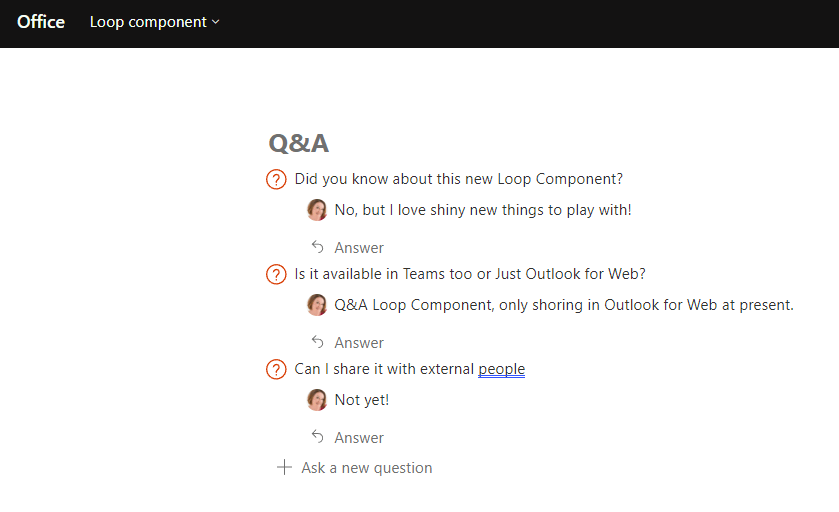
Which shall I try, oooh Q&A is new, I’ll try that one. A quick click adds the Loop component to my message. As it’s a first time use, up pops a little reminder about what a Loop component is.
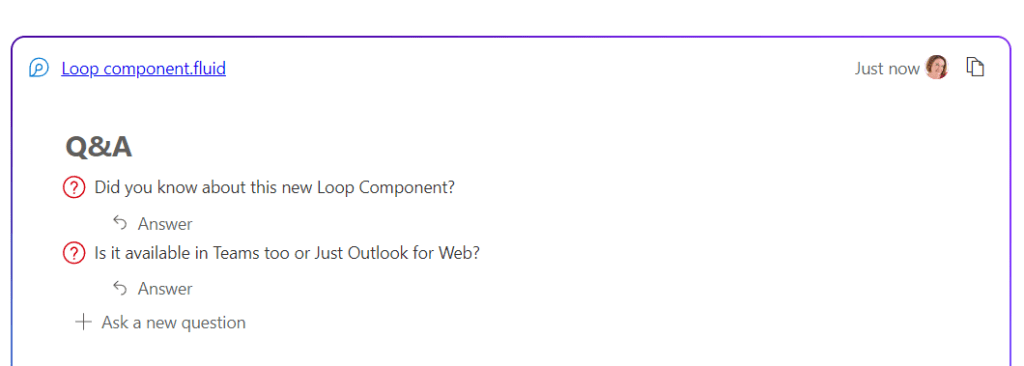
So now to test it out. Add a couple of questions and send off the email.
Turns out I still cannot share with external people, but internal worked fine.
Microsoft Inspire is, to quote the website, Microsoft’s “largest partner event of the year that’s focused on the Microsoft Cloud, partner programs, and opportunities for you to grow your business in the year ahead.” Microsoft Inspire 2022 is running from 18th July 2022.
Whilst not normally a conference for new feature announcements, Inspire sessions are usually excellent for making the business case and understanding the value of features and products. Personally I am mostly interested in the sessions those focused on Microsoft Viva, this year, but found a few others too.
Once registered you can search for sessions using keywords, the filters or the session code, but here are my favourites, with dates and times for the UK:
Cameo in PowerPoint is a feature which embeds webcam video into your slides, which means you can position your webcam where you want. Initially this feature was best used for recording content with PowerPoint, but it is now also supported by Microsoft Teams when presenting using PowerPoint Live. This means that your web cam will be positioned on the slide in the camera object, rather than in the normal meeting video position in Teams meetings.
Note: At time of publication (July 2nd 2022) Cameo in PowerPoint is only available in Office Insider Beta channel and in Teams meetings using Public Preview. These features are scheduled for general availably in September 2022.
Screenshot showing presentation inside Teams meeting with webcam in object on the slide
This feature is limited to the full desktop client, meeting recording, web & mobile clients show standard layout.
To use this feature, you need to prepare your slides to include the cameo object and then share into the meeting using PowerPoint live.
For more detailed instructions follow the following step by step instructions or view a video of these steps at https://youtu.be/AgfNgCoRxJc
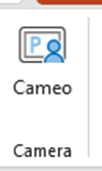
Step 1: Create Your Presentation
Build the presentation as normal, adding the Cameo object to each slide. To insert the camera placeholder select Cameo from the Insert ribbon tab.
Cameo button from the Insert ribbon tab
Adjust the size and position of the object on the slide and format the object using the Camera ribbon tab to best fit your content.
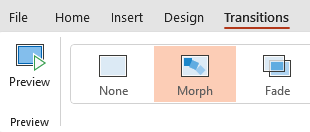
The Morph transition gives a smooth visual change between slides, especially when the cameo object is a different shape and/or in a different position on the slide. Apply the transition by choosing Morph on the Transitions ribbon tab
Transitions ribbon tab with Morph transition selected
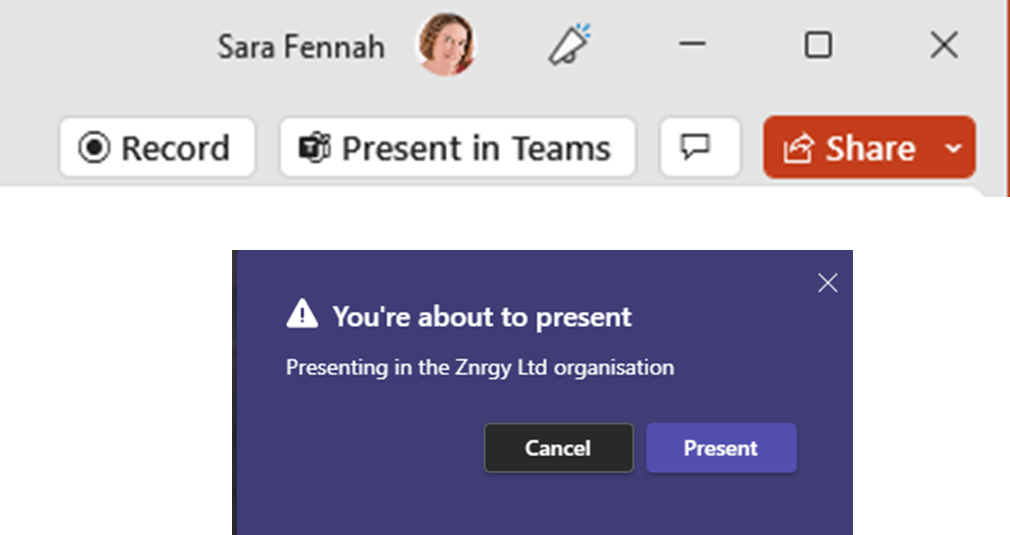
Step 2: Present in Teams
To share a presentation using PowerPoint Live choose the desired presentation from the Share button in the Teams meeting.
Share menu in Teams meeting showing file in PowerPoint Live list
OR…
Once you have joined the Teams meeting and opened the presentation in PowerPoint on your device and select Present in Teams button then confirm in the meeting by selecting Present.
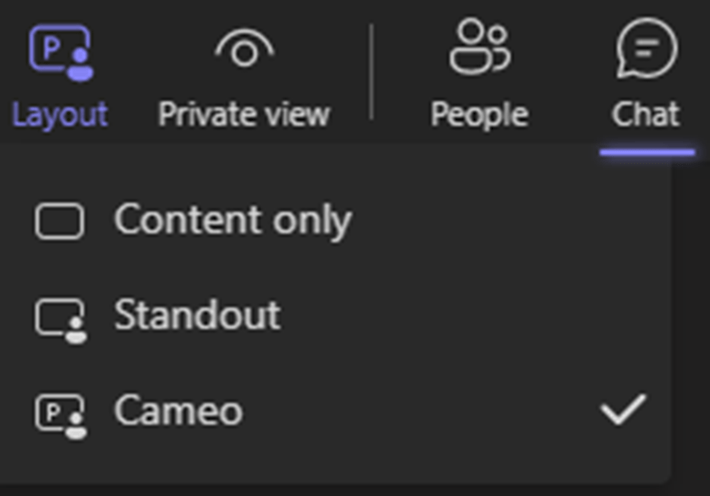
Step3 : Camera on and Choose Cameo Layout
In the meeting ensure your camera is on and virtual background enabled (if using a virtual background), then choose Cameo from the Layout button on the meeting toolbar.
Meeting toolbar with layout option expanded showing Cameo selected with other options of Content Only and Standout available.
Do you take your laptop or mobile into a meeting in a Teams Meeting Room? If you do this blog is for you.
Casting
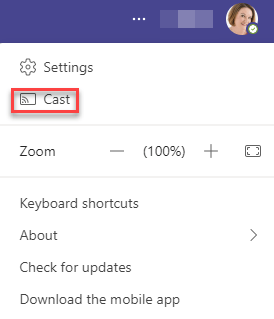
If you have you device with you and simply want to share something, there is no longer any need to connect your laptop to the meeting room system. The cast feature uses bluetooth to locate the meeting room, so both the companion device and meeting room need bluetooth enabled for this to work. First choose Cast from the …menu
Teams Desktop … Menu with Cast option highlighted
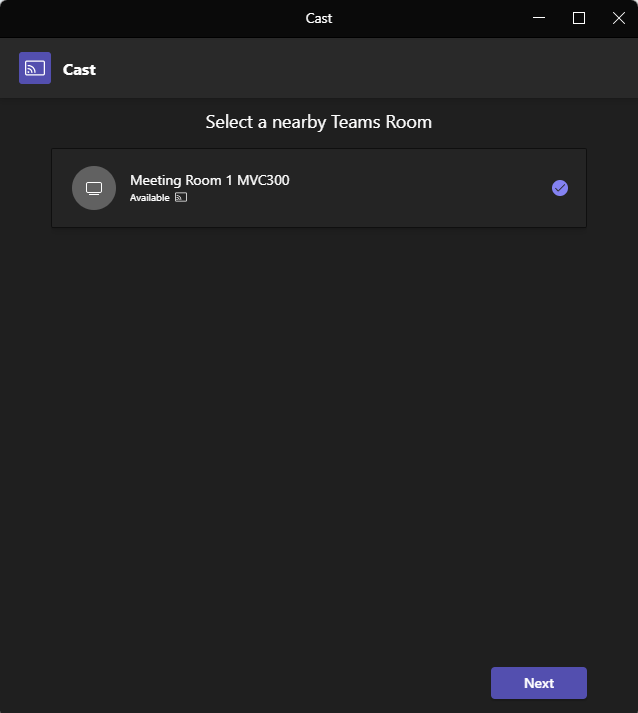
Then wait for your device to locate the meeting room and select the room and click Next
Teams room selector showing only one available room, which is ticked
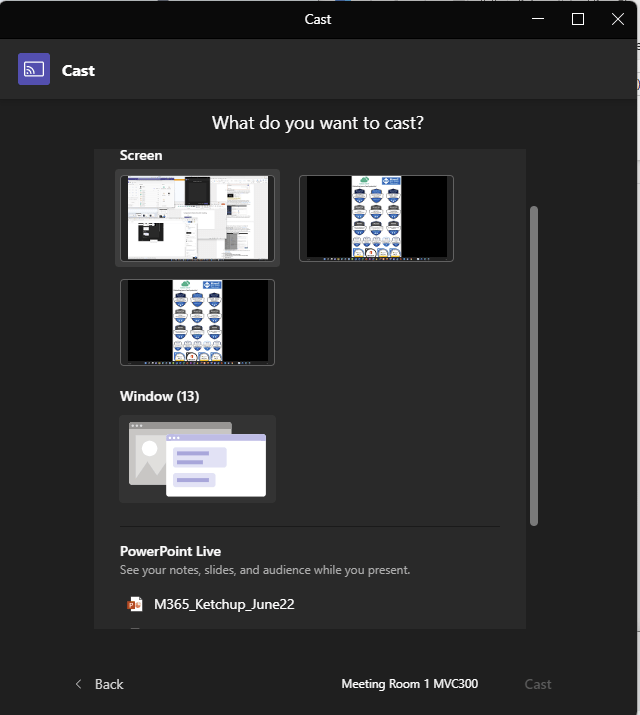
Select the content you wish to share and select Cast
Cast Window showing available sources from local machine
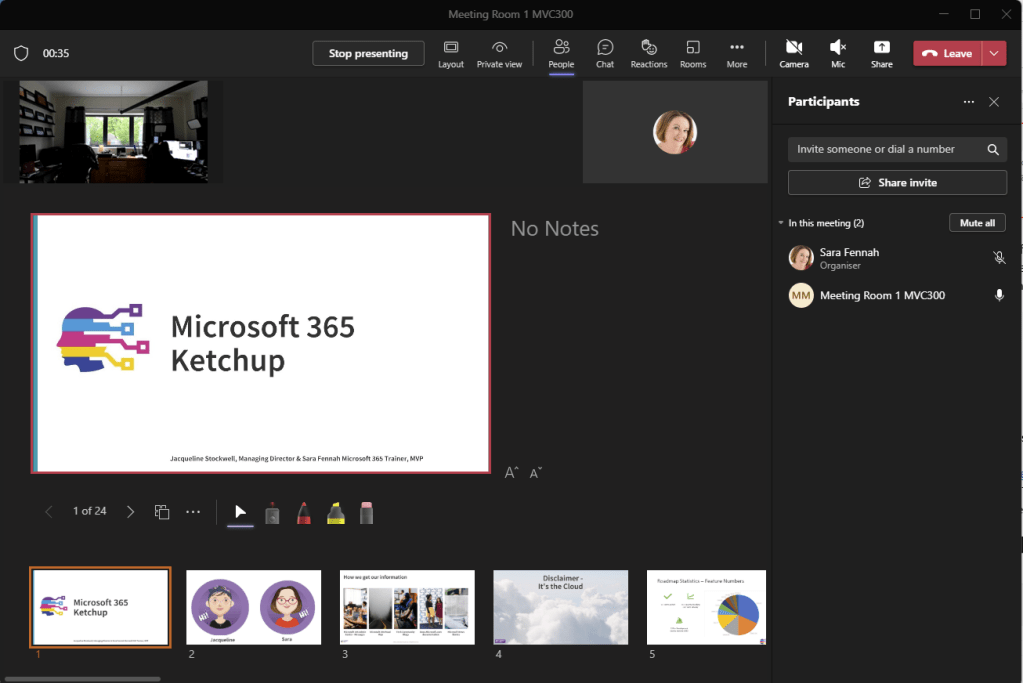
Your device will automatically join the meeting in ‘companion’ mode, with the camera, speaker and microphone off, and share the content.
Microsoft Teams on Desktop showing meeting screen with content shared with the sound and camera off.
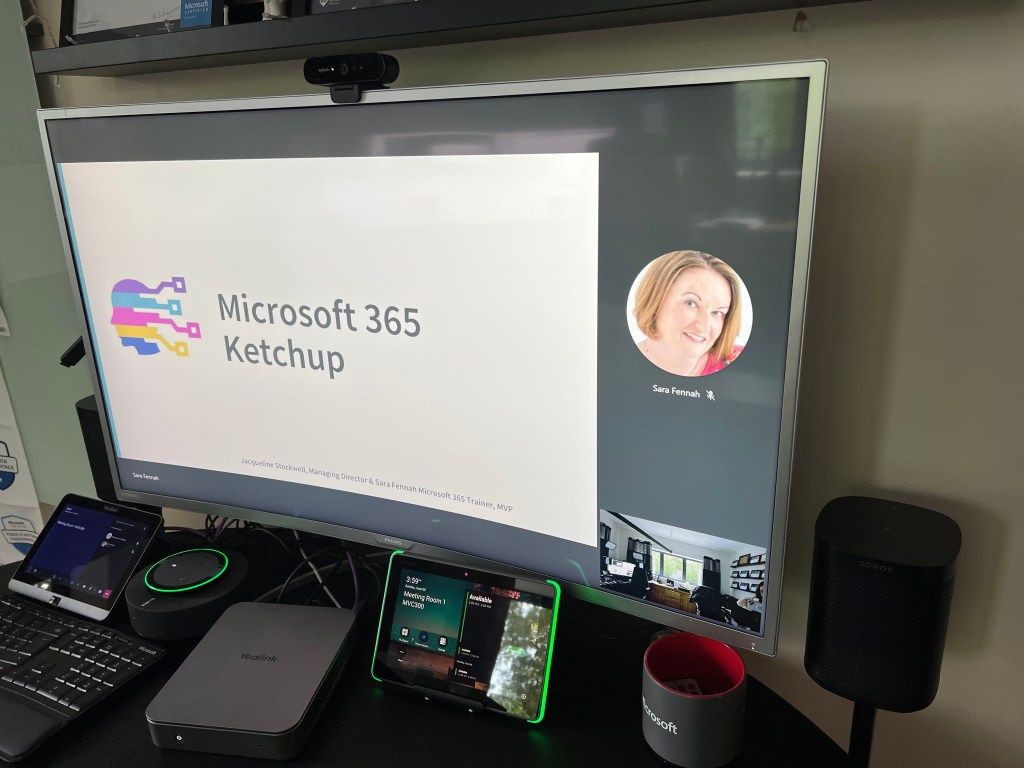
The meeting room screen will show the shared content.
Meeting room showing shared content and virtual attendee.
Companion Mode
Companion mode (not its official name) is where you join a meeting but select the meeting room as the audio device. Note this is different to joining the meeting as yourself from a second device, here we are joining as ourselves but with audio disabled. For more information on joining as yourself from two or more devices see the guide for joining a Teams meeting on a second device from the Desktop or Mobile.
To join using room audio from a mobile device, open the meeting from your calendar and select Join. The Teams meeting should detect the room audio if the meeting is already in progress and default to that option.
Join meeting screen with meeting room audio selected
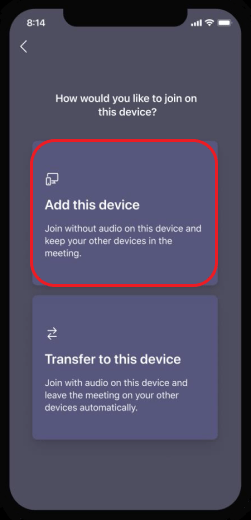
If you join from a meeting reminder, you will see the following screen, if the meeting is already in progress in the meeting room and should choose Add this device.
Meeting join choices screen on iOS with Add this device option highlighted
Once you are in the meeting, you can use the chat, reactions etc.
Meeting menu on iOS device
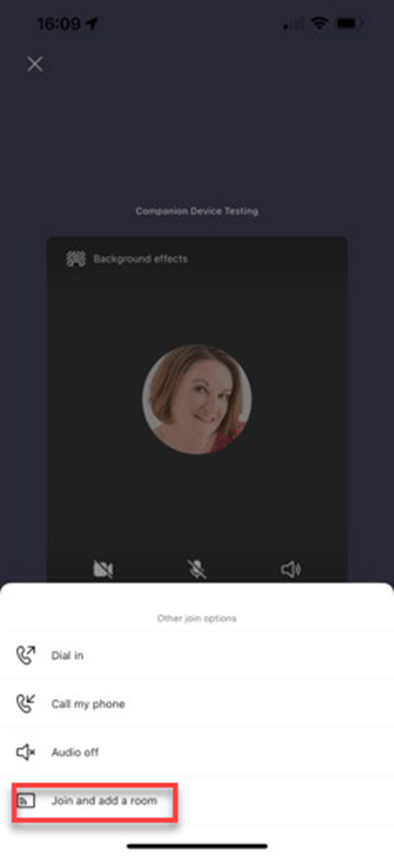
If the meeting has not started on the meeting room device, you can still join the meeting from your device and choose the room audio, by selecting the arrow on the Join Now button and choosing Join & add room.
Meeting join screen with join and add room audio option highlighted
Nearby rooms should appear automatically or you can search. Select required room and choose Join
Meeting room search screen with nearby rooms showing
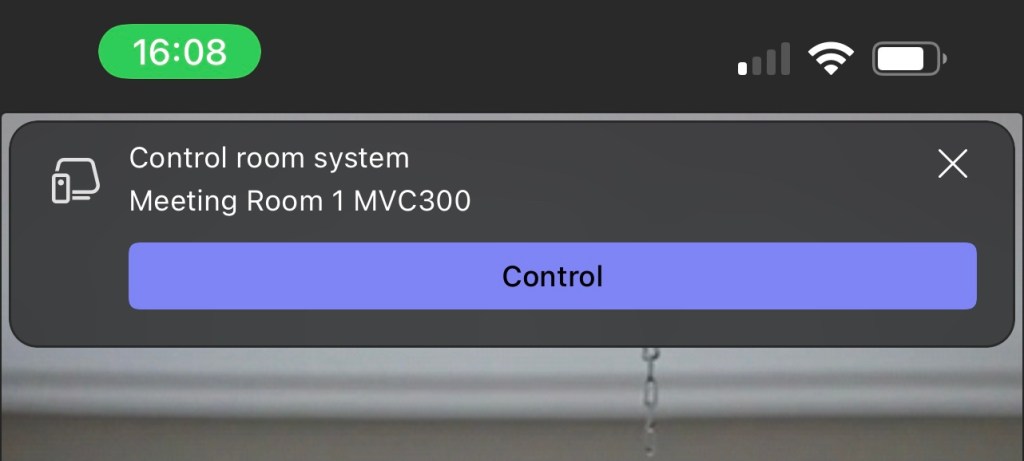
As the meeting had not started you will now also see the option to open meeting room controls.
Control room system screen with Control button to open controls
The meeting room controls allow you to control video and audio as well as select display layouts such as Front Row or Gallery.
Meeting room control panel with volume, video, mute, captions and layout options
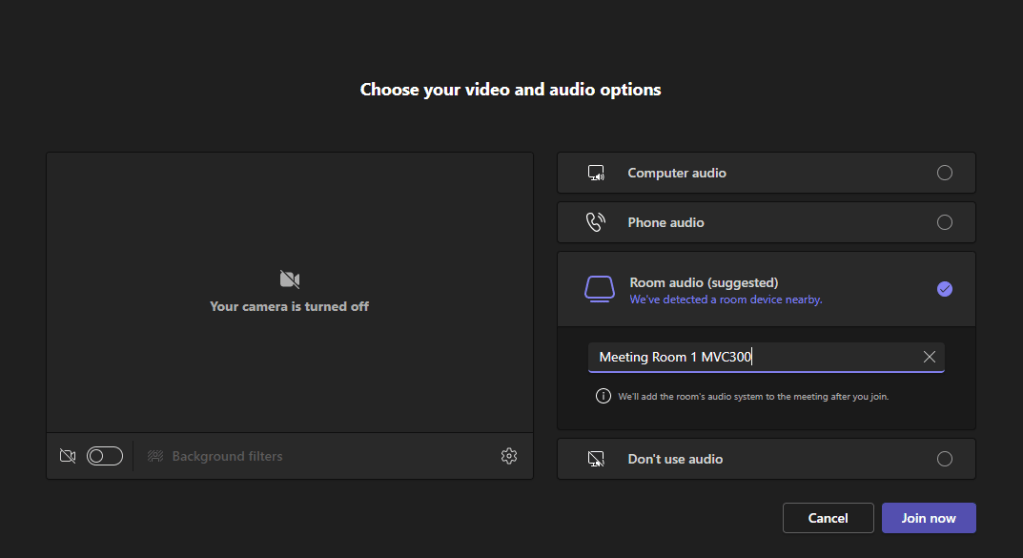
Should you with to join a meeting from a laptop or Mac then you should select the room audio on the join screen to join in companion mode.
Desktop meeting join screen with room audio option selected
Once you join the meeting from your desktop, you will see the camera is off and the mute button is replaced with a different icon to indicate all sound is disabled on the device.
Meeting tool bar in companion mode on desktop client with camera off and audio disabled
You may have started to see meeting expiry recording notifications in Microsoft Teams. Before you panic, you it is simply letting you know that the expiry date is now being enforced.
Meeting recording expiry is set by the meeting policy assigned to the user who recorded the meeting.
The person who recorded the meeting and the meeting organiser can view and edit the expiry date by clicking here in the message View or change the expiry date here.
This will take you to the recording. Clicking the i icon will open the file properties pane, which includes the meeting expiry date.
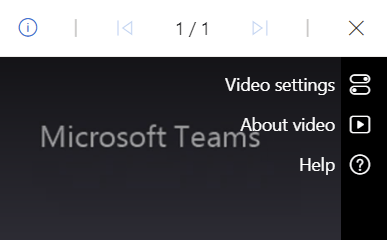
Once you start playing a meeting recording you will also see some icons on the top right.
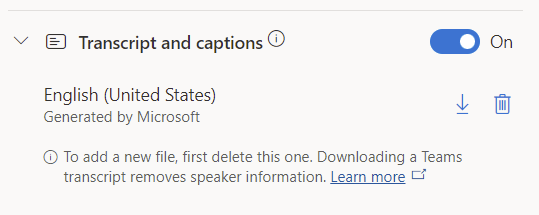
Video settings enables the automatic generation of a video transcript or upload, if one has already been generated, as well as the creation of chapters in the video and toggle to turn on/off the About video section.
Once a transcript has been generated it can be downloaded.
About Video, includes the title which was taken from the meeting title, but can be edited and a description added as well.
The transcript shows up from the Transcript button, and the transcript can be used to navigate through the recording, by clicking on to the text in the transcript at the point of the meeting recording you wish to jump to.
With Chapters switch on, you can create chapters in the recording. Pause the recording where the new chapter should start and click the New chapter button, enter the chapter title and click the tick to create.
The chapters can then be used to jump to the marked point in the video.